Aller au contenu principal
Dell Studio 1558 RAM Replacement

Dell Studio 1558 RAM Replacement

Nic Birky

Nic Birky et 2 autres contributeurs

Dernière mise à jour le June 1, 2022

20 - 30 minutes
Modérée

RAM is crucial for a computer to function properly. Faulty RAM can cause a variety of issues in a computer, from onscreen graphical errors to random crashes that seemingly occur out of nowhere.

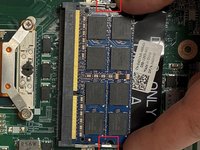
The RAM modules are easy to access on the Dell Studio 1558. It is important to properly disengage the holding arms in order to avoid damaging the components.

Ce dont vous avez besoin

Outils

Afficher plus…

  1. Dell Studio 1558 RAM Replacement, Battery: étape 1, image 1 de 2 Dell Studio 1558 RAM Replacement, Battery: étape 1, image 2 de 2
    • To begin, flip over the laptop.

  2. Dell Studio 1558 RAM Replacement: étape 2, image 1 de 1
    • Next, slide the slider to the right and hold it in place.

  3. Dell Studio 1558 RAM Replacement: étape 3, image 1 de 2 Dell Studio 1558 RAM Replacement: étape 3, image 2 de 2
    • While holding down the slider, gently remove the battery.

  4. Dell Studio 1558 RAM Replacement: étape 4, image 1 de 1
    • The battery has been successfully removed.

  5. Dell Studio 1558 RAM Replacement, RAM: étape 5, image 1 de 3 Dell Studio 1558 RAM Replacement, RAM: étape 5, image 2 de 3 Dell Studio 1558 RAM Replacement, RAM: étape 5, image 3 de 3
    • Make sure the battery is properly removed. If not, you could experience shocks.

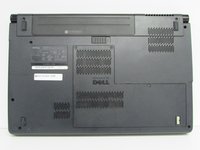
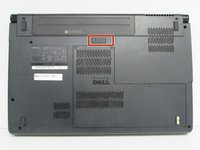
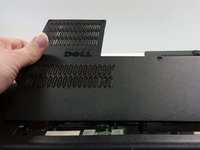
    • Unscrew the three screws (Phillips #0) on the back panel to reveal the innards underneath the panel. It is helpful to keep these screws in the holes of the back panel.

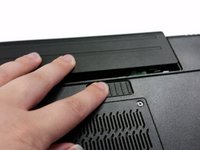
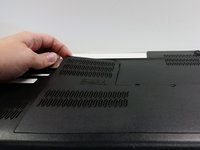
    • Pry the back panel off and set aside.

    • A little bit of force may be necessary in removing the panel as there are some minor plastic clips holding the panel in place in addition to the screws.

  6. Dell Studio 1558 RAM Replacement: étape 6, image 1 de 2 Dell Studio 1558 RAM Replacement: étape 6, image 2 de 2
    • Two small tabs are located on either side of the RAM stick. Push those tabs inwards to release the RAM stick.

    • A new RAM stick can be inserted by inserting the golden pins into the slot, and then lowering the rest of the RAM stick into the slot.

Conclusion

To reassemble your device, follow these instructions in reverse order.

Nic Birky

Membre depuis le 04/12/22

133 Réputation

2 tutoriels rédigés

Équipe

IUPUI, Team 4-4, Beck Spring 2022 Membre de l'équipe IUPUI, Team 4-4, Beck Spring 2022

IUPUI-BECK-S22S4G4

4 membres

4 tutoriels rédigés

0 commentaires de tutoriel

Ajouter un commentaire

Nombre de vues :

Dernières 24 heures : 2

7 derniers jours : 3

30 derniers jours : 7

Total : 199