Aller au contenu principal
Dyson Pure Cool AM11 Oscillation Motor Replacement

Dyson Pure Cool AM11 Oscillation Motor Replacement

AidenManchester

AidenManchester et un autre contributeur

Dernière mise à jour le December 29, 2023

10 minutes
Modérée

If, after consulting the troubleshooting page, you believe your oscillation motor has blown, this guide will walk you through accessing it to do your own repair/replacement. The oscillation motor is wired directly into the devices main circuitry and thus requires knowledge and experience to replace. This guide will simply cover how to access and remove it.

Ce dont vous avez besoin

Outils

Afficher plus…

  1. Dyson Pure Cool AM11 Oscillation Motor Replacement, Base: étape 1, image 1 de 3 Dyson Pure Cool AM11 Oscillation Motor Replacement, Base: étape 1, image 2 de 3 Dyson Pure Cool AM11 Oscillation Motor Replacement, Base: étape 1, image 3 de 3
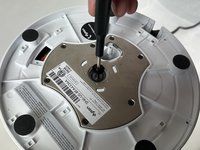
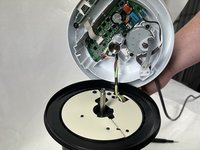
    • With the device flipped upside down, use a Phillips #1 screwdriver to remove the 4 screws holding the 3 tabs down.

  2. Dyson Pure Cool AM11 Oscillation Motor Replacement: étape 2, image 1 de 3 Dyson Pure Cool AM11 Oscillation Motor Replacement: étape 2, image 2 de 3 Dyson Pure Cool AM11 Oscillation Motor Replacement: étape 2, image 3 de 3
    • Remove all 3 tabs that you unscrewed.

  3. Dyson Pure Cool AM11 Oscillation Motor Replacement: étape 3, image 1 de 2 Dyson Pure Cool AM11 Oscillation Motor Replacement: étape 3, image 2 de 2
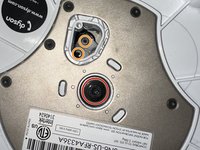
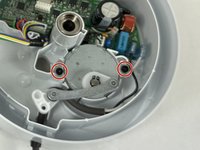
    • Using a Torx T20 Screwdriver, remove the screw in the center of the base.

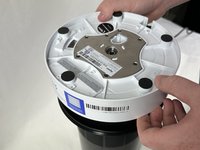
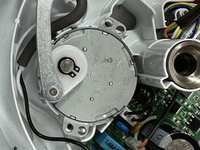
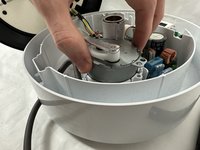
    • Remove the two screws connected to the rotation arm.

    There are instructions missing here. The black middle panel once removed gives access to two screws that are connected to the rotation arm (visible in the photo above), these need to be removed.

    Alex Howarth - Réponse

  4. Dyson Pure Cool AM11 Oscillation Motor Replacement: étape 4, image 1 de 3 Dyson Pure Cool AM11 Oscillation Motor Replacement: étape 4, image 2 de 3 Dyson Pure Cool AM11 Oscillation Motor Replacement: étape 4, image 3 de 3
    • Lift the base of the housing from the rest of the fan.

    • Be careful not to pull too hard while lifting the lower body housing as there is wires that run throughout the housing that could be damaged if too much force is used.

  5. Dyson Pure Cool AM11 Oscillation Motor Replacement, Oscillation Motor: étape 5, image 1 de 2 Dyson Pure Cool AM11 Oscillation Motor Replacement, Oscillation Motor: étape 5, image 2 de 2
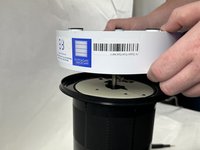
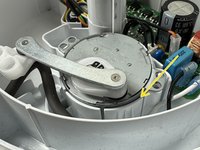
    • Using a T20 Torx screwdriver, remove the two screws on either side of the motor.

  6. Dyson Pure Cool AM11 Oscillation Motor Replacement: étape 6, image 1 de 2 Dyson Pure Cool AM11 Oscillation Motor Replacement: étape 6, image 2 de 2
    • (Optionally) Use a jimmy around the edge of the motor to loosen it from its housing.

    • Lift the motor out of its housing.

    • Ensure that you do not grab the motor by the swing arm as you may damage both the motor and surrounding components.

Ligne d'arrivée

Une autre personne a terminé cette réparation.

AidenManchester

Membre depuis le 11/01/23

252 Réputation

2 tutoriels rédigés

Équipe

UMass Dartmouth, Team 2-7, Gulbrandsen Fall 2023 Membre de l'équipe UMass Dartmouth, Team 2-7, Gulbrandsen Fall 2023

UMASSD-GULBRANDSEN-F23S2G7

3 membres

5 tutoriels rédigés

2 commentaires de tutoriel

Where’d you get the motor

Jon Murch - Réponse

any luck finding the proper motor replacement?

Kay -

Ajouter un commentaire

Nombre de vues :

Dernières 24 heures : 2

7 derniers jours : 21

30 derniers jours : 49

Total : 782