Aller au contenu principal
Eluktronics N850HK SSD Replacement

Eluktronics N850HK SSD Replacement

Brandon Yuan

Brandon Yuan et un autre contributeur

Dernière mise à jour le September 21, 2024

10 - 20 minutes
Modérée

The Eluktronics N850HK is a laptop model equipped with an M.2 PCIe SSD. The SSD is a storage device, used to store the data in a laptop. Removing the SSD from the laptop is necessary to check for damages, or to replace the card. Replacing a laptop's SSD can yield greater storage space and higher reading/writing speeds.

Replacing the SSD in the N850HK is a simple task that can be accomplished with just a screwdriver and some careful handling. This guide will cover the replacement of the SSD in this laptop model.

Before you begin this repair, power off your laptop and unplug it from the power cord. For an additional safety measure, disconnect or remove the battery prior to the repair.

Ce dont vous avez besoin

Outils

Afficher plus…

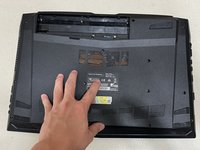
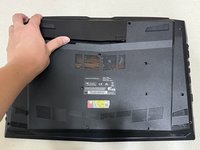
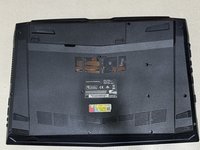
  1. Eluktronics N850HK SSD Replacement, SSD: étape 1, image 1 de 3 Eluktronics N850HK SSD Replacement, SSD: étape 1, image 2 de 3 Eluktronics N850HK SSD Replacement, SSD: étape 1, image 3 de 3
    • Push both switch locks inward to unlock the battery from the bottom panel.

    • The switch on the left must be held in place.

    • Remove the battery from the back of the laptop.

  2. Eluktronics N850HK SSD Replacement: étape 2, image 1 de 2 Eluktronics N850HK SSD Replacement: étape 2, image 2 de 2
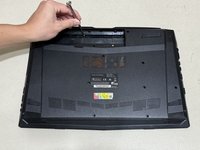
    • Use a Phillips #00 screwdriver to remove the twelve 4 mm screws from the bottom panel of the laptop.

  3. Eluktronics N850HK SSD Replacement: étape 3, image 1 de 2 Eluktronics N850HK SSD Replacement: étape 3, image 2 de 2
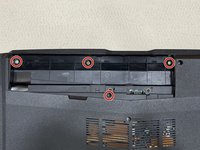
    • Use a Phillips #00 screwdriver to remove the four 3 mm screws located under where the battery usually rests.

    • Do not remove the two additional screws near the bottom screw. These are connected to the motherboard and do not need to be removed.

  4. Eluktronics N850HK SSD Replacement: étape 4, image 1 de 2 Eluktronics N850HK SSD Replacement: étape 4, image 2 de 2
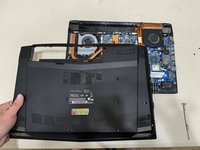
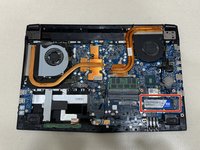
    • Lift the back case off and identify the SSD in the lower right corner.

    • Although the chances of damage are low, it is important to be aware of static electricity in your surroundings when working a computer motherboard. Ground yourself or use an anti-static wrist strap.

  5. Eluktronics N850HK SSD Replacement: étape 5, image 1 de 3 Eluktronics N850HK SSD Replacement: étape 5, image 2 de 3 Eluktronics N850HK SSD Replacement: étape 5, image 3 de 3
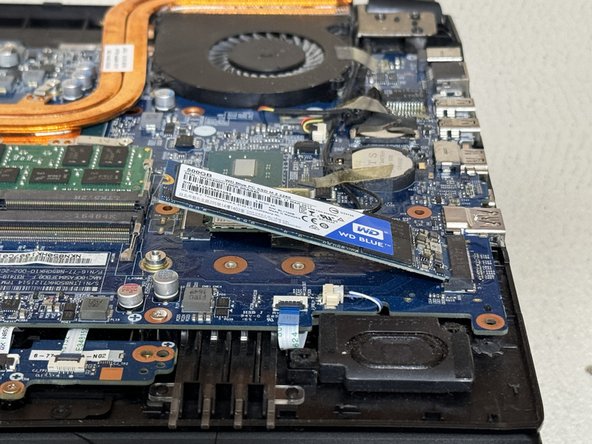
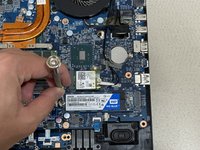
    • Use a Phillips #00 screwdriver to remove 3 mm screw securing the SSD.

    • The SSD will naturally lift by a few millimeters.

    • Carefully slide the SSD from the M.2 slot.

  6. Eluktronics N850HK SSD Replacement: étape 6, image 1 de 3 Eluktronics N850HK SSD Replacement: étape 6, image 2 de 3 Eluktronics N850HK SSD Replacement: étape 6, image 3 de 3
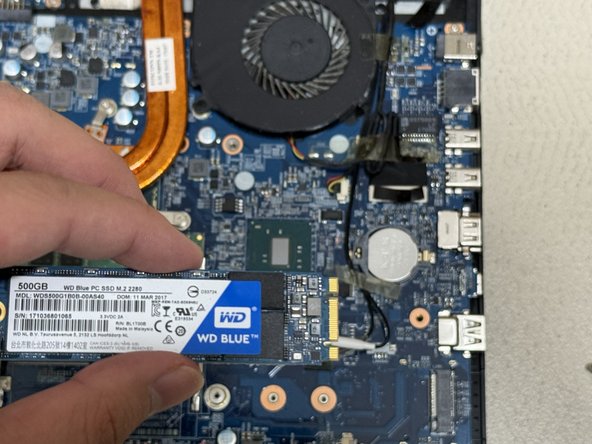
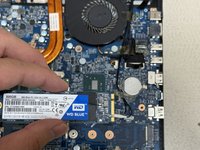
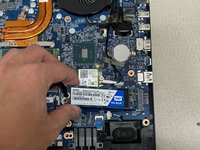
    • Use the ridges on the right side to align the SSD properly.

    • Slide the new SSD into the M.2 mounting slot.

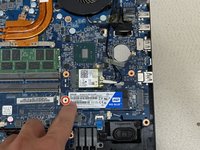
    • Use the Phillips #00 screwdriver to replace the 3 mm screw that secures the SSD.

  7. Eluktronics N850HK SSD Replacement: étape 7, image 1 de 3 Eluktronics N850HK SSD Replacement: étape 7, image 2 de 3 Eluktronics N850HK SSD Replacement: étape 7, image 3 de 3
    • Reassemble by following the directions in reverse order.

Conclusion

Alternative models where this guide may still apply:

  • Eluktronics N857HK1
  • Eluktronics N850HP6

3 autres ont terminé cette réparation.

Brandon Yuan

Membre depuis le 06/22/24

196 Réputation

1 tutoriel rédigé

Équipe

Austin Community College, Team 6-12, Watkins Summer 2024 Membre de l'équipe Austin Community College, Team 6-12, Watkins Summer 2024

AUSTINCC-WATKINS-SU24S6G12

1 membre

2 tutoriels rédigés

0 commentaires de tutoriel

Ajouter un commentaire

Nombre de vues :

Dernières 24 heures : 14

7 derniers jours : 116

30 derniers jours : 584

Total : 1,864