Aller au contenu principal
Fitbit Charge HR Screen Replacement

Fitbit Charge HR Screen Replacement

Aekchanin Iamborisut

Aekchanin Iamborisut et 3 autres contributeurs

Dernière mise à jour le May 23, 2022

30 minutes - 1 heure
Difficile
Outils incorrects
Nécessite plus d'images

The Fitbit Charge HR is a smart watch with an LED screen that tracks the health of its user. While engaging in physical activities, one might experience some wear and tear on their device that can cause an unresponsive screen. This guide will teach you how to replace the screen on a Fitbit Charge HR. These instructions require separating the screen from the motherboard, so remember to use ESD-safe opening tools.

Ce dont vous avez besoin

Outils

  • Spudger
    Spudger
  • iFixit Opening Tool
    iFixit Opening Tool

Afficher plus…

  1. Fitbit Charge HR Screen Replacement, Screen: étape 1, image 1 de 1
    • Remove the four 2.9 mm screws from the back of the display using a Torx screwdriver.

    • Remove the back cover from the device.

  2. Fitbit Charge HR Screen Replacement: étape 2, image 1 de 3 Fitbit Charge HR Screen Replacement: étape 2, image 2 de 3 Fitbit Charge HR Screen Replacement: étape 2, image 3 de 3
    • Remove the two 2.9 mm Torx screws holding the circuit board in place.

    • Carefully pry the board out using an opening tool.

  3. Fitbit Charge HR Screen Replacement: étape 3, image 1 de 2 Fitbit Charge HR Screen Replacement: étape 3, image 2 de 2
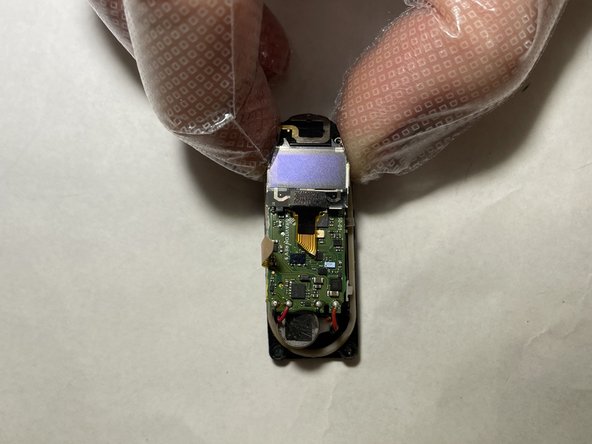
    • Remove the motherboard assembly from the device.

    • Flip the motherboard over so the screen is facing upwards.

  4. Fitbit Charge HR Screen Replacement: étape 4, image 1 de 3 Fitbit Charge HR Screen Replacement: étape 4, image 2 de 3 Fitbit Charge HR Screen Replacement: étape 4, image 3 de 3
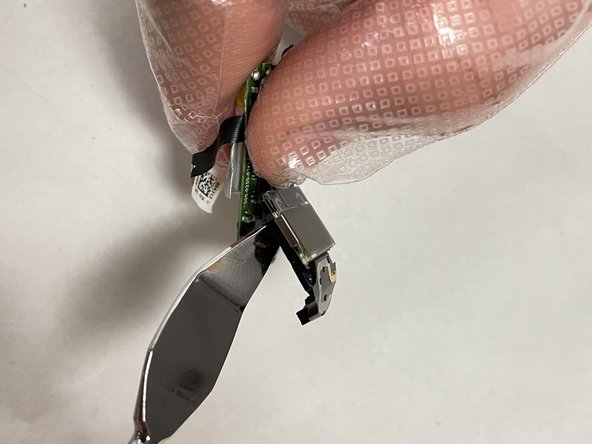
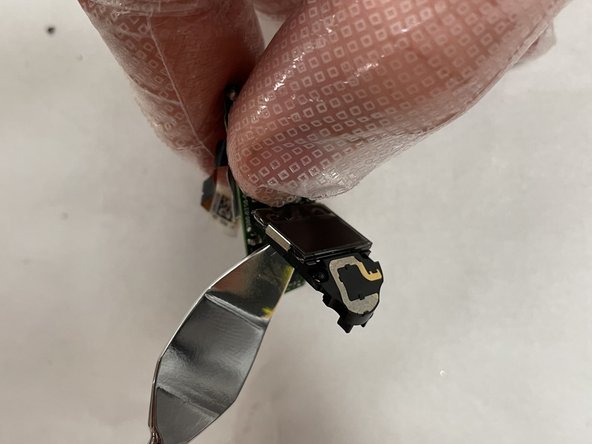
    • Wedge a nylon spudger between the screen and the motherboard.

    • Gently pry the screen up and remove it from the motherboard.

    • Metal spudgers can puncture an unprotected battery and damage components like the motherboard. Always choose a tool that's ESD-safe, such as a nylon spudger or plastic opening tool.

Conclusion

To reassemble your device, follow these instructions in reverse order.

Une autre personne a terminé cette réparation.

0 commentaires de tutoriel

Ajouter un commentaire

Nombre de vues :

Dernières 24 heures : 1

7 derniers jours : 1

30 derniers jours : 7

Total : 897