Aller au contenu principal
HP 15-d076nr Motherboard Replacement

HP 15-d076nr Motherboard Replacement

Amy Weed

Amy Weed et 3 autres contributeurs

Dernière mise à jour le April 21, 2017

1 heure
Modérée

This guide details how to replace the motherboard on an HP 15-d076nr. If your laptop suffered liquid damage and is not working properly, the motherboard could be fried. This may be the guide for you.

Ce dont vous avez besoin

Pièces

Outils

Afficher plus…

  1. HP 15-d076nr Motherboard Replacement, Battery: étape 1, image 1 de 1
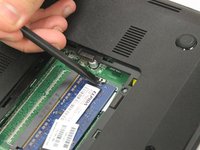
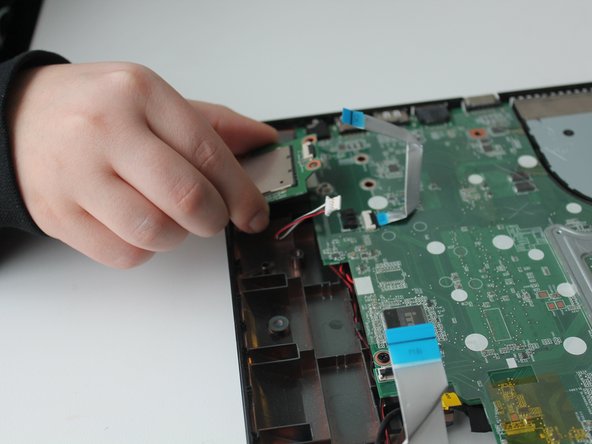
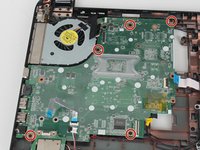
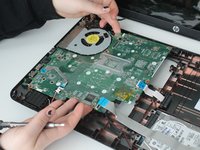
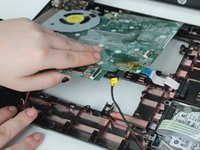
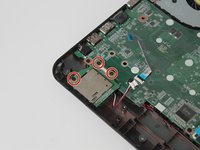
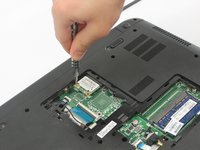
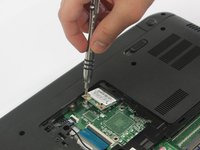
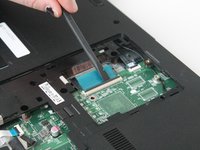
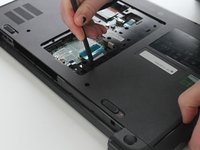
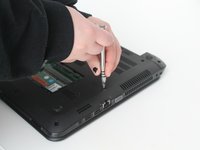
    • Orient the laptop upside down so that the back of the laptop, where the battery is located, faces you.

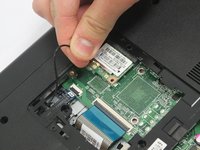
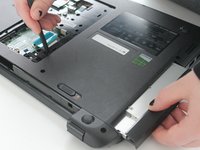
    • Locate the left and right switches at the bottom of the laptop.

  2. HP 15-d076nr Motherboard Replacement: étape 2, image 1 de 1
    • Move the right switch to the left so that the orange unlock symbol is showing.

  3. HP 15-d076nr Motherboard Replacement: étape 3, image 1 de 1
    • Move the left switch to the right, covering the battery symbol, and hold.

  4. HP 15-d076nr Motherboard Replacement: étape 4, image 1 de 1
    • While holding the left switch in place, slide the battery towards you and away from the laptop.

  5. HP 15-d076nr Motherboard Replacement, Wireless Card: étape 5, image 1 de 1
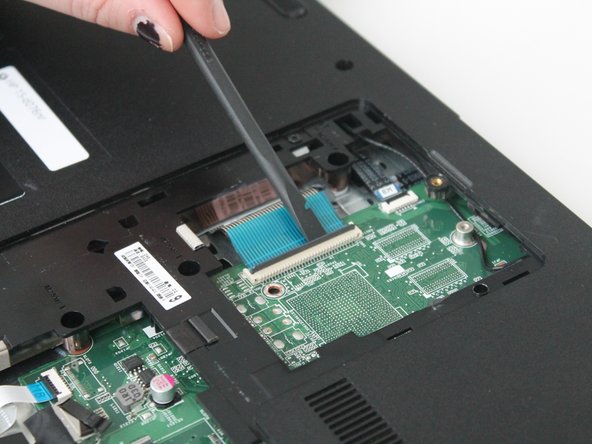
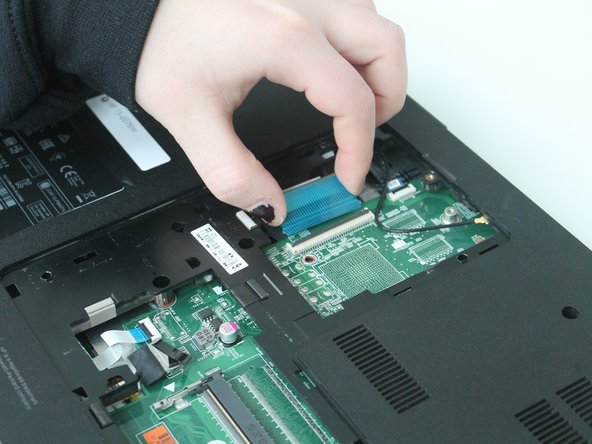
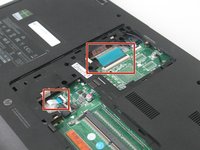
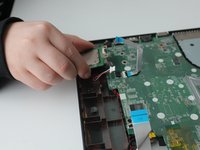
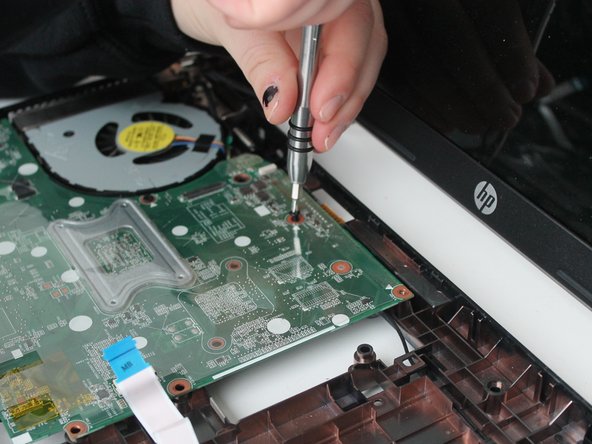
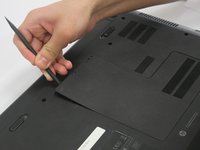
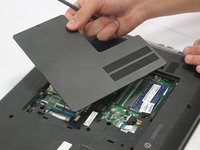
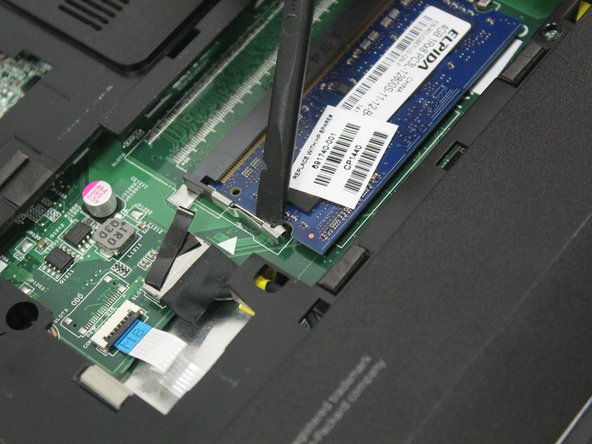
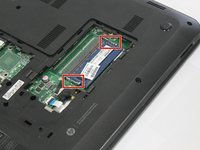
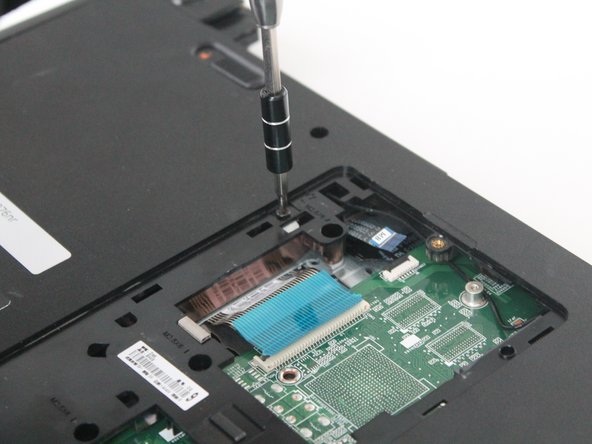
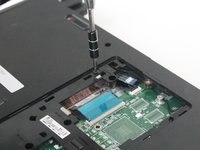
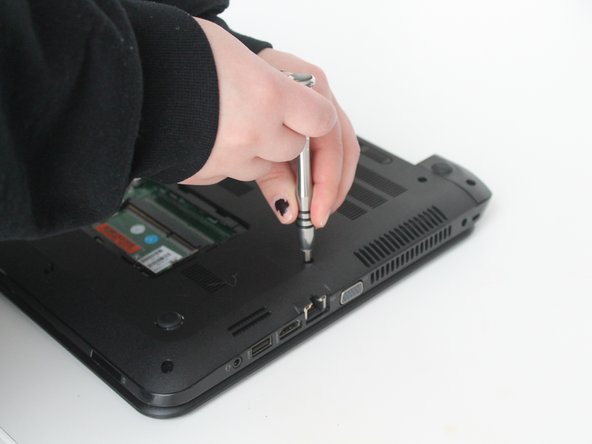
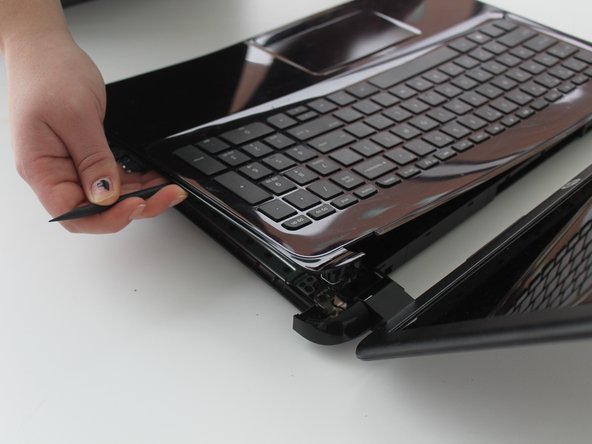
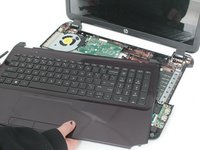
    • Re-orient the laptop, so that the back of the laptop faces away from you.

  6. HP 15-d076nr Motherboard Replacement: étape 6, image 1 de 1
    • Locate the small screw on the panel at the center of the laptop.

    • Loosen the small screw using a Philips # 1 screwdriver.

    • The screw does not come free from the panel. It only needs to be loosened enough so that the panel can be lifted/pried.

  7. HP 15-d076nr Motherboard Replacement: étape 7, image 1 de 2 HP 15-d076nr Motherboard Replacement: étape 7, image 2 de 2
    • Carefully pry the middle panel up using a plastic spudger, or other prying tool .

    • Pull the panel away from the laptop and set it off to the side.

  8. HP 15-d076nr Motherboard Replacement: étape 8, image 1 de 2 HP 15-d076nr Motherboard Replacement: étape 8, image 2 de 2
    • Gently wiggle and lift the black antenna wire away from the wireless card.

    • If there is also a white wire attached, both black and white wires will need to be removed from the wireless card.

  9. HP 15-d076nr Motherboard Replacement: étape 9, image 1 de 3 HP 15-d076nr Motherboard Replacement: étape 9, image 2 de 3 HP 15-d076nr Motherboard Replacement: étape 9, image 3 de 3
    • Locate the Phillips 2.0x3.0mm screw on the upper left corner of the wireless card.

    • Carefully remove the 2.0x3.0mm screw using a Philips #0 screwdriver.

  10. HP 15-d076nr Motherboard Replacement: étape 10, image 1 de 1
    • Slide the wireless card to the left to remove it from the socket.

  11. HP 15-d076nr Motherboard Replacement, Motherboard: étape 11, image 1 de 1
    • Locate the RAM in the exposed area.

  12. HP 15-d076nr Motherboard Replacement: étape 12, image 1 de 3 HP 15-d076nr Motherboard Replacement: étape 12, image 2 de 3 HP 15-d076nr Motherboard Replacement: étape 12, image 3 de 3
    • Locate the latches on the RAM.

    • Slide the latches away from the RAM using a plastic spudger.

    • The RAM might spring out.

  13. HP 15-d076nr Motherboard Replacement: étape 13, image 1 de 1
    • Remove the RAM.

  14. HP 15-d076nr Motherboard Replacement: étape 14, image 1 de 3 HP 15-d076nr Motherboard Replacement: étape 14, image 2 de 3 HP 15-d076nr Motherboard Replacement: étape 14, image 3 de 3
    • Locate the ribbon cables.

    • Pry up the black tabs on the connectors and disconnect both of the ribbon cables.

  15. HP 15-d076nr Motherboard Replacement: étape 15, image 1 de 2 HP 15-d076nr Motherboard Replacement: étape 15, image 2 de 2
    • Locate the DVD drive screw.

    • Remove the Phillips PM2.5×6.5 screw using a Phillips #0 screwdriver.

    • Continue using a Phillips #0 screwdriver for the rest of this guide, and subsequent guides.

    • Take the screw and place it in a container so as to not lose it.

  16. HP 15-d076nr Motherboard Replacement: étape 16, image 1 de 2 HP 15-d076nr Motherboard Replacement: étape 16, image 2 de 2
    • Push down the tab that is located by the DVD drive screw.

    • Take the DVD drive in one hand, and using the plastic spludger, push the tab down, and out.

  17. HP 15-d076nr Motherboard Replacement: étape 17, image 1 de 2 HP 15-d076nr Motherboard Replacement: étape 17, image 2 de 2
    • Remove the fourteen Phillips PM2.5×6.0 screws, and place them in a separate container.

  18. HP 15-d076nr Motherboard Replacement: étape 18, image 1 de 3 HP 15-d076nr Motherboard Replacement: étape 18, image 2 de 3 HP 15-d076nr Motherboard Replacement: étape 18, image 3 de 3
    • Flip the laptop over, and open it as if you were using it.

    • Gently, remove the laptop cover/keyboard from the laptop using the plastic spudger.

    • When you remove the cover/keyboard, the laptop will become top heavy.

  19. HP 15-d076nr Motherboard Replacement: étape 19, image 1 de 1
    • Disconnect the monitor cable, using the plastic spudger, and pry it upwards.

    • Pull the cable from its routing until it is free.

  20. HP 15-d076nr Motherboard Replacement: étape 20, image 1 de 2 HP 15-d076nr Motherboard Replacement: étape 20, image 2 de 2
    • Lift the black tabs, and disconnect the three ribbon cables.

    • Disconnect the red-black-white speaker cable located in the lower left corner.

  21. HP 15-d076nr Motherboard Replacement: étape 21, image 1 de 2 HP 15-d076nr Motherboard Replacement: étape 21, image 2 de 2
    • Remove the three Phillips PM2.5×4.0 screws on the card reader in the bottom left corner.

    • Place the screws in a separate container.

    • Remove the card reader.

  22. HP 15-d076nr Motherboard Replacement: étape 22, image 1 de 2 HP 15-d076nr Motherboard Replacement: étape 22, image 2 de 2
    • Remove the five Phillips PM2.5×5.0 screws on the motherboard.

  23. HP 15-d076nr Motherboard Replacement: étape 23, image 1 de 1
    • Remove the Phillips PM2.5×5.0 screw located on the fan, in the upper right corner.

  24. HP 15-d076nr Motherboard Replacement: étape 24, image 1 de 2 HP 15-d076nr Motherboard Replacement: étape 24, image 2 de 2
    • Carefully lift up the motherboard.

    • Do not completely remove the motherboard. Simply lift it. There is a black cable on the bottom of the motherboard that is anchoring it.

  25. HP 15-d076nr Motherboard Replacement: étape 25, image 1 de 1
    • Locate the cable on the underside of the motherboard, in its lower right corner.

    • Carefully grip the cable, and pull downward to remove it.

  26. HP 15-d076nr Motherboard Replacement: étape 26, image 1 de 1
    • Flip the motherboard over.

  27. HP 15-d076nr Motherboard Replacement: étape 27, image 1 de 1
    • Locate the charge port cable connection point on the motherboard.

    • Grab the charge port cable's connector, and wiggle it to remove it.

    • Set the board off to the side.

Conclusion

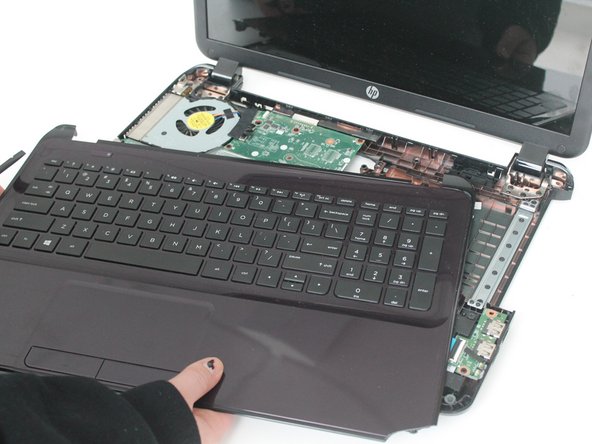
To reassemble your device, follow these instructions in reverse order.

2 autres ont terminé cette réparation.

Amy Weed

Membre depuis le 01/12/17

577 Réputation

5 tutoriels rédigés

Équipe

Oakland University, Team 2-2, Ruskiewicz Winter 2017 Membre de l'équipe Oakland University, Team 2-2, Ruskiewicz Winter 2017

OAK-RUSKIEWICZ-W17S2G2

4 membres

7 tutoriels rédigés

1Commentaire sur le guide

H! May I have the part number of the LCD flex cable? or can you send me a picture of it? Thanks.

Question??? - Réponse

Ajouter un commentaire

Nombre de vues :

Dernières 24 heures : 2

7 derniers jours : 10

30 derniers jours : 19

Total : 1,482