
HP Pavilion Notebook 15-ab293cl CPU Fan Replacement
Introduction
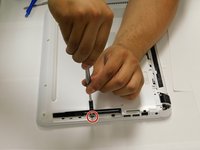
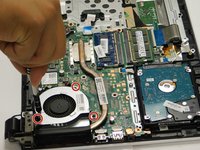
Passez à l'étape 1The cooling fan is essential in order for your laptop to keep from overheating and for it to function at all. Being such an essential part of the laptop as a whole, it is absolutely necessary for it to be running at optimal conditions. Through thorough examination of this guide you will be fully able to access the cooling fan and replace it with ease.
Ce dont vous avez besoin


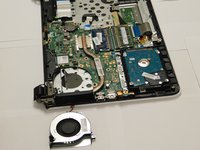
To reassemble your device, follow these instructions in reverse order.
To reassemble your device, follow these instructions in reverse order.
Annulation : je n'ai pas terminé ce tutoriel.
5 autres ont terminé cette réparation.
Équipe

Gateway, Team S1-G2, Luster Fall 2018 Membre de l'équipe Gateway, Team S1-G2, Luster Fall 2018
GCC-LUSTER-F18S1G2
4 membres
4 tutoriels rédigés