Aller au contenu principal
How to Open the Fitbit Charge 2

How to Open the Fitbit Charge 2

Adriana Zwink

Adriana Zwink et un autre contributeur

Dernière mise à jour le May 24, 2024

10 - 15 minutes
Modérée

Use this guide to open your Fitbit Charge 2 for repairs.

Ce dont vous avez besoin

Outils

  • iOpener
    iOpener
  • iSesamo Opening Tool
    iSesamo Opening Tool
  • Spudger
    Spudger

Afficher plus…

  1. How to Open the Fitbit Charge 2, Remove the watch band: étape 1, image 1 de 1
    • Before starting, take your Fitbit Charge 2 off the charger and power it down.

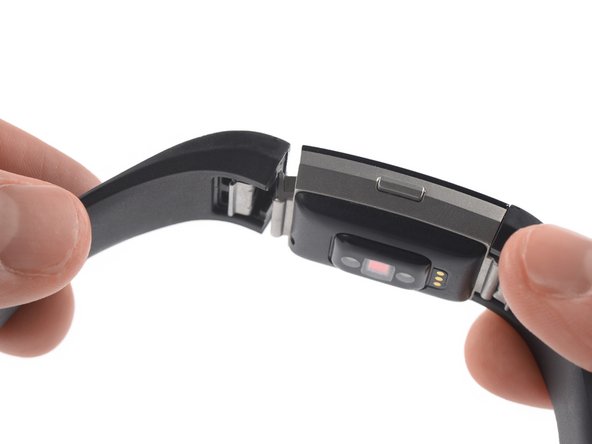
    • Remove the watch band on both sides.

  2. How to Open the Fitbit Charge 2, Heat the touch screen: étape 2, image 1 de 1
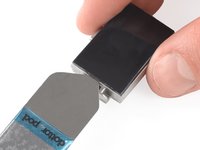
    • Heat an iOpener and apply it to the touch screen for two minutes.

    • The screen is not glued down, but the heat helps to loosen the touch screen assemly.

  3. How to Open the Fitbit Charge 2, Slide along the left edge: étape 3, image 1 de 3 How to Open the Fitbit Charge 2, Slide along the left edge: étape 3, image 2 de 3 How to Open the Fitbit Charge 2, Slide along the left edge: étape 3, image 3 de 3
    Outil utilisé dans cette étape :
    iSesamo Opening Tool
    $9.99
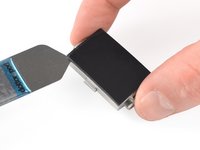
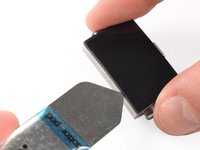
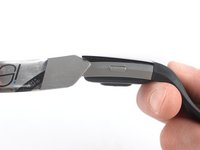
    • Insert an iSesamo into the gap between the touch screen and the watch assembly on the top left corner.

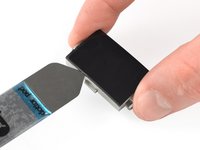
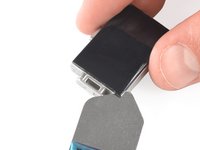
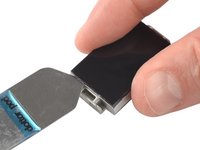
    • Slide the iSesamo along the left edge to the bottom left corner.

  4. How to Open the Fitbit Charge 2, Slide along the bottom edge: étape 4, image 1 de 2 How to Open the Fitbit Charge 2, Slide along the bottom edge: étape 4, image 2 de 2
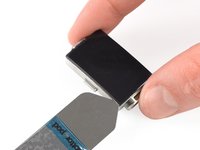
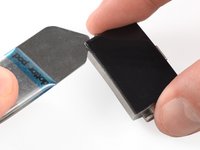
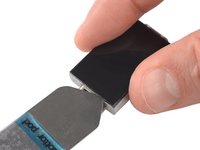
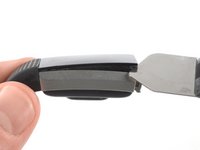
    • Slide the iSesamo around the bottom left corner.

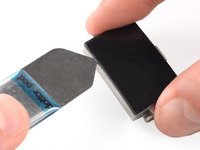
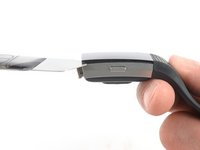
    • Slide it along the edge to the bottom right corner.

  5. How to Open the Fitbit Charge 2: étape 5, image 1 de 3 How to Open the Fitbit Charge 2: étape 5, image 2 de 3 How to Open the Fitbit Charge 2: étape 5, image 3 de 3
    • Slide the iSesamo around the bottom right corner.

    • Keep sliding it along the right edge to the top right corner.

  6. How to Open the Fitbit Charge 2: étape 6, image 1 de 2 How to Open the Fitbit Charge 2: étape 6, image 2 de 2
    • Slide the iSesamo around the top right corner.

    • Slide it along the top edge to the top left corner.

  7. How to Open the Fitbit Charge 2: étape 7, image 1 de 2 How to Open the Fitbit Charge 2: étape 7, image 2 de 2
    • Place the iSesamo under the top left corner.

    • Feel free to reattach the watch band for this and the next step for a better grip.

    • Pry up the touch screen assembly by twisting the iSesamo sideways to create a gap and unhinge the plastic clips which are holding the screen in place.

  8. How to Open the Fitbit Charge 2: étape 8, image 1 de 2 How to Open the Fitbit Charge 2: étape 8, image 2 de 2
    • Place the iSesamo under the top right corner.

    • Pry up the touch screen assembly by twisting the iSesamo sideways to create a gap.

  9. How to Open the Fitbit Charge 2: étape 9, image 1 de 2 How to Open the Fitbit Charge 2: étape 9, image 2 de 2
    • Insert a spudger into the gap on the top edge of your Fitbit Charge 2.

    • Use the spudger to pry up the touch screen assembly.

    • Do not remove the touch screen assembly all the way yet—it's still connected to the motherboard.

  10. How to Open the Fitbit Charge 2: étape 10, image 1 de 1
    • Carefully fold the touch screen assembly in the direction of the bottom edge.

Conclusion

To reassemble your device, follow these instructions in reverse order.

Opening didn’t go as planned? Ask our Answers community for help.

Adriana Zwink

Membre depuis le 12/18/19

56 807 Réputation

167 tutoriels rédigés

Équipe

iFixit Membre de l'équipe iFixit

Staff

120 membres

19 665 tutoriels rédigés

1 commentaire de tutoriel

How do I get the daughterboard out?

Pospesel - Réponse

Ajouter un commentaire

Nombre de vues :

Dernières 24 heures : 2

7 derniers jours : 17

30 derniers jours : 86

Total : 5,950