Aller au contenu principal
LeapFrog LeapPad Ultra XDi Battery Replacement

LeapFrog LeapPad Ultra XDi Battery Replacement

Victoria Shew

Victoria Shew et 7 autres contributeurs

Dernière mise à jour le June 11, 2024

15 minutes
Facile

This guide provides steps for replacing the battery in the LeapFrog LeapPad Ultra XDi (model number 33300) .

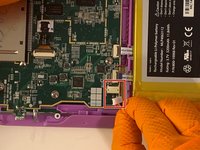
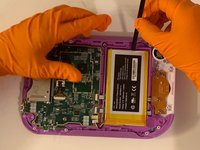
The battery provides power to the device. When this part is not working properly the device may not power on or hold a charge. You should first try the battery troubleshooting guide before replacing the entire battery.

If the battery looks swollen, damaged, or is leaking fluid proceed with caution.

Before beginning, make sure to power down the device completely and disconnect it from any power source.

Ce dont vous avez besoin

Outils

Afficher plus…

  1. LeapFrog LeapPad Ultra XDi Battery Replacement, Battery: étape 1, image 1 de 2 LeapFrog LeapPad Ultra XDi Battery Replacement, Battery: étape 1, image 2 de 2
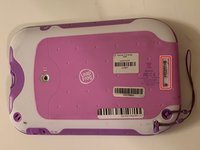
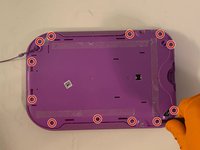
    • Orient the tablet so it’s laying screen down and the barcode sticker is facing up.

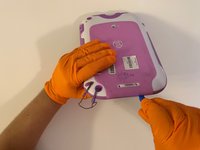
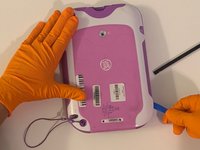
    • Remove the barcode sticker to expose the two screws.

  2. LeapFrog LeapPad Ultra XDi Battery Replacement: étape 2, image 1 de 2 LeapFrog LeapPad Ultra XDi Battery Replacement: étape 2, image 2 de 2
    • Remove the two 5.0mm Phillips #0 screws.

  3. LeapFrog LeapPad Ultra XDi Battery Replacement: étape 3, image 1 de 3 LeapFrog LeapPad Ultra XDi Battery Replacement: étape 3, image 2 de 3 LeapFrog LeapPad Ultra XDi Battery Replacement: étape 3, image 3 de 3
    • Using the iFixit opening tool, pry off the purple and white child-proof casing to expose the twelve screws.

  4. LeapFrog LeapPad Ultra XDi Battery Replacement: étape 4, image 1 de 2 LeapFrog LeapPad Ultra XDi Battery Replacement: étape 4, image 2 de 2
    • Remove all twelve 7mm Phillips #1 screws located along the edges of the device.

  5. LeapFrog LeapPad Ultra XDi Battery Replacement: étape 5, image 1 de 2 LeapFrog LeapPad Ultra XDi Battery Replacement: étape 5, image 2 de 2
    • Remove the purple case, exposing the motherboard and battery.

  6. LeapFrog LeapPad Ultra XDi Battery Replacement: étape 6, image 1 de 3 LeapFrog LeapPad Ultra XDi Battery Replacement: étape 6, image 2 de 3 LeapFrog LeapPad Ultra XDi Battery Replacement: étape 6, image 3 de 3
    • Using your fingers, grab the battery wires and carefully unplug them from the motherboard.

    • Use the Spudger to remove the glued down battery.

Conclusion

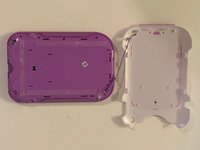
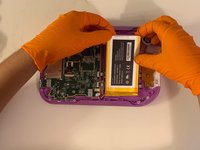
To reassemble your device, follow these instructions in reverse order.

Victoria Shew

Membre depuis le 08/28/19

503 Réputation

2 tutoriels rédigés

Équipe

0 commentaires

Ajouter un commentaire

Nombre de vues :

Dernières 24 heures : 0

7 derniers jours : 0

30 derniers jours : 9

Total : 1,388