
Lenovo ThinkPad X1 Yoga Battery Replacement
Introduction
Passez à l'étape 1This guide shows how to remove and replace the battery on the Lenovo ThinkPad X1 Yoga (model number 20FQ005YUS). If the computer has a short battery life or is not charging at all, the battery should be replaced.
For your safety, discharge your battery below 25% before disassembling your device. This reduces the risk of a dangerous thermal event if the battery is accidentally damaged during the repair. If your battery is swollen, take appropriate precautions.
Ce dont vous avez besoin
Kits de réparation
Ces kits contiennent toutes les pièces et tous les outils nécessaires à la réalisation du tutoriel.


Pièces


Outils


Afficher plus…
-
-
Flip the computer over so the bottom is facing up.
-
Remove nine 4mm Phillips #1 screws from the bottom of the computer.
-
Use an iFixit opening tool to pry the back cover off of the laptop.
-
-
-
-
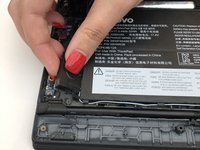
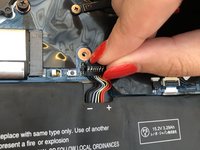
Lift the plastic black strip cover that's laying over the battery connector.
-
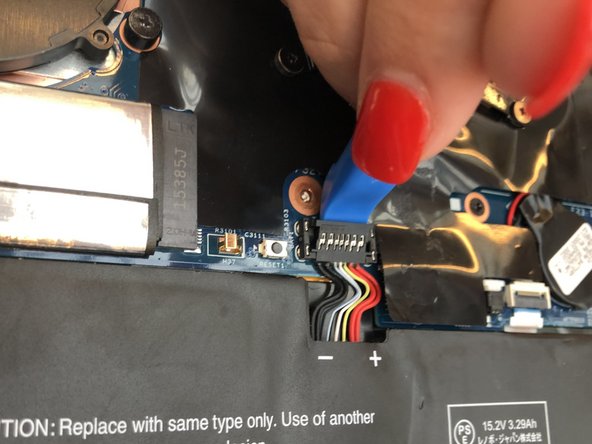
Use the iFixit opening tool to flip up and disconnect the black battery connector from its motherboard socket.
-
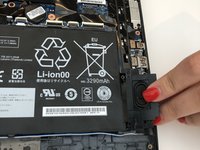
Gently pull the connector away from the battery to pull it out of the slot.
-


To reassemble your device, follow these instructions in reverse order.
Take your e-waste to an R2 or e-Stewards certified recycler.
Repair didn’t go as planned? Try some basic troubleshooting, or ask our Answers community for help.
To reassemble your device, follow these instructions in reverse order.
Take your e-waste to an R2 or e-Stewards certified recycler.
Repair didn’t go as planned? Try some basic troubleshooting, or ask our Answers community for help.
Annulation : je n'ai pas terminé ce tutoriel.
13 autres ont terminé cette réparation.
Équipe

Embry-Riddle Aeronautical University, Team S22-G6, Branham Fall 2019 Membre de l'équipe Embry-Riddle Aeronautical University, Team S22-G6, Branham Fall 2019
ERAU-BRANHAM-F19S22G6
3 membres
23 tutoriels rédigés
4 commentaires
Hello, I was able to install the battery on my X1 carbon, but the laptop is not detecting my battery. How to remove whitelisting on X1 carbon yoga 1st gen?
Did you find a solution for your problem? Because i have the same problem since i changed my battery :/
Sarah -
Very useful instructions. I was able to replace the battery without any problems. Thank you very much.
Where can I buu original replacement batteries in the EU?