
Lenovo ThinkPad X280 Fingerprint Scanner Replacement

Introduction
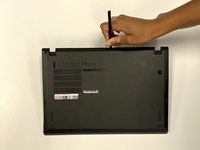
Passez à l'étape 1This replacement guide will enable users to properly remove the fingerprint scanner on the Lenovo ThinkPad X280.
The fingerprint scanner is commonly used as an authentication device to grant users access to the device.
If your device’s sensor is dirty and failing to work properly, your device is unresponsive to your fingerprint, and/or fails to recognize your fingerprint, your fingerprint scanner may be insufficient.
It is important to note that typically only one finger can be used to relay an appropriate response from your device. Using multiple fingers can result in an ‘error’ or ‘fingerprint cannot be read’ message. In addition, in order to remove or replace the fingerprint scanner, you must first remove the battery.
Before consulting this guide, review this document for more solutions.
Ce dont vous avez besoin


-
-
-
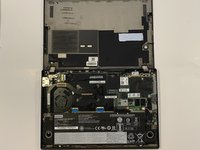
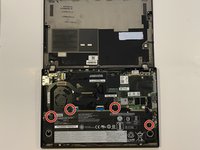
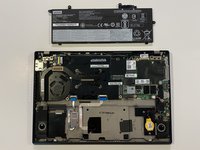
Using the Phillips #1 screwdriver, remove the four 5 mm screws that are holding the battery down.
-
Remove the battery.
-
-
-
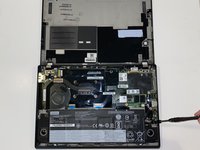
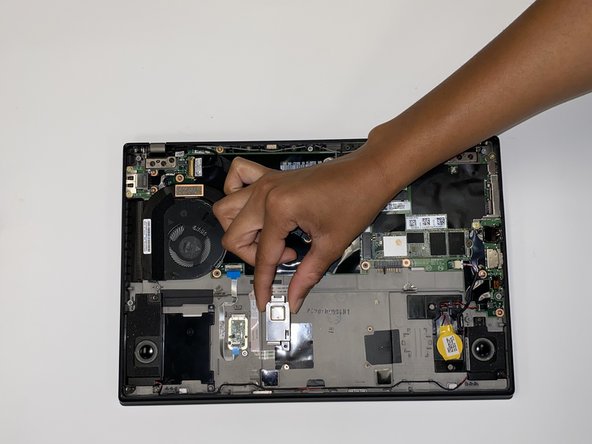
Using a Phillips #1 screwdriver, remove one 5 mm screw from the fingerprint sensor.
-
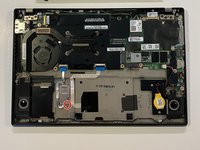
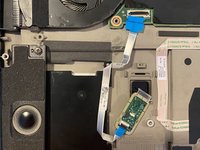
Remove the metal plate covering the sensor.
-


To reassemble your device, follow these instructions in reverse order.
To reassemble your device, follow these instructions in reverse order.
Annulation : je n'ai pas terminé ce tutoriel.
2 autres ont terminé cette réparation.

Équipe

University of Alabama, Team 1-3, Bedsole Fall 2021 Membre de l'équipe University of Alabama, Team 1-3, Bedsole Fall 2021
UA-BEDSOLE-F21S1G3
4 membres
6 tutoriels rédigés