
Lenovo ThinkPad X280 SSD Replacement

Introduction
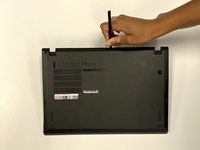
Passez à l'étape 1This guide will show you how to remove key parts to access the SSD. The SSD provides the laptop with external storage for performance.
SSDs have a limited lifespan, and over time, the factory-installed SSD in a laptop will age and eventually run out of usable storage. You would have to change the SSD. Getting extra data/storage provides the laptop with better performance power and space to render applications. This process should only take a maximum of 20 minutes to complete.
Ce dont vous avez besoin
Pièces

Outils


Afficher plus…


To reassemble your device, follow the above steps in reverse order.
Take your e-waste to an R2 or e-Stewards certified recycler.
Repair didn’t go as planned? Try some basic troubleshooting or ask our Answers community for help.
To reassemble your device, follow the above steps in reverse order.
Take your e-waste to an R2 or e-Stewards certified recycler.
Repair didn’t go as planned? Try some basic troubleshooting or ask our Answers community for help.

Équipe

University of North Texas, Team 3-7, Coppersmith Fall 2024 Membre de l'équipe University of North Texas, Team 3-7, Coppersmith Fall 2024
UNT-COPPERSMITH-F24S3G7
4 membres
4 tutoriels rédigés