
Lenovo ThinkPad Yoga 370 Battery Replacement

Introduction
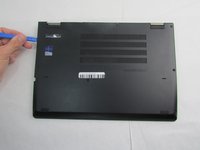
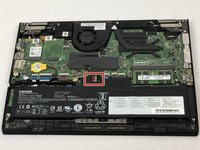
Passez à l'étape 1For the Lenovo ThinkPad Yoga 370 (Model Number: 20JH002AUS), if the battery is not charging the device, it could be faulty and this guide will show step by step instructions on how to replace the faulty battery.
Caution: When replacing the battery, make sure the replacement battery is the exact same type as before. Replacement of a wrong battery could cause it to ignite.
Ce dont vous avez besoin
Kit de réparation
Ce kit contient toutes les pièces et tous les outils nécessaires à la réalisation de ce tutoriel.

Pièces

Outils


Afficher plus…


To reassemble your device, follow these instructions in reverse order.
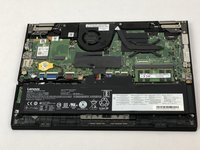
Note: Due to the similarity of the devices, several of the pictures were used from the Lenovo ThinkPad Yoga 260 Battery Replacement Guide to show the specific components that were missing in the Yoga 370.
To reassemble your device, follow these instructions in reverse order.
Note: Due to the similarity of the devices, several of the pictures were used from the Lenovo ThinkPad Yoga 260 Battery Replacement Guide to show the specific components that were missing in the Yoga 370.
Annulation : je n'ai pas terminé ce tutoriel.
Une autre personne a terminé cette réparation.

Équipe

Embry-Riddle Aeronautical University, Team S12-G6, Lamothe Fall 2019 Membre de l'équipe Embry-Riddle Aeronautical University, Team S12-G6, Lamothe Fall 2019
ERAU-LAMOTHE-F19S12G6
3 membres
5 tutoriels rédigés
Un commentaire
There’s a procedure you must do before removing any of the screws- disable the battery!