
Little Tikes Tobi 2 Interactive Karaoke Machine Screen Replacement

Introduction
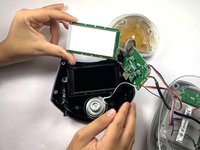
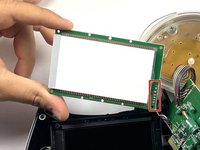
Passez à l'étape 1The screen is an essential component of the Little Tikes Tobi 2 Interactive Karaoke Machine, as it serves multiple purposes, including displaying the device's friendly face, user interface, and various interactive games. The screen acts as the primary visual communication tool, allowing users to engage with the device. This guide may be required if your device's screen is frozen.
Before you begin this repair, make sure your karaoke machine is turned off and the batteries are removed. This repair requires soldering. This guide is a helpful reference: Soldering/desoldering connections. Be careful when soldering as the iron is extremely hot and can burn. Also, make sure to solder in a well-ventilated area to avoid breathing toxic fumes.
Ce dont vous avez besoin
Pièces

Outils


Afficher plus…
-
-
Use a Phillips screwdriver to remove the single screw that is holding the cover to the battery compartment.
-
Use a spudger to carefully pry off the battery cover.
-
-
-
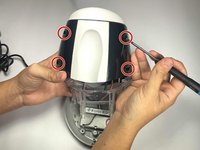
Use a Phillips screwdriver to remove four screws from the base of the device.
-
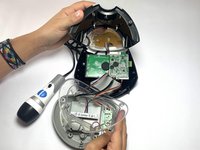
Remove the bottom of the karaoke machine.
-
-
-
-
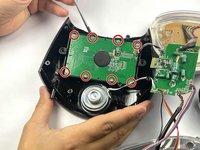
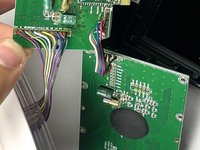
Use a Phillips screwdriver to remove the two screws from the green circuit board.
-


To reassemble your device, follow these instructions in reverse order. Take your e-waste to an R2 or e-Stewards certified recycler.
To reassemble your device, follow these instructions in reverse order. Take your e-waste to an R2 or e-Stewards certified recycler.

Équipe

CSU Los Angeles, Team 5-4, Kershman Fall 2024 Membre de l'équipe CSU Los Angeles, Team 5-4, Kershman Fall 2024
CSULA-KERSHMAN-F24S5G4
4 membres
6 tutoriels rédigés