
MacBook Pro 15" Retina Display Mid 2014 MagSafe DC-In Board Replacement

Introduction
Passez à l'étape 1Use this guide to replace the MagSafe DC-In board.
Ce dont vous avez besoin


-
-
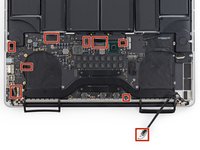
Remove the following P5 pentalobe screws securing the lower case to the MacBook Pro:
-
Eight 3.0 mm
-
Two 2.3 mm
-
-
Outil utilisé dans cette étape :Tweezers$4.99
-
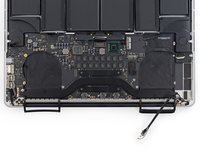
Use a spudger or tweezers to pry the three AirPort antenna cables straight up off of their sockets on the AirPort board.
-
-
-
Use the flat end of a spudger to pry the rubber hinge covers up off the left and right hinges.
-
-
-
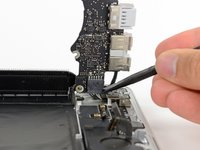
Using the flat end of a spudger, pry the I/O Board connector straight up out of its socket on the logic board.
-
In a similar fashion, remove the I/O Board cable connector from its socket on the I/O Board.
-
Remove the I/O Board cable from the MacBook Pro.
-
-
-
Remove the single 2.9 mm T5 Torx screw securing the AirPort card to the logic board.
-
-
-
-
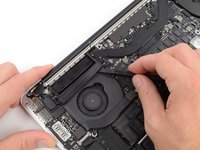
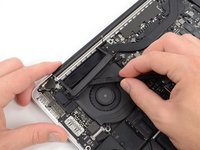
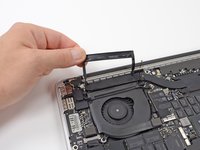
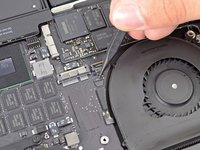
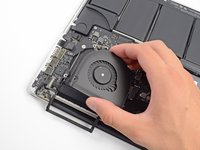
Use the flat end of a spudger to lift the rubber heat sink cover up off the left fan.
-
-
-
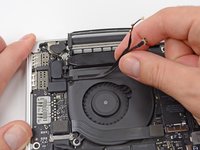
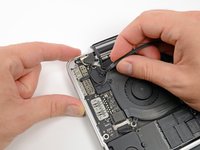
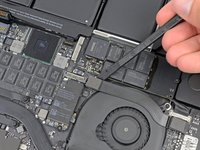
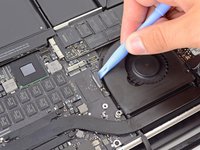
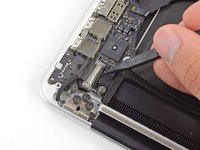
Use the tip of a spudger to flip up the I/O board data cable lock and rotate it toward the battery side of the computer.
-
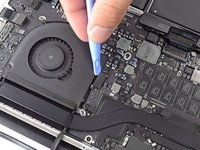
Use the flat end of a spudger to slide the I/O board data cable straight out of its socket on the logic board.
-
-
-
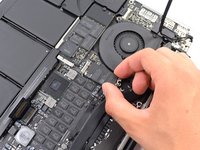
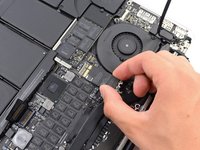
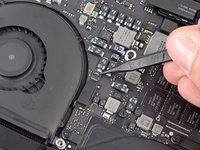
Use the flat end of a spudger to pry the left speaker connector up and out of its socket on the logic board.
-
Use the tip of a spudger to pry the right speaker connector up and out of its socket on the logic board
-
-
-
Peel back the tape covering the top of the keyboard ribbon cable connector.
-
Use the flat end of a spudger to flip up the retaining flap on the keyboard ribbon cable ZIF socket.
-
Use the flat end of a spudger to push the keyboard ribbon cable out of its socket.
-
-
-
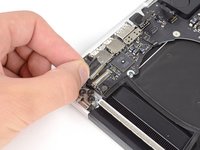
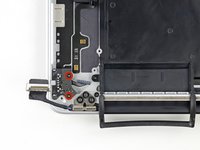
Remove the two 2.5 mm T5 Torx screws securing the MagSafe DC-In board to the upper case.
-
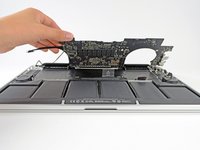
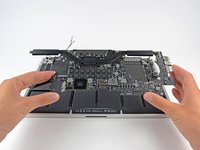
Slide the MagSafe DC-In board towards the right to free it from its recess within the upper case.
-
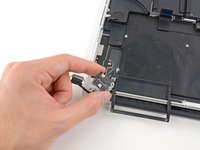
Lift and remove the MagSafe DC-In board out of the upper case assembly.
-


To reassemble your device, follow these instructions in reverse order.
To reassemble your device, follow these instructions in reverse order.
Annulation : je n'ai pas terminé ce tutoriel.
47 autres ont terminé cette réparation.

29 commentaires de tutoriel
Thanks! I just completed this repair on a 15” mid 2015. It’s almost identical except there are some extra shields to remove from some of the connections (IO board cable connections, touch pad connection) which are very obvious.
I accidentally broke the flip/hinge for the ZIF on the right fan but it doesn’t seem to be an issue because the cable fits in snug anyways.
thanks a lot! I did the same repair on a 15” mid 2015 and encountered the same issues described already by Christopher. Had also a broken flip on the ZIF of the right fan. But everything works again.
I have now replaced the battery and the dc-in board, and I still can’t get the battery to charge. I also bought a new magsafe power adapter. It appears all cables are connected, and the computer runs fine on the battery (until it runs out of juice, then I will be at a complete loss). No clue what to try next. Any suggestions? Thanks!
I thought I was the only one having the same problems. I haven’t replaced my dc-in board yet nor the charger. I’m sure this has something to do with the new Battery Health Management, MacOS 10.15.5 update served. Now I just don’t know how to use my mac when the battery is 0%. Last time I could charge it by taking the battery plug out of logic board and simply putting it back in and then it charged. Any suggestions are welcome here too.
Just to add. When I have my Macbook open and charger plugged in, it shows the red charging light, but in MacOS it tells its actually not charging. When I close the lid, the red charging indicator will go off after a while, and to get it back working (reset the magsafe chargers fault mode or something), I have to take the charger out of wall socket.