
Nintendo Wii mini Disc Drive Replacement
Introduction
Passez à l'étape 1This guide will provide instruction on replacing the disc drive in your Nintendo Wii mini so game discs can be inserted. Aside from the disc drive being incapable of taking in a disc, other reasons are dirt on the disc and scratches that can ultimately make the game choppy/appear unclear. You may need to replace the disc. The troubleshooting page will give you more insight on further issues.
Using tweezers to handle small objects such as screws are suggested to prevent the loss of contents. To prevent further issues regarding hardware, do not tamper with connector or cables while detaching the fan, for it may cause the connector to loosen.
Ce dont vous avez besoin


-
-
Remove the two rubber feet at the back of the console to reveal the hidden screws.
-
Remove the four 6mm Phillips #0 screws.
-
-
-
Turn the Wii mini right-side up. Then run a plastic opening tool around the middle edge of the console to loosen the top piece.
-
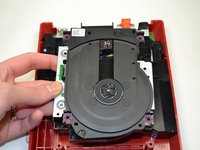
Gently lift the top piece of the console and set it aside.
-
-
Outil utilisé dans cette étape :Tweezers$4.99
-
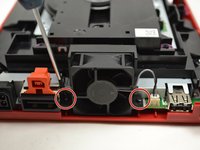
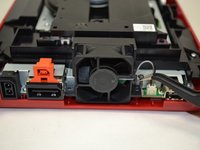
Turn the Wii mini around so that the back of the device is facing you.
-
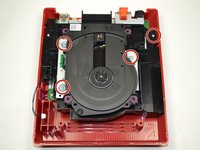
Using a Phillips #0 Screwdriver, unscrew the two 6mm screws on either side of the fan piece.
-
-
-
-
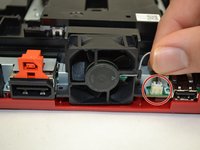
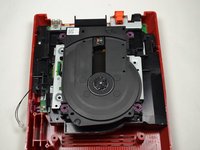
Using your fingers, gently pull the top of the pin connector straight up to detach the fan from the console.
-
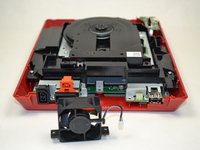
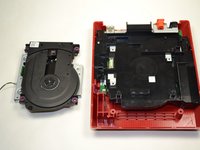
Remove the fan piece and set it aside.
-
-
-
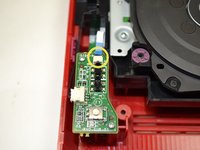
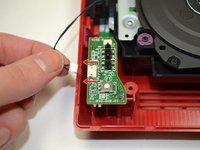
Using your fingers, slide out the blue ribbon cable from the the top of the power board.
-
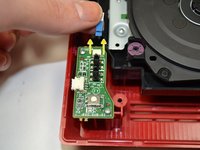
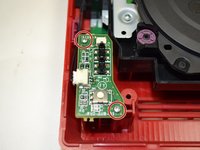
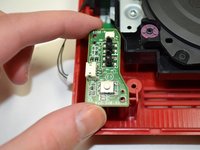
Using a Phillips #0 Screwdriver, unscrew the two 4mm screws at the top and bottom of the power board.
-


To reassemble your device, follow these instructions in reverse order.
To reassemble your device, follow these instructions in reverse order.
Annulation : je n'ai pas terminé ce tutoriel.
3 autres ont terminé cette réparation.
Équipe
