Aller au contenu principal
Pour réparer ensemble - Je crée un compte
Roccat Vulcan II Mini Air Backplate Replacement

Roccat Vulcan II Mini Air Backplate Replacement

Ethan Mueller

Ethan Mueller et 2 autres contributeurs

Dernière mise à jour le 31 déc. 2024

10 - 20 minutes
Modérée
A besoin de meilleures images
Conditions préalables manquantes
Étapes manquantes
Meilleure introduction

This guide is meant to showcase how to remove the backplate and open up the Roccat Vulcan II Mini Air keyboard for access to all the interior components.

Ce dont vous avez besoin

Outils

Afficher plus…

  1. Roccat Vulcan II Mini Air Backplate Replacement, Backplate: étape 1, image 1 de 3 Roccat Vulcan II Mini Air Backplate Replacement, Backplate: étape 1, image 2 de 3 Roccat Vulcan II Mini Air Backplate Replacement, Backplate: étape 1, image 3 de 3
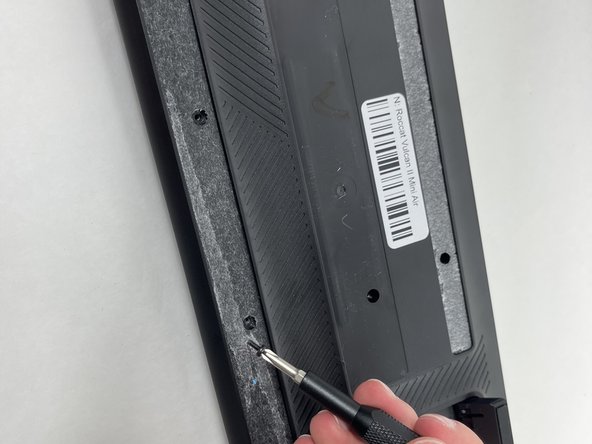
    • Flip your keyboard over so the bottom is facing up.

    • Before you begin, gently peel the sticker in the center and rubber strip that runs along the bottom and top to expose all the screws.

    • Be sure to save the rubber screw covers for reinstallation when you're finished.

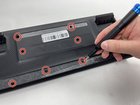
    • Use a Phillips #0 screwdriver to remove all of the screws from the back plate.

    • Keep the screws for the replacement.

  2. Roccat Vulcan II Mini Air Backplate Replacement: étape 2, image 1 de 3 Roccat Vulcan II Mini Air Backplate Replacement: étape 2, image 2 de 3 Roccat Vulcan II Mini Air Backplate Replacement: étape 2, image 3 de 3
    • With the screws removed the backplate will be loose and can be removed. Be careful, as it is still attached to the switch plate with ribbon cables so don't pull it.

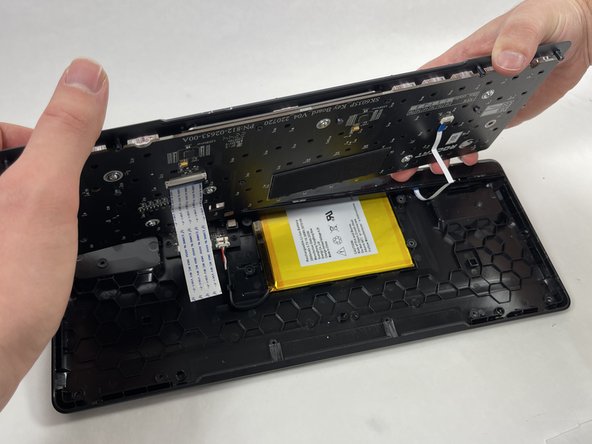
    • Gently lift the switch plate from the backplate, setting them next to each other with the ribbon cables facing upwards.

    • Use a spudger or a clean fingernail to flip up the locking flaps of the two ZIF connectors using the widest tool possible to avoid damaging the delicate hinge pins.

    • This is the unlocked position.

    • Use tweezers or your fingers to gently pull the cable out of its socket by the pull tab.

    • You could damage the cable by gripping it directly.

Conclusion

To reassemble your device, follow these instructions in reverse order.

Une autre personne a terminé cette réparation.

Équipez-vous pour vos futures réparations

Voir tous les produits

Ethan Mueller

Membre depuis le 10/22/24

162 Réputation

1 tutoriel rédigé

Équipe

UMass Dartmouth, Team 3-3, Santin Fall 2024 Membre de l'équipe UMass Dartmouth, Team 3-3, Santin Fall 2024

UMASSD-SANTIN-F24S3G3

4 membres

4 tutoriels rédigés

0 commentaires de tutoriel

Ajouter un commentaire

Nombre de vues :

Dernières 24 heures : 3

7 derniers jours : 10

30 derniers jours : 19

Total : 277