
Sony GTK-XB5 Audio Port Replacement
Introduction
Passez à l'étape 1This replacement guide will instruct you how to replace the audio port on the speaker. Before doing anything, be sure to safely discharge the capacitor using this guide.
Ce dont vous avez besoin
Pièces
Outils


Afficher plus…
-
-
First, remove the eight screws on the speaker's back panel. These screws should be located on the top and bottom corners of the back, as well as along the sides.
-
Remove the 7.5 mm Phillips-head screws using a Phillips #1 screwdriver with a J sized head.
-
-
-
Next, remove 4 more 7.5 mm Phillips-head screws on the top part of the speaker (where the power buttons and extra BASS buttons are located). Two of the screws are located on the underside of the handle and are hidden beneath black rubber covers. Remove the covers and use a Phillips #1 screwdriver to unscrew the screws.
-
The remaining two 7.5 mm Phillips-head screws are located on the base of the indented section of the speaker, pictured here. They are also hidden beneath black rubber covers. Repeat same process in removing the screws.
-
-
-
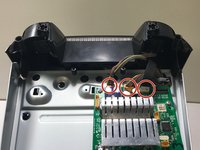
Additionally, the sides need to be taken apart. You will need to take out 4 additional 7.5 mm Phillips-head screws on either side. These screws are located beneath larger grey pads with adhesive on them at the side corners of your speaker.
-
Remove the pads slowly, as the adhesive makes them tougher to remove and you do not want to rip them.
-
Use an opening tool to help take out the side shell from the rest of the speaker.
-
-
-
-
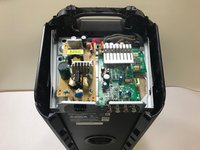
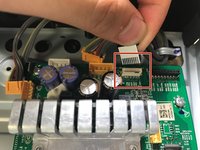
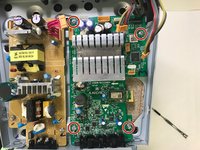
Find the large green motherboard, located underneath the top plastic housing of the speaker.
-
-
-
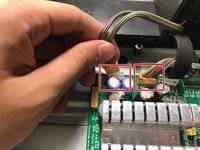
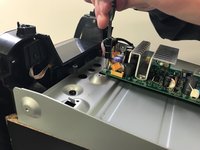
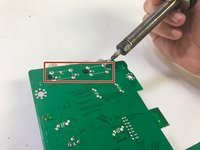
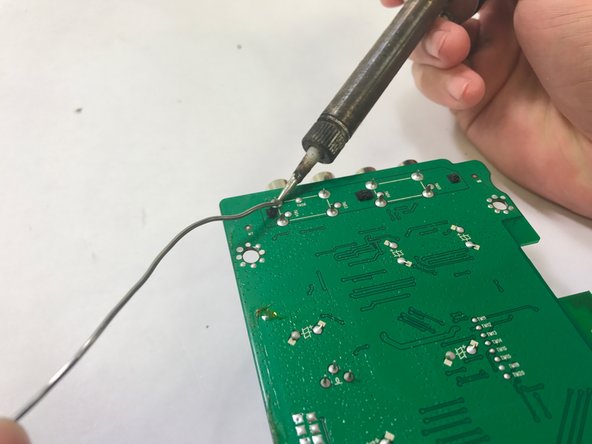
Unsolder the audio ports from the underside of the motherboard. If you would like more information on the technique to soldering, refer to this link.
-


To reassemble your device, follow these instructions in reverse order.
To reassemble your device, follow these instructions in reverse order.
Équipe

Cal Poly, Team 9-3, Banghart Winter 2017 Membre de l'équipe Cal Poly, Team 9-3, Banghart Winter 2017
CPSU-BANGHART-W17S9G3
4 membres
6 tutoriels rédigés