Aller au contenu principal
Toshiba Satellite E45t-B4204 Charging Port Replacement

Toshiba Satellite E45t-B4204 Charging Port Replacement

Eduardo

Eduardo et 4 autres contributeurs

Dernière mise à jour le January 9, 2023

45 minutes
Modérée
A besoin de meilleures images

This is a quick guide on how to replace the charging port of a Toshiba Satellite E45t-B4204. Replacing the charging port can fix a charging port due to excessive use.

Ce dont vous avez besoin

Outils

  • Phillips #1 Screwdriver
    Phillips #1 Screwdriver
  • Spudger
    Spudger
  1. Toshiba Satellite E45t-B4204 Charging Port Replacement, Back Case: étape 1, image 1 de 3 Toshiba Satellite E45t-B4204 Charging Port Replacement, Back Case: étape 1, image 2 de 3 Toshiba Satellite E45t-B4204 Charging Port Replacement, Back Case: étape 1, image 3 de 3
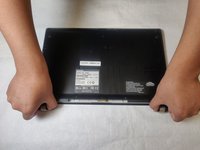
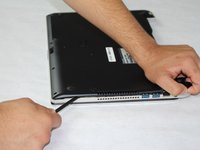
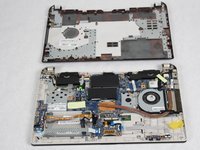
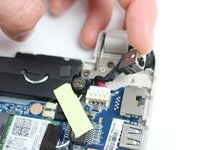
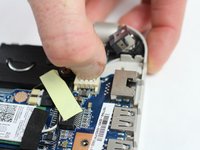
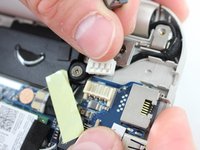
    • Remove all 14 of the 4 mm screws on the back side of the laptop with a Phillips #1 screwdriver.

  2. Toshiba Satellite E45t-B4204 Charging Port Replacement: étape 2, image 1 de 2 Toshiba Satellite E45t-B4204 Charging Port Replacement: étape 2, image 2 de 2
    • Gently pull out the battery.

  3. Toshiba Satellite E45t-B4204 Charging Port Replacement: étape 3, image 1 de 3 Toshiba Satellite E45t-B4204 Charging Port Replacement: étape 3, image 2 de 3 Toshiba Satellite E45t-B4204 Charging Port Replacement: étape 3, image 3 de 3
    • Lift up in the spaces left by the battery to create a gap between the back case and the laptop body.

    • Run a spudger along both sides of the laptop to widen the separation and release the clips holding the back case on.

    • Remove the back case.

  4. Toshiba Satellite E45t-B4204 Charging Port Replacement, Charging Port: étape 4, image 1 de 1
    • Locate the charging port housing.

  5. Toshiba Satellite E45t-B4204 Charging Port Replacement: étape 5, image 1 de 3 Toshiba Satellite E45t-B4204 Charging Port Replacement: étape 5, image 2 de 3 Toshiba Satellite E45t-B4204 Charging Port Replacement: étape 5, image 3 de 3
    • Unplug the charging plug housing from the motherboard.

Conclusion

To reassemble your device, follow these instructions in reverse order.

Eduardo

Membre depuis le 03/22/18

411 Réputation

4 tutoriels rédigés

Équipe

Sam Houston State, Team S17-G4, Blackburne Spring 2018 Membre de l'équipe Sam Houston State, Team S17-G4, Blackburne Spring 2018

SHSU-BLACKBURNE-S18S17G4

4 membres

10 tutoriels rédigés

Un commentaire

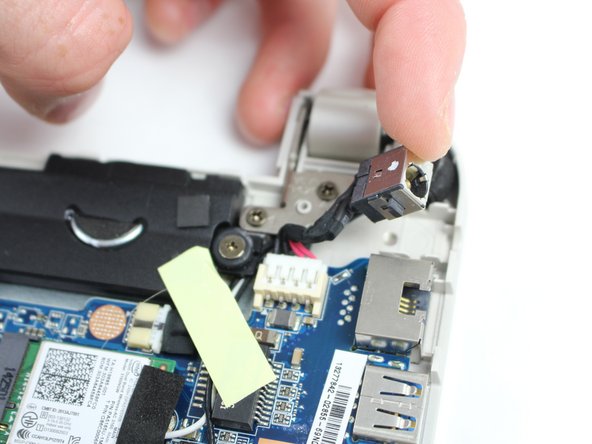
You didn’t complete the instructions. It ended after you said unplug the charging port housing. The pictures are not clear. Please add red lines or arrows, etc. to show what you are trying to do. It doesn’t show or spell out the next steps to replace it.

Correy Smith Hartzog - REALTOR - Réponse

Ajouter un commentaire

Nombre de vues :

Dernières 24 heures : 0

7 derniers jours : 3

30 derniers jours : 7

Total : 3,266