
Toshiba Satellite P55t-A5116 Fan & CPU Cooler Replacement
Introduction
Passez à l'étape 1Use this guide to remove the Toshiba Satellite P55t-A5116 Fan CPU cooler.
Ce dont vous avez besoin
Pièces
Outils


Afficher plus…
-
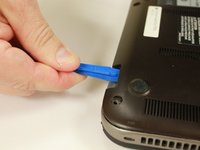
Outil utilisé dans cette étape :Tweezers$4.99
-
Close laptop and turn it upside down
-
Remove the 14 circular rubber covers with tweezers along with one smaller more cylindrical rubber cover.
-
-
-
-
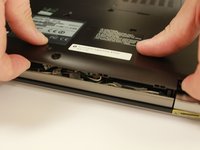
Use the #PH0 screw head, remove 4 (5.7mm) screws.
-
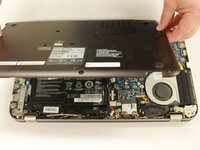
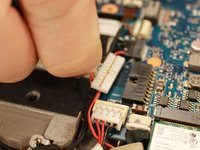
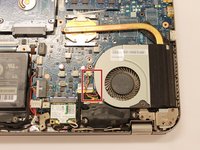
Unplug the battery's 10 pin connector and gently lift the battery out of the laptop.
-
-
-
Using a PH0 screwdriver, remove 2 (5.7mm) screws.
-
Using a PH0 screwdriver, remove 4 (3.68mm) screws.
-


To reassemble your device, follow these instructions in reverse order.
To reassemble your device, follow these instructions in reverse order.
Annulation : je n'ai pas terminé ce tutoriel.
3 autres ont terminé cette réparation.
Équipe

Eastern Washington University, Team 1-5, Mathisen Winter 2017 Membre de l'équipe Eastern Washington University, Team 1-5, Mathisen Winter 2017
EWU-MATHISEN-W17S1G5
5 membres
12 tutoriels rédigés