
Changement carte mère manette sans fil Xbox 360

Ce dont vous avez besoin


-
-
Appuyez sur le bouton pour retirer la batterie situé sur le haut du contrôleur.
-
Retirez le conteneur de la batterie du contrôleur.
-
-
Outil utilisé dans cette étape :Tweezers$4.99
-
Utilisez une pincette pour retirer l'autocollant du code-barre du compartiment de la batterie.
-
-
-
Outil utilisé dans cette étape :Spudger$2.99
-
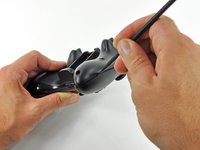
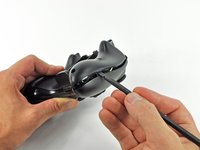
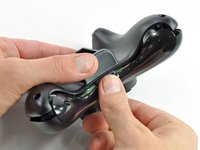
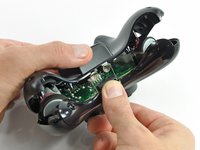
Insérez une spatule (spudger) entre les coques avant et arrière le long du bord gauche de la manette.
-
Pivotez la spatule vers l'avant de la manette pour séparer les deux coques.
-
-
-
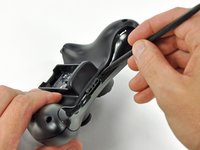
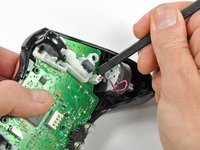
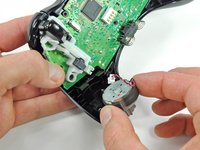
Utilisez la partie plate d'une spatule pour retirer le câble du moteur de vibration, en le déplaçant vers le haut depuis sa prise sur la carte mère.
-
Soulevez le moteur de vibration hors de la coque avant.
-
-
-
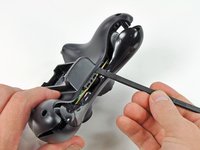
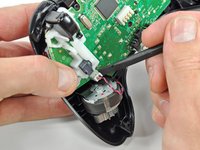
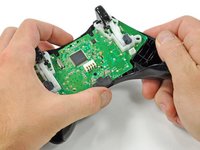
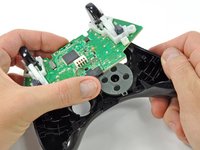
Soulevez au niveau de la prise jack et d'alimentation, puis retirez la carte mère du boîtier avant.
-


Pour remonter votre appareil, suivez ces étapes en sens inverse.
Pour remonter votre appareil, suivez ces étapes en sens inverse.
Merci à ces traducteurs :
100%


Ces traducteurs nous aident réparer le monde ! Vous voulez contribuer ?
Commencez à traduire ›

