Aller au contenu principal

Cuisinart Mini-Prep DLC-2A Button Replacement

Ce dont vous avez besoin

  1. Cuisinart Mini-Prep DLC-2A Button Replacement, Cuisinart Mini-Prep DLC-2A Case Disassembly: étape 1, image 1 de 2 Cuisinart Mini-Prep DLC-2A Button Replacement, Cuisinart Mini-Prep DLC-2A Case Disassembly: étape 1, image 2 de 2
    • Remove the back panel using a Phillips #1 Screwdriver on the four screws that hold it in place.

  2. Cuisinart Mini-Prep DLC-2A Button Replacement, Button: étape 2, image 1 de 1
    • Locate the Button Panel inside the blender.

    • Using your Phillips #1 Screwdriver, remove the two screws which hold the panel in place.

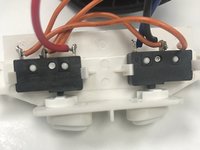
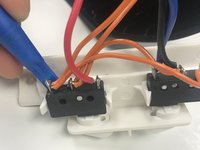
  3. Cuisinart Mini-Prep DLC-2A Button Replacement: étape 3, image 1 de 3 Cuisinart Mini-Prep DLC-2A Button Replacement: étape 3, image 2 de 3 Cuisinart Mini-Prep DLC-2A Button Replacement: étape 3, image 3 de 3
    • Locate the black box held in place on the panel.

    • Using your Spudger, wedge the black box out of its place to uncover the button

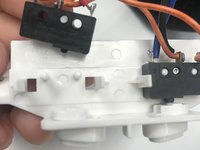
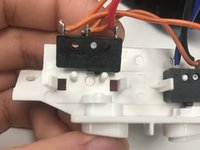
  4. Cuisinart Mini-Prep DLC-2A Button Replacement: étape 4, image 1 de 2 Cuisinart Mini-Prep DLC-2A Button Replacement: étape 4, image 2 de 2
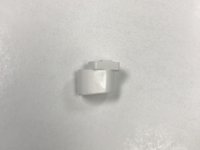
    • Once the black box is out of place, use your finger to push out the button.

    • Now replace the old button with your newly acquired button.

Conclusion

To reassemble your device, follow these instructions in reverse order.

Une autre personne a terminé cette réparation.

Xavier Tapia

Membre depuis le 09/25/17

144 Réputation

1 tutoriel rédigé

Équipe

Un commentaire

Hi,

Where’d you get the new buttons?

Mark B - Réponse

Ajouter un commentaire

Nombre de vues :

Dernières 24 heures : 0

7 derniers jours : 1

30 derniers jours : 4

Total : 267