
Dell Inspiron 15 7579 Fan Replacement

25 minutes
Facile
Introduction
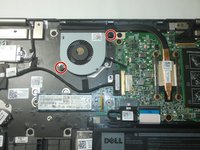
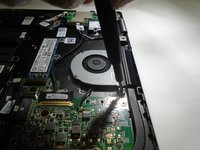
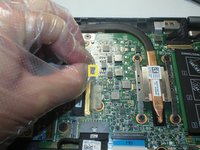
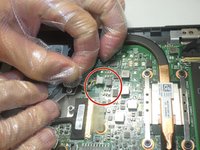
Passez à l'étape 1This guide will give detailed instructions and photos to replace the fan inside a Dell Inspiron 15 7579. This replacement will resolve overheating issues caused directly by the fan. Hazards include exposure of the motherboard and operating with small electrical wires that cannot sustain large amounts of force.
Ce dont vous avez besoin


Presque terminé !
To reassemble your device, follow these instructions in reverse order.
Conclusion
To reassemble your device, follow these instructions in reverse order.

Équipe

The Citadel Military College of South Carolina, Team 2-11, Eggleston Fall 2021 Membre de l'équipe The Citadel Military College of South Carolina, Team 2-11, Eggleston Fall 2021
CMCSC-EGGLESTON-F21S2G11
3 membres
3 tutoriels rédigés