Aller au contenu principal
Dell Inspiron 15-5558 Screen Replacement

Dell Inspiron 15-5558 Screen Replacement

Adam Lourenco

Adam Lourenco et 3 autres contributeurs

Dernière mise à jour le December 21, 2017

15 minutes
Modérée

If your device screen breaks, you might need to replace it. The screen is the part of the device when images are displayed. This guide shows you how to replace a broken or faulty screen

Ce dont vous avez besoin

Outils

  • Spudger
    Spudger
  • Phillips #0 Screwdriver
    Phillips #0 Screwdriver
  1. Dell Inspiron 15-5558 Screen Replacement, Battery: étape 1, image 1 de 1
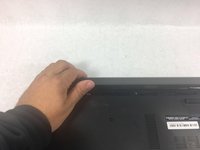
    • Make sure you turn off the device before starting.

    • Flip the device over and so the white bar code is on the right.

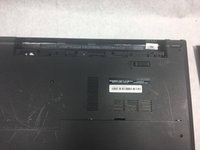
  2. Dell Inspiron 15-5558 Screen Replacement: étape 2, image 1 de 1
    • Slide the battery latch all the way to the left until you hear the click and see the battery prop up.

    It is no big deal but try to erase the service tag.

    Somecan even summon the Dell support to you by it and make a fuss.

    Why am I saying this? this is internet and there are various people. Try to be safe before rant.

    Kind-hearted, spirited Man - Réponse

  3. Dell Inspiron 15-5558 Screen Replacement: étape 3, image 1 de 2 Dell Inspiron 15-5558 Screen Replacement: étape 3, image 2 de 2
    • Rotate the battery up and remove it.

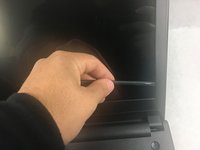
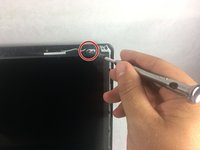
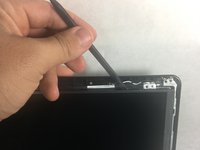
  4. Dell Inspiron 15-5558 Screen Replacement, Screen: étape 4, image 1 de 2 Dell Inspiron 15-5558 Screen Replacement, Screen: étape 4, image 2 de 2
    • Open device so it is at least opened at a 90 degree angle.

    • Wedge a spudger between the screen and the plastic frame.

    • Push in the spudger and push down to pop the frame from the pins.

    • Repeat around the whole frame.

    Will need a heat gun. The Bezel is glued with double sided tape.

    Nicholas Cain - Réponse

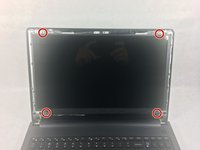
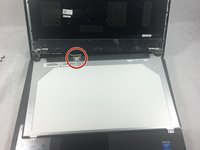
  5. Dell Inspiron 15-5558 Screen Replacement: étape 5, image 1 de 3 Dell Inspiron 15-5558 Screen Replacement: étape 5, image 2 de 3 Dell Inspiron 15-5558 Screen Replacement: étape 5, image 3 de 3
    • Once all the pins are off, remove the frame by pulling it away from the screen.

    • Using a Phillips #0 screwdriver, unscrew the four 3mm screws holding the screen in place.

    • Push the spudger behind the screen and push down to remove the screen.

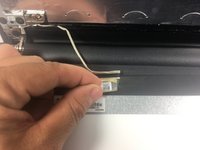
  6. Dell Inspiron 15-5558 Screen Replacement: étape 6, image 1 de 3 Dell Inspiron 15-5558 Screen Replacement: étape 6, image 2 de 3 Dell Inspiron 15-5558 Screen Replacement: étape 6, image 3 de 3
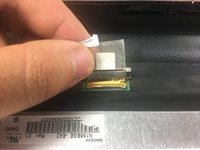
    • Pull the tape connecting the screen up with your fingers and pull the securing bar up with it.

    • Disconnect the securing bar to remove the screen.

Conclusion

To reassemble your device, follow these instructions in reverse order.

7 autres ont terminé cette réparation.

Adam Lourenco

Membre depuis le 10/19/17

793 Réputation

5 tutoriels rédigés

Équipe

UMass Dartmouth, Team S3-G4, Bailey Fall 2017 Membre de l'équipe UMass Dartmouth, Team S3-G4, Bailey Fall 2017

UMASSD-BAILEY-F17S3G4

3 membres

5 tutoriels rédigés

3Commentaires sur le guide

Where can I buy the screen from?

wardak_90 - Réponse

How many pins is the screen connector? 30? 40?

Adrian Lewis - Réponse

Very useful guide. Works with Dell Inspiron 15 5559. Screen replacement is a lot easier than replacing the whole screen assembly.

James Diamond - Réponse

Ajouter un commentaire

Nombre de vues :

Dernières 24 heures : 4

7 derniers jours : 11

30 derniers jours : 41

Total : 4,847