
Dell Inspiron 5570 Battery Replacement

Introduction
Passez à l'étape 1Use this guide to replace the battery in your Dell Inspiron 5570 Laptop.
For your safety, discharge the battery below 25% before disassembling your device. This reduces the risk of fire if the battery is accidentally damaged during the repair. If your battery is swollen, take appropriate precautions.
Ce dont vous avez besoin
Kit de réparation
Ce kit contient toutes les pièces et tous les outils nécessaires à la réalisation de ce tutoriel.

Pièces

Outils


Afficher plus…
-
-
Use your Phillips screwdriver to remove the seven screws securing the back cover:
-
Three 5 mm-long screws
-
Four 7.5 mm-long screws
-
Loosen the three captive screws.
-
-
-
Flip the laptop upright and open the lid so that the keyboard is exposed.
-
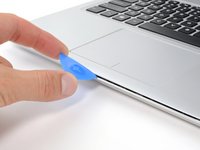
Insert an opening pick between the front right corner of the back cover and the chassis.
-
Pry upward to release the retaining clips holding the cover.
-
Repeat this procedure for the opposite corner.
-
-
-
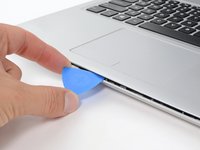
Insert an opening pick between the front edge of the back cover and the chassis, near the trackpad.
-
Pry upward to release the clips along the front edge of the laptop.
-
-
-
-
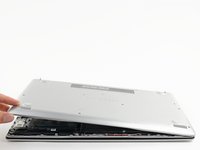
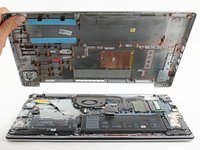
Close the screen to the laptop and flip it over.
-
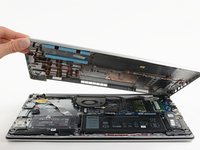
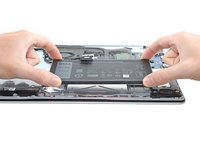
Pull the left side of the back cover away from the frame and remove it.
-
-
-
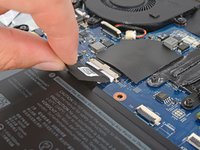
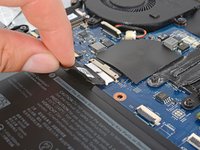
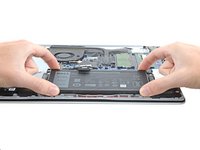
Pull the tab on the head of the battery cable away from the socket to disconnect the battery.
-
-
-
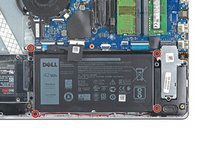
Use a Phillips screwdriver to remove the four 4 mm-long screws securing the battery.
-


To reassemble your device, follow these instructions in reverse order.
For optimal performance, calibrate your newly installed battery after completing this guide.
Take your e-waste to an R2 or e-Stewards certified recycler.
Repair didn’t go as planned? Try some basic troubleshooting, or ask our Answers community for help.
Annulation : je n'ai pas terminé ce tutoriel.
3 autres ont terminé cette réparation.


2 commentaires de tutoriel
These instructions did not match my laptop, since they did not cover the removal of the DVD drive and removing two screws underneath where the drive goes. Also, there seems to be a difference in the location of some of the screws on my laptop. Maybe Dell changed the Inspiron 5570 and there are different flavors of it. I found the video here to be helpful in figuring out how to proceed: https://www.youtube.com/watch?v=IhTu834o...
Regarding steps 5 and 6, I had to remove the battery (#6) to access the tab (#5) because it was underneath the battery.
I highly recommend the screwdriver and picks.
i had the same issues, and funny enough in every youtube video they talk about the hooks on the side of the battery connector, but there were no hooks on mine..