Aller au contenu principal

Dell Vostro V13 Battery Replacement

Ce dont vous avez besoin

  1. Dell Vostro V13 Battery Replacement, Back Cover: étape 1, image 1 de 3 Dell Vostro V13 Battery Replacement, Back Cover: étape 1, image 2 de 3 Dell Vostro V13 Battery Replacement, Back Cover: étape 1, image 3 de 3
    • Back up the memory to an external drive and power off the laptop before starting.

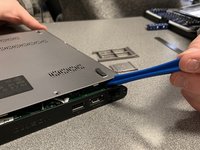
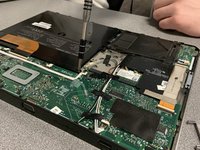
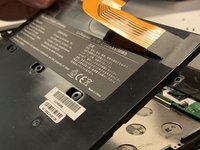
    • Flip the laptop over so the vents are facing you.

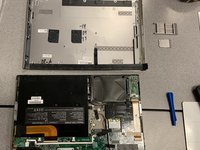
    • Remove the six 5.0 mm Phillips #1 screws using the magnetic driver.

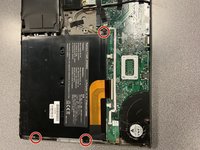
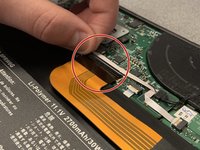
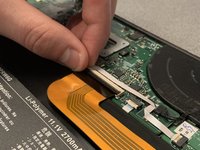
    • Remove the two 5.0 mm Phillips #1 screws on the back side of the laptop.

  2. Dell Vostro V13 Battery Replacement: étape 2, image 1 de 3 Dell Vostro V13 Battery Replacement: étape 2, image 2 de 3 Dell Vostro V13 Battery Replacement: étape 2, image 3 de 3
    • Slide out the SD and MicroSD holders.

    • If you are having trouble sliding them out, use the plastic opening tool.

  3. Dell Vostro V13 Battery Replacement: étape 3, image 1 de 3 Dell Vostro V13 Battery Replacement: étape 3, image 2 de 3 Dell Vostro V13 Battery Replacement: étape 3, image 3 de 3
    • Slide the plastic opening tool around the perimeter of the laptop until the cover pops off.

    • Pull the back cover off.

  4. Dell Vostro V13 Battery Replacement: étape 4, image 1 de 2 Dell Vostro V13 Battery Replacement: étape 4, image 2 de 2
    • Remove the three black 3.9 mm Phillips #1 screws holding the battery in place.

  5. Dell Vostro V13 Battery Replacement: étape 5, image 1 de 3 Dell Vostro V13 Battery Replacement: étape 5, image 2 de 3 Dell Vostro V13 Battery Replacement: étape 5, image 3 de 3
    • Flip up the clip of the ribbon connector.

    • Pull the strip out to disconnect the battery.

  6. Dell Vostro V13 Battery Replacement: étape 6, image 1 de 2 Dell Vostro V13 Battery Replacement: étape 6, image 2 de 2
    • Remove the battery.

    • Removing the battery allows you to work safely.

  7. Dell Vostro V13 Battery Replacement, Battery: étape 7, image 1 de 2 Dell Vostro V13 Battery Replacement, Battery: étape 7, image 2 de 2
    • Replace with the new battery.

Conclusion

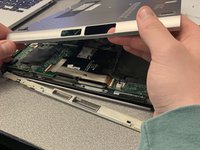
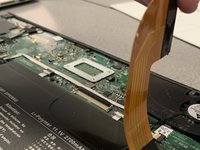
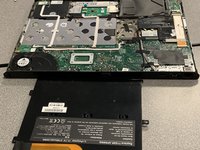
To reassemble your device, follow these instructions in reverse order.

Patrick Swaney

Membre depuis le 01/16/19

363 Réputation

3 tutoriels rédigés

Équipe

0 commentaires

Ajouter un commentaire

Nombre de vues :

Dernières 24 heures : 3

7 derniers jours : 12

30 derniers jours : 38

Total : 1,522