
Lenovo ThinkPad T495 CPU Fan Replacement

Introduction
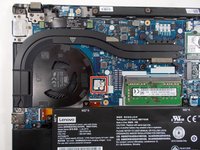
Passez à l'étape 1If your Lenovo ThinkPad T495 is experiencing decreased performance and increased operating temperatures, this is a sign that your CPU is overheating. Before replacement, first check that the fan's blades are free of any dirt or debris. If the blades are gunky or clogged, first clean them with an ESD safe brush. If that doesn't solve the issue, then a fan replacement is in order. This step by step guide will show you how to replace the CPU fan in your laptop.
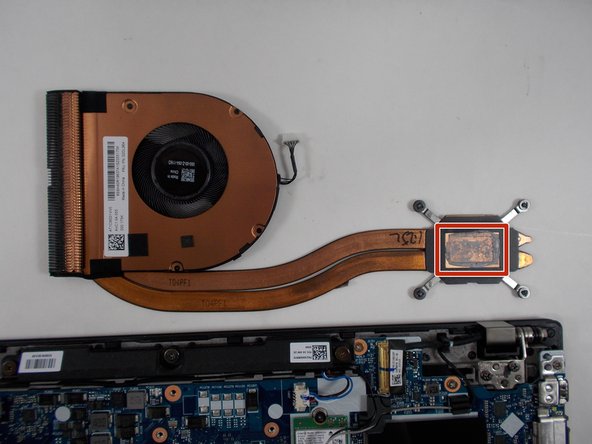
Note: Before placing the new fan, you must reapply new thermal paste when reattaching the CPU fan to the motherboard. For a walkthrough of this process, use this guide.


-
-
Use an iFixit opening tool to start prying under one of the hinges, between the baseplate and chassis, and work your way around the perimeter until the baseplate releases.
-
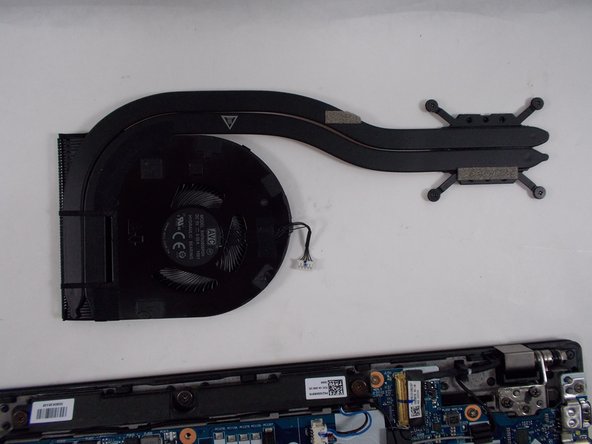
Lift off the baseplate.
It gets easier (or necessary, idk) if you remove the SIM card slot first.
-
-
-
-
Firmly grip the white plug between your fingers and pull it straight backwards, parallel to the motherboard, until the fan connector releases.
-


To reassemble your device, follow these instructions in reverse order.
To reassemble your device, follow these instructions in reverse order.
Annulation : je n'ai pas terminé ce tutoriel.
2 autres ont terminé cette réparation.

Équipe

UMass Dartmouth, Team 1-6, Petersen Spring 2022 Membre de l'équipe UMass Dartmouth, Team 1-6, Petersen Spring 2022
UMASSD-PETERSEN-S22S1G6
3 membres
7 tutoriels rédigés
2 commentaires de tutoriel
I just used your instructions just to remove the baseplate and clean the fan. Worked, thank you! :)
My T495 is the LTE version. I noticed that you have to remove the SIM card tray from its slot (located on the "back" side between the hinges) to easily remove the backplate. I thought maybe you would want to add that in your instruction.
Buenas, ya llevé mi ThinkPad t495 con Lenovo y quería preguntarles ¿Es normal que cuando agitas el portátil suene como un clic?