Aller au contenu principal
Lenovo ThinkPad X1 Yoga 2nd Generation SSD Replacement

Lenovo ThinkPad X1 Yoga 2nd Generation SSD Replacement

Ashley Haraguchi

Ashley Haraguchi et 6 autres contributeurs

Dernière mise à jour le August 1, 2023

5 minutes
Facile

If you are running out of storage space on your laptop, you can either transfer files to an external storage device or follow this guide to replace and upgrade your solid-state drive. Before you do so, check how much storage space you have on your laptop, which will help you decide if you need to upgrade the SSD or not. The Lenovo X1 ThinkPad Yoga 2nd Generation comes with a 256 GB SSD, so you have the option to upgrade to a 512 GB or 1 TB SSD.

Additionally, back up your SSD before you replace it so you do not lose any data. These instructions can also be followed to simply transfer files to an external storage device.

Ce dont vous avez besoin

Kits de réparation

Ces kits contiennent toutes les pièces et tous les outils nécessaires à la réalisation du tutoriel.

Pièces

Outils

Afficher plus…

  1. Lenovo ThinkPad X1 Yoga 2nd Generation SSD Replacement, Back Cover: étape 1, image 1 de 1
    • Ensure the laptop is powered off and the charging cable is disconnected before opening the back cover.

    • Flip over the laptop to access the back cover.

  2. Lenovo ThinkPad X1 Yoga 2nd Generation SSD Replacement: étape 2, image 1 de 2 Lenovo ThinkPad X1 Yoga 2nd Generation SSD Replacement: étape 2, image 2 de 2
    • Use a Phillips #0 screwdriver to remove the eight 8 mm screws.

  3. Lenovo ThinkPad X1 Yoga 2nd Generation SSD Replacement: étape 3, image 1 de 1
    • Remove the back cover.

    • A popping sound may occur when the back cover is removed.

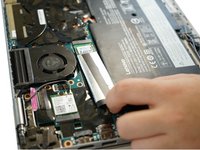
  4. Lenovo ThinkPad X1 Yoga 2nd Generation SSD Replacement, SSD: étape 4, image 1 de 1
    • Use a Phillips #0 screwdriver to remove one 6 mm screw.

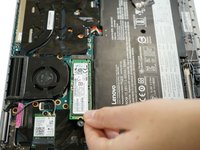
  5. Lenovo ThinkPad X1 Yoga 2nd Generation SSD Replacement: étape 5, image 1 de 2 Lenovo ThinkPad X1 Yoga 2nd Generation SSD Replacement: étape 5, image 2 de 2
    • Slide the SSD out of the shiny covering.

    • Remove the SSD.

Conclusion

To reassemble your device, follow these instructions in reverse order.

9 autres ont terminé cette réparation.

Ashley Haraguchi

Membre depuis le 02/10/20

599 Réputation

4 tutoriels rédigés

Équipe

Cal Poly, Team S22-G3, Regan Winter 2020 Membre de l'équipe Cal Poly, Team S22-G3, Regan Winter 2020

CPSU-REGAN-W20S22G3

5 membres

7 tutoriels rédigés

1 commentaire de tutoriel

What kind of SSD is this compatible with? There are several different connector standards…

Shai Revzen - Réponse

Ajouter un commentaire

Nombre de vues :

Dernières 24 heures : 0

7 derniers jours : 12

30 derniers jours : 69

Total : 8,210