Aller au contenu principal
Lenovo Yoga 3 11 Trackpad Replacement

Lenovo Yoga 3 11 Trackpad Replacement

Slade Fernandes

Slade Fernandes et 4 autres contributeurs

Dernière mise à jour le May 7, 2024

30 - 40 minutes
Modérée
Nécessite plus d'images
Photos d’action

Is your laptop's trackpad not reacting when you use it? Then you will probably need to replace it and this guide will help you accomplish the task!

Ce dont vous avez besoin

Outils

Afficher plus…

  1. Lenovo Yoga 3 11 Trackpad Replacement, Lower Case: étape 1, image 1 de 1
    • Remove the eleven 6 mm T5 Torx screws securing the lower case.

    • Gently lift the lower case up and away from the device.

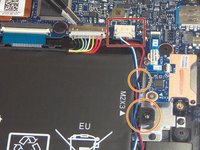
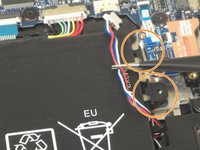
  2. Lenovo Yoga 3 11 Trackpad Replacement, Battery: étape 2, image 1 de 3 Lenovo Yoga 3 11 Trackpad Replacement, Battery: étape 2, image 2 de 3 Lenovo Yoga 3 11 Trackpad Replacement, Battery: étape 2, image 3 de 3
    • Remove the two 3 mm Phillips #00 screws securing the battery.

    • There are arrows on the battery indicating the location of the screws.

  3. Lenovo Yoga 3 11 Trackpad Replacement: étape 3, image 1 de 1
    Outil utilisé dans cette étape :
    Tweezers
    $4.99
    • Use a pair of tweezers to gently disconnect the battery connector.

  4. Lenovo Yoga 3 11 Trackpad Replacement: étape 4, image 1 de 2 Lenovo Yoga 3 11 Trackpad Replacement: étape 4, image 2 de 2
    • Use a pair of tweezers to gently disconnect the speaker cable.

    • Remove the wires from underneath the battery tabs using the tweezers.

  5. Lenovo Yoga 3 11 Trackpad Replacement: étape 5, image 1 de 1
    • Carefully remove the battery from the device.

  6. Lenovo Yoga 3 11 Trackpad Replacement, Trackpad: étape 6, image 1 de 1
    • Remove the four 2 mm Phillips #0 securing the trackpad.

  7. Lenovo Yoga 3 11 Trackpad Replacement: étape 7, image 1 de 1
    Outil utilisé dans cette étape :
    Tweezers
    $4.99
    • Use the tweezers to partially remove the tape.

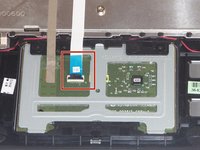
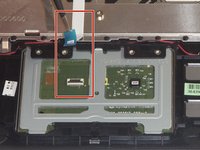
  8. Lenovo Yoga 3 11 Trackpad Replacement: étape 8, image 1 de 2 Lenovo Yoga 3 11 Trackpad Replacement: étape 8, image 2 de 2
    • Use a pair of tweezers to disconnect the ZIF connector securing the trackpad ribbon cable. Gently lift up the black tab and the ribbon cable should come free.

  9. Lenovo Yoga 3 11 Trackpad Replacement: étape 9, image 1 de 2 Lenovo Yoga 3 11 Trackpad Replacement: étape 9, image 2 de 2
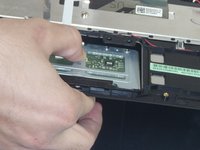
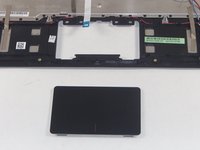
    • Slightly push down with your thumb to pop out the trackpad.

    • The laptop must be slightly open in order for the trackpad to pop out.

Conclusion

To reassemble your device, follow these instructions in reverse order.

Une autre personne a terminé cette réparation.

Slade Fernandes

Membre depuis le 08/27/15

532 Réputation

3 tutoriels rédigés

Équipe

USF Tampa, Team 2-3, Blackwell Fall 2015 Membre de l'équipe USF Tampa, Team 2-3, Blackwell Fall 2015

USFT-BLACKWELL-F15S2G3

4 membres

11 tutoriels rédigés

Un commentaire

Very brief, great illustrations. Now, I need to try it.

M T Martinez - Réponse

Ajouter un commentaire

Nombre de vues :

Dernières 24 heures : 0

7 derniers jours : 11

30 derniers jours : 25

Total : 2,935