
Remplacement de l'écran de l'iMac Intel 21.5" EMC 2638

Introduction
Passez à l'étape 1Pour découper l'adhésif de votre iMac Intel 21.5" EMC 2638, vous devrez utiliser un outil spécialement conçu.
Ce dont vous avez besoin
Pièces

Outils


Afficher plus…
-
-
Si vous utilisez la cale de maintien en carton iFixit, suivez ces instructions d'assemblage pour l'assembler.
-
Avant de commencer votre réparation iMac : Débranchez l'ordinateur et appuyez sur le bouton de marche pendant dix secondes, afin de décharger les condensateurs de l'alimentation.
-
-
-
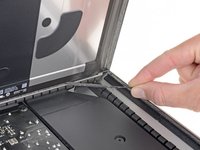
Outil utilisé dans cette étape :Plastic Cards$2.99
-
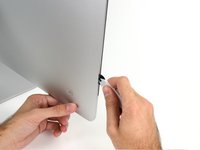
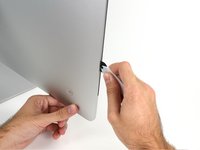
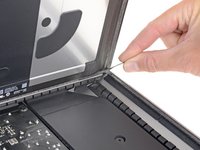
En partant de l'angle supérieur droit de l'iMac, insérez une carte en plastique entre l'écran et le châssis.
-
-
-
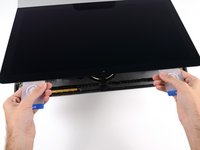
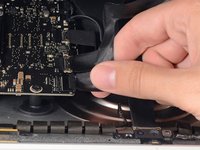
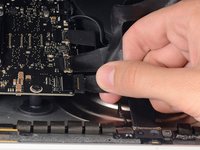
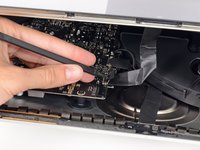
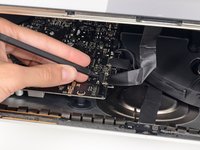
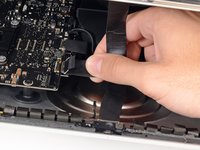
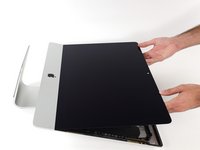
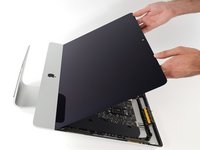
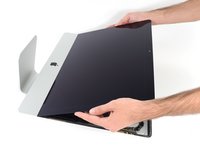
Tout en maintenant l'écran d'une main, débranchez sa nappe d'alimentation de l'autre main.
-


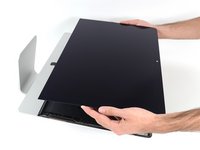
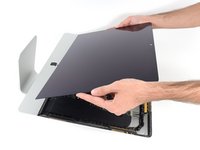
Pour remonter l'appareil, suivez à nouveau les instructions dans l'ordre inverse.
Pour remonter l'appareil, suivez à nouveau les instructions dans l'ordre inverse.
Annulation : je n'ai pas terminé ce tutoriel.
61 autres ont terminé cette réparation.
Merci à ces traducteurs :
100%


Ces traducteurs nous aident réparer le monde ! Vous voulez contribuer ?
Commencez à traduire ›


7 commentaires de tutoriel
I put off replacing my hdd with an ssd on my late 2013 iMac because it looked a bit tricky. This guide and an iMac opening tool made the job really strait-forward. Just be gentle and patient and the screen comes off with very little bother. Thanks ifixit!
Used this and the adhesive guide to replace the cracked display on a relative’s 21.5 inch iMac. Thank you, iFixit! These guides and the toolkit I purchased from iFixit years ago have saved me roughly $200.00 vs. having a repair shop do it. I still have a 2008 24inch iMac up and running thanks to this website!
I used this guide and successfully replaced the stock HDD with a Crucial 1TB SDD MX500 and upgraded the RAM to 16GB, blew out all the internal dust and now it runs beautifully and didn’t have to buy an entirely new iMac.