Introduction
Les batteries d'iPhone sont estimées tenir 80 % de leur charge pendant près de 500 cycles, ce qui équivaut à environ 18–24 mois pour la plupart des utilisateurs. Passé ce délai, peut-être que vous devrez charger plus souvent votre iPhone ou iOS vous préviendra que les performances sont affectées (bref, votre téléphone est plus lent). Remplacez votre batterie avec ce tutoriel et votre iPhone sera à nouveau au top de ses performances.
Si votre batterie est gonflée, prenez les précautions nécessaires.
Remarque : votre iPhone affichera peut-être un avertissement sur “l'authenticité” de la batterie après la réparation, même si vous utilisez une pièce Apple d'origine. Si votre iPhone fonctionne normalement, vous pouvez l'ignorer en toute sécurité.
Lors du remontage, vous aurez besoin d’adhésif de remplacement pour rattacher certains composants.
Ce dont vous avez besoin
-
-
Éteignez votre iPhone avant de commencer à le démonter.
-
Dévissez les deux vis Pentalobe de 6,7 mm en bas de l'iPhone.
-
-
-
Mesurez 3 mm à partir de la pointe et tracez une ligne sur le médiator avec un marqueur permanent.
Got to step 2 and realized the fix kit doesn't include an opening pick! Looks like a guitar pick, and I have those lying around. Is that expected? Looks like the pick is used in many steps below. There's a little blue crowbar that isn't mentioned in the instructions. Perhaps that replaces the opening pick?
Hi! I can't see which guide you were using when writing this comment. Can you reply here with which guide and fix kit you used?
I see you posted this in Meta. I hope it's resolved soon! In the meantime, a guitar pick may work well enough for your repair.
what fix kit?
My fix kit didn't include an opening pick either
My AliExpress refurbished screen came with a pick that has a coin-like circle that pops out, so no modification was necessary
-
-
-
Recouvrez l'écran de bandes de ruban adhésif, qui se chevauchent, jusqu'à ce que toute la surface soit couverte.
-
Si la ventouse n'adhère pas au cours des étapes suivantes, pliez un morceau de ruban adhésif épais (du ruban adhésif toilé p.e.) pour former une poignée et soulevez l'écran de cette façon.
-
-
-
Tirez la poignée bleue vers l'arrière pour débloquer les bras de l'Anti-Clamp.
-
Insérez le côté droit ou gauche de votre iPhone entre les bras.
-
Positionnez les ventouses près du bas de l'écran iPhone : une devant, une derrière.
-
Appuyez sur les ventouses pour faire le vide à l'endroit désiré.
-
-
-
Tirez la poignée bleue vers l'avant pour bloquer les bras.
-
Tournez la poignée dans le sens horaire de 360 degrés ou bien jusqu'à voir les ventouses se tendre.
-
Vérifiez que les ventouses restent bien alignées entre elles. Si elles commencent à se décaler, détachez-les pour les réaligner.
-
-
-
Posez votre iPhone sur quelque chose de solide comme un livre à couverture rigide, pour qu'il tienne tout seul à l'horizontale. Ainsi, il sera plus facile de procéder aux étapes suivantes.
-
Servez-vous d'un sèche-cheveux pour faire chauffer le bord inférieur de l'iPhone. L'écran doit être légèrement trop chaud au toucher.
-
Attendez une minute pour donner à l'adhésif le temps de se détendre et d'ouvrir un interstice.
-
Insérez un médiator sous le joint en plastique de l'écran, dès que l'Anti-Clamp a ouvert un interstice suffisant.
-
Passez les trois étapes suivantes.
-
-
-
Utilisez un sèche-cheveux ou un pistolet thermique pour chauffer le bord de l'iPhone pendant 90 secondes ou jusqu'à ce que l'écran soit légèrement trop chaud au toucher.
you need to clarify that you're heating the metal frame, not the glass. I gently heated the glass front with a heat gun and proceeded to pull the display apart, destroying it. :-(
-
-
-
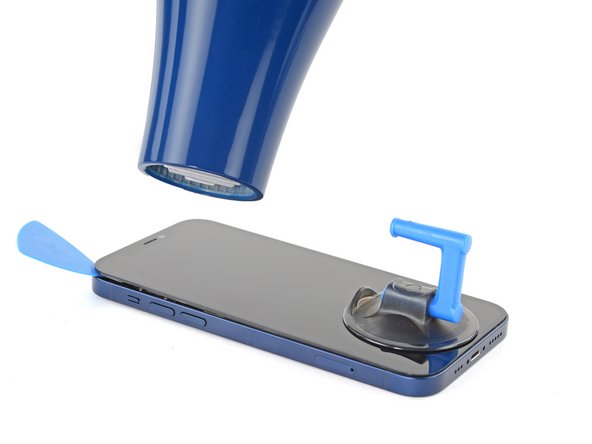
Si vous utilisez une simple ventouse, posez-la aussi près que possible du bord inférieur du téléphone.
-
Si votre écran est méchamment fissuré, recouvrez-le d'une couche de ruban adhésif d'emballage transparent pour aider la ventouse à adhérer. Ou bien servez-vous de ruban adhésif très épais à la place de la ventouse. Si aucune des deux astuces ne marchent, vous pouvez essayer de coller la ventouse à l'écran cassé avec de la superglue.
-
-
-
Tirez fermement et constamment sur la ventouse pour ouvrir un léger espace entre l'écran et le châssis
-
Insérez un médiator dans l'interstice sous le joint en plastique de l'écran.
I ended up separating my screen rather than getting under the scren casing.. BE CAREFUL TO MAKE SURE YOU ARE UNDER THE PLASTIC PART - otherwise you just ruin your screen... No mention of this precaution here and as a result, my phone is more broken than when I started
-
-
-
Utilisez un sèche-cheveux pour chauffer le bord droit de l'iPhone (celui avec le bouton de marche) pendant 90 secondes ou jusqu'à ce que l'écran soit légèrement trop chaud au toucher.
The pictures show the left side. I know that the left side is the correct one to heat, but for others it might be confusing. 😊
@dviosz You mean the right edge! The picture shows the left edge but the right edge is the correct one to heat. As described in the text next to it. Opening the phone from the left will damage it!
Yeah, sorry, you are right! (tried to make something less confusing and created more confusion by accident… 😃 )
-
-
-
Faites glisser le médiator le long du coin inférieur droit et du bord droit de l'iPhone, en tranchant l'adhésif qui maintient l'écran en place.
Be very careful your tool does NOT go in between the screen and the screen frame but rather in between the screen frame and the phone frame. If not you will damage the screen and need a new one. This has happened to MANY people. The screen is attached to the screen frame with an adhesive that can also be accidentally pried apart if not done carefully. This is probably more likely if your tool is too thin, if you dont heat enough, or dont suction and pull enough to create a big enough separation between the screen frame and the phone frame.
-
-
-
-
Utilisez un sèche-cheveux pour chauffer le bord supérieur de l'iPhone pendant 90 secondes ou jusqu'à ce que l'écran soit légèrement trop chaud au toucher.
-
-
-
Utilisez un sèche-cheveux pour chauffer le bord gauche de l'iPhone pendant 90 secondes ou jusqu'à ce que l'écran soit légèrement trop chaud au toucher.
-
-
-
-
Insérez un second médiator dans le coin inférieur gauche de l'iPhone.
-
Faites pivoter les deux médiators en même temps, jusqu'à ce que les clips du bord gauche se détachent.
Don't go from just one corner (like on the right side). I've done that (forgot this step) and broke my screen.
-
-
-
Tournez votre iPhone de façon que son bord droit est en face de vous.
-
Ouvrez l'iPhone en soulevant le côté droit de l'écran comme on ouvre la couverture avant d'un livre.
-
Calez l'écran contre un objet pour qu'il reste ouvert pendant que vous travaillez sur votre téléphone.
-
-
-
Ôtez la vis Y000 de 1,25 mm qui fixe le cache des connecteurs de la batterie et de l'écran.
-
-
-
Prenez une pincette pour retirer le cache des connecteurs de la batterie et de l'écran.
-
-
-
Prenez une spatule (spudger) ou un ongle propre pour soulever le connecteur de la batterie de sa prise sur la carte mère.
-
Repliez légèrement le connecteur par rapport à la carte mère pour l'empêcher de faire accidentellement contact avec la prise et d'alimenter le téléphone pendant que vous effectuez votre réparation.
-
-
-
Servez-vous d'une spatule ou d'un ongle pour débrancher le connecteur de la nappe du panneau OLED de sa prise sur la carte mère.
-
-
-
Enlevez les cinq vis Y000 de 1 mm qui fixent le cache de l'ensemble capteurs frontaux.
what 3 are the small ones? I don't know anymore
in case anyone else reads this, the 3 small ones screw directly onto the board. the two longer ones screw into standoffs (the two top screws, based on the picture above)
Skyejobs -
-
-
-
Prenez la pointe d'une spatule ou un ongle propre pour débrancher la nappe de l'ensemble capteurs frontaux.
-
-
-
Dévissez les quatre vis cruciformes de 1,5 mm de long qui fixent le haut-parleur.
-
-
-
Prenez une pincette pour ôter le haut-parleur.
-
-
-
Décollez la première languette d'extraction du bord inférieur de la batterie.
-
-
-
Saisissez la languette d'extraction et éloignez-la lentement de la batterie, en l'étirant vers le bas de l'iPhone.
-
Tirez suffisamment pour garder la languette sous tension constante, mais ne forcez pas. Laissez-lui le temps de s'étirer et de se décoller sous la batterie.
-
N'appuyez pas sur la batterie. Tenez fermement les bords de l'iPhone.
-
Veillez à ce que la bande reste plate et ne fasse pas de plis. Essayez de tirer de façon homogène sur toute la largeur de la bande, et non juste au milieu ou sur le côté.
-
Tirez en formant un angle plat de façon que la bande ne reste pas accrochée au bord de la batterie.
-
Si la bande se déchire, essayez de la récupérer avec vos doigts ou une pincette émoussée, puis continuez à tirer. Mais ne faites surtout pas levier sous la batterie.
-
-
-
Saisissez la languette d'extraction et éloignez-la lentement de la batterie, en l'étirant vers le bas de l'iPhone.
-
Répétez la procédure précédente pour les deux languettes restantes.
-
Attendez environ une minute que la solution alcoolisée ramollisse l'adhésif.
-
Prenez l'extrémité plate d'une spatule pour soulever délicatement la batterie.
-
-
-
Enlevez la batterie.
-
S'il reste de la solution alcoolisée dans le téléphone, essuyez soigneusement ou faites sécher à l'air avant de poser votre batterie neuve.
I just buy this phone 5 months ago..and the battery health is 90%, why? I need to change the battery or not?
-


Si possible, allumez votre téléphone et testez votre réparation avant de poser du nouvel adhésif et de sceller à nouveau votre téléphone.
Fixez la nouvelle batterie avec de l'adhésif prédécoupé ou du ruban adhésif double-face. Afin de la positionner correctement, appliquez le nouvel adhésif sur le téléphone, là où il y avait de l'adhésif auparavant, et non directement sur la batterie. Appuyez fermement sur la nouvelle batterie pour qu’elle adhère bien.
Pour remonter votre appareil, suivez les étapes ci-dessus en sens inverse. Nettoyez les zones d'adhérence avec de l'alcool isopropylique (> 90 %) et posez une nouvelle couche d'adhésif là où c'est nécessaire.
Pour une performance optimale, calibrez votre nouvelle batterie.
Déposez vos déchets électroniques dans un centre de recyclage certifié.
La réparation ne s’est pas déroulée comme prévu ? Consultez nos conseils basiques de diagnostic ou la section iPhone 12 mini de notre Forum pour obtenir de l’aide.
Annulation : je n'ai pas terminé ce tutoriel.
52 autres ont terminé cette réparation.
Merci à ces traducteurs :
100%


Ces traducteurs nous aident réparer le monde ! Vous voulez contribuer ?
Commencez à traduire ›


14 commentaires
I don't think it's stated clearly enough that the display adhesive is VERY strong and you might think you've gotton a big enough gap when sticking in a pick will actually separate the layers of the screen and break it (defintely not speaking from experience). Make sure the phone is totally, thoroughly heated and be very, very careful.
+1
Tried it without the clamp for two hours and couldn‘t get it open. With clamp, it was opened within 30 minutes.
Overall battery replacement worked well, the instructions were clear enough to follow along. Would do this again… but with the clamp. ;)
same pried in between layer and then realized after after i separated the bottom corners that needed to go deeper
Hi karim,
the batteries that you can buy for iPhones in our shop are not OEM.
you should always ask the shop where you go if you will receive a warning message saying the battery was not changed by apple. unless the shop knows how to properly install the right batteries, you will get that message.
I have a problem every time I soldered the cell to the new battery it no longer works could you help me with a tip!!! I've been watching the video more than 100 times I'm interested in learning, but even so the original flex burns
Ich habe bereits einige Akkus getauscht. Aber das Display vom 12 mini ist wirklich heftig verklebt. Ich habe kaputt gemacht.. keine Chance. Durch das erwärmen hat sich das Glas von der Platine gelöst oder ich habe es durchs hebeln getrennt.. Jedenfalls zeigt das Display nichts mehr an. Also nochmal der Hinweis. Überlegt es euch gut! evtl sind 99€ für einen Akkutausch bei Apple besser investiert.
Don't do this repair, just don't. The battery adhesive is very strong, but that's not the problem. When you finally get the battery replaced, you will have a permanent badge notification on your settings app that indicates that you are not using an OEM battery. But that's not even the problem. When I did this repair, I was connecting the new battery and sparks and smoke came out, and now my screen has a line across it. Obviously this is user error to an extent, but I have replaced iphone batteries around 15 times, no exageration, and I've been WAY rougher than I was in this case and nothing bad happened. I still have no idea what I did to make this happen, I can guarantee the battery connector only touched the area on the board where it was supposed to connect. I couldn't tell you if this is because it's not an OEM battery, or if Apple is making these phones more fragile on the inside (though I suspect it's a bit of both), but ultimately it's just not worth it do attempt this repair, go to an Apple store.
This is a solid guide. I was able to replace my battery with the fix kit and these instructions. Unfortunately, I destroyed my display in the process. Probably the same issue that Wesley pointed out here.
I'm guessing I didn't have the adhesive loosened enough along the right-hand side. I was sliding the pick up along that edge, apparently hulked out on it, and a crack shot across the screen. I applied more heat and carried on from there. Once everything was reconnected, I hit the power button and could feel the haptic feedback from the phone booting up, but there was nothing on the display.
Learn from my mistake and be absolutely sure the adhesive is softened enough that you don't have to apply much force to separate the screen from the body (and maybe pick up the Anti-Clamp, I think I would have had a better time with that thing).
I performed this repair twice. First time, I damaged the screen slightly before realizing the thin plastic frame around the screen was not coming up. If you are not sure you are getting the pick under the plastic, then don’t proceed. Take more time to heat and suction. On the second iPhone I pulled out the infrared thermometer, turned my hairdryer to max and kept the iPhone at a nice toasty 140 degrees Fahrenheit while letting the Anti-Clamp do it's work. Still took slightly over 30 minutes to get the screen off. The extra heat also seemed to help keep the screen adhesive stay in good shape and attached to the base. I did not feel the need to replace it which saved me an hour.
First time success. Display damage can be caused only if you are not patient enough and apply force uneven, screen glass is as strong as the adhesive, if adhesive is warm enough, screen will come out with just constant tension.
Tricky part is to remove all leftovers of adhesive, in my case most of it left inside of the case and needed a lot of alcohol to clean it fully.
is it oem apple battery, because at some photo shows(Ifixit) and another shows (apple) ... wait your answer?
karim - Réponse
BEWARE! This screen isn’t the same as older iPhone models’ screens. The iPhone mini 12-screen comes with a thin plastic frame around the screen on its back. Thus, make sure you don’t insert the pick in between the screen and its plastic frame, as you’ll seperate the screen and leave the plastic frame still sitting in the phone’s metal housing (this cost me 100 dollars…). Carefully heat the sides of the metal housing and do not heat directly on the glass, as doing so will potentially loosen the glue from the plastic frame stuck to the screen. My suggestion is that you watch a video of this repair as this step-by-step-guide is undercooked.
Dan - Réponse
This is an excellent comment. Following this step-by-step guide to the letter will break your screen; it's by far the worst iFixit guide I've seen to date.
Dormouse -