
Toshiba Satellite 2430-S255 Optical Disc Drive Replacement
Introduction
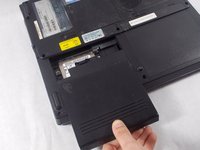
Passez à l'étape 1A simple guide to replace the Optical Disc Drive (CD/DVD Drive) in a Toshiba Satellite 2430-S255. This guide precedes the Hard Drive replacement guide.
To make sure the hard drive is not properly working and is in need of replacement, refer to bethis troubleshooting guide
-
-
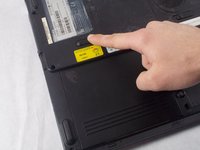
Locate the battery locking mechanism on the back side of the laptop. It is labeled with a lock and unlock symbol to indicate its function. The mechanism also has a serrated texture to increase grip.
-
-
-
-
Flip your device on its backside.
-
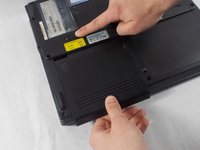
Slide the latch on the bottom left of the backside all the way to the left
-
Keep holding the latch in that position and move to the next step.
-


To reassemble your device, follow these instructions in reverse order.
To reassemble your device, follow these instructions in reverse order.
Annulation : je n'ai pas terminé ce tutoriel.
Une autre personne a terminé cette réparation.
Équipe

UMass Dartmouth, Team S6-G5, Bernier Spring 2018 Membre de l'équipe UMass Dartmouth, Team S6-G5, Bernier Spring 2018
UMASSD-BERNIER-S18S6G5
3 membres
12 tutoriels rédigés