
Xbox Series S Motherboard Replacement

Introduction
Passez à l'étape 1Follow this guide to remove and replace the motherboard on a Xbox Series S.
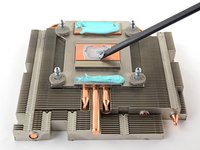
Note: When you remove the heat sink, you’ll need to replace the thermal compound between the plate and the heat sink. Since normal thermal paste isn’t designed to bridge large gaps, the closest replacement is K5 Pro viscous thermal paste. You will, however, need normal replacement thermal paste for the APU.
There are some photo discontinuities with the exterior Bluetooth, Wifi, and power boards. These discontinuities do not affect the repair procedure.
Ce dont vous avez besoin
Pièces


Outils


Afficher plus…
-
Outil utilisé dans cette étape :Tweezers$4.99
-
Use tweezers to peel off the two white screw covers located on the bottom corners of the back panel.
-
-
Outil utilisé dans cette étape :Magnetic Project Mat$19.95
-
Use a T8 Torx driver to remove the two 10 mm-long screws securing the back panel to the bottom panel.
-
-
-
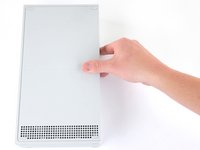
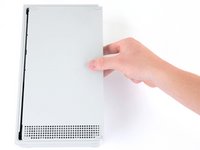
Slide the bottom panel horizontally toward the back of the console until it comes to a stop.
-
Lift straight up and remove the bottom panel from the plastic case.
-
-
-
Use a T10 Torx driver to remove the seven 51 mm-long screws securing the chassis to the plastic case.
-
-
-
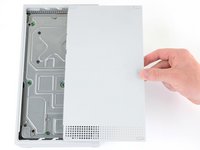
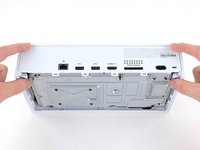
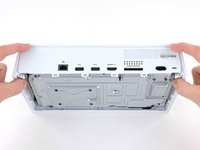
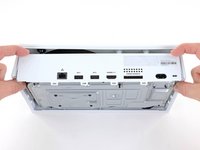
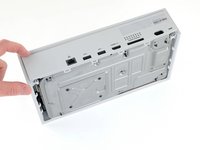
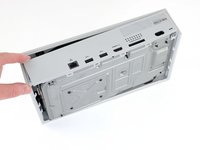
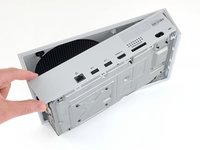
With the bottom of the Xbox facing you, pull the two bottom-rear corners of the plastic case away from each other.
-
As you pull the corners apart, slide the back panel towards the bottom of the device. This releases the back panel from the plastic case.
-
-
-
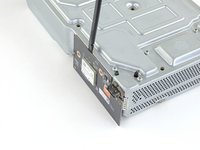
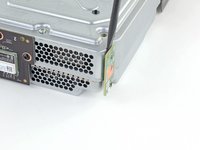
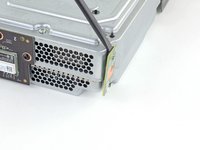
Use a T8 Torx driver to remove the three 9.5 mm-long screws securing the Bluetooth board to the long edge of the chassis.
-
-
-
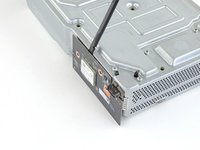
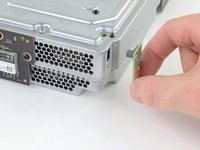
Use a T8 Torx driver to remove the 9.5 mm-long screw securing the power button board to the chassis.
-
-
-
-
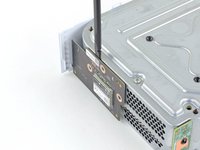
Use a T8 Torx driver to remove the three 9.5 mm-long screws securing the Wi-Fi board to the short edge of the chassis.
-
-
-
Use a T10 Torx driver to remove the seven 11.3 mm-long screws securing the power supply to the chassis.
-
-
-
Flip the device over.
-
Lift the upper chassis straight up to remove it.
-
-
-
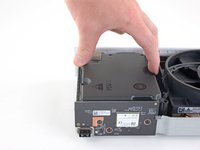
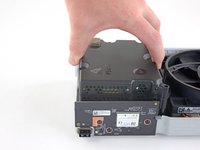
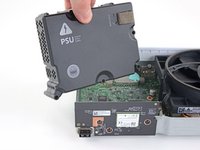
Lift the power supply straight up to disconnect it from the motherboard.
-
Remove the power supply.
Can you please tell whether it is indispensable to use the power supply with exactly the same Revision, S/N and P/N or is the same model number, like 1920, 1921 enough to make it work? Thanks for showing the teardown.
-
-
-
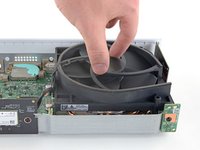
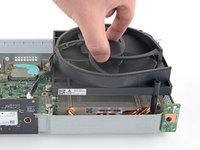
Use a T10 Torx driver to remove the two 11.3 mm-long screws securing the fan to the chassis.
-
-
-
Flip the device over.
-
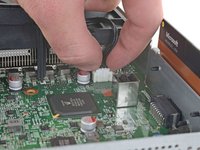
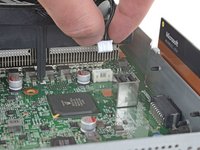
Use your fingers to pull and disconnect the fan connector from its motherboard socket.
If you are careful you can also remove the connector by lightly prying from the sides of the connector in equal proportions (left then right then left etc.) using a 2.5 flathead.
my fan was solder to my board but it broke off i have no idea ho to put it back my power button is missing the power button on the board i need help
If you don't know how to soldier you'll need to get a quote from repair man or company to repair it and weight up the cost or watch videos on Xbox S repairs from Ifixit or YouTube Xbox repair videos
-
-
Étape 19 Remove the motherboard screws
Attention : les étapes 19 à 21 sont issues d'un tutoriel marqué comme étant en cours.
-
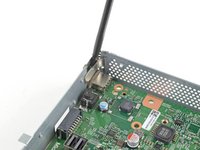
Use a T8 Torx driver to remove the four 9.4 mm-long screws securing the motherboard to the chassis.
-
-
-
Flip the device over.
-
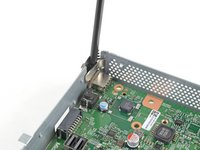
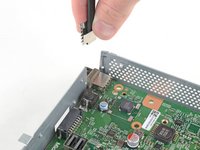
Insert a spudger into the locking clip located on the front-left corner of the chassis.
-
Lift straight up to remove the clip.
-
-
-
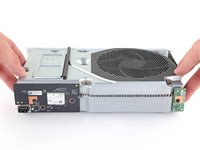
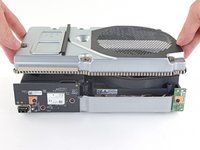
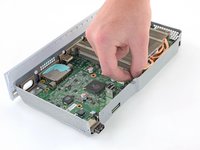
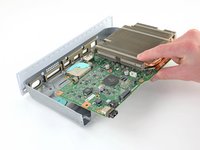
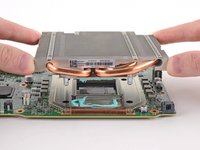
Grasp the heat sink with your fingers and lift up the front of the motherboard up above the edge of the chassis.
-
Pull the motherboard towards the front of the chassis to remove it.
-
-
-
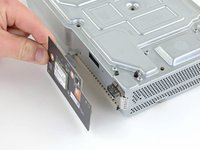
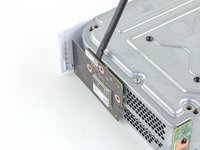
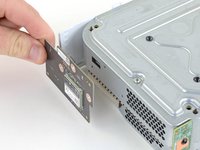
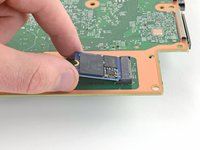
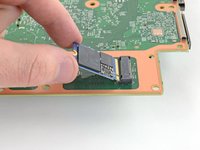
Use a T8 Torx driver to remove the 5.1 mm-long screw securing the SSD card to the motherboard.
-
-
Outil utilisé dans cette étape :Flathead 1.5 mm Screwdriver$5.49
-
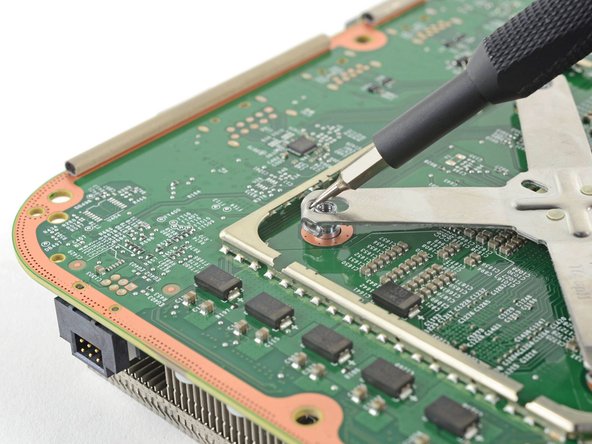
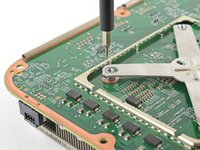
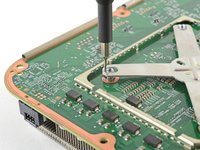
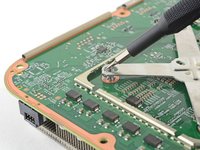
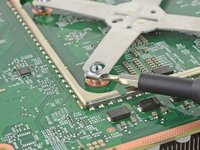
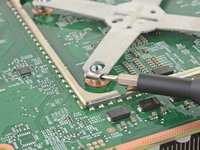
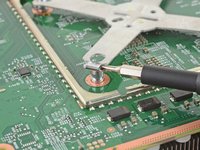
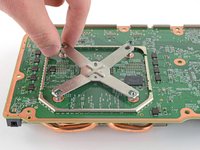
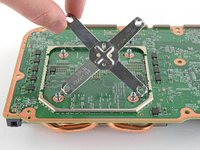
Insert a 1.5 mm flathead screwdriver from the top between the heat sink pin and the x-clamp.
-
Pry the x-clamp out and away from the heat sink pin to loosen the x-clamp.
-
-
-
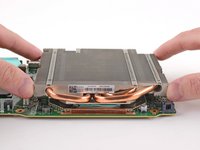
Flip the motherboard over.
-
Lift the heat sink straight up to remove it from the motherboard.
-
-
-
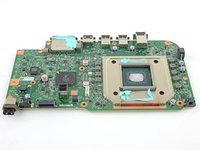
Only the motherboard remains.
-
Follow this guide for more specifics on how to reapply thermal paste to the processor and shield plate.
-


To reassemble your device, follow these instructions in reverse order.
Take your e-waste to an R2 or e-Stewards certified recycler.
Repair didn’t go as planned? Try some basic troubleshooting, or ask our Answers community for help.
To reassemble your device, follow these instructions in reverse order.
Take your e-waste to an R2 or e-Stewards certified recycler.
Repair didn’t go as planned? Try some basic troubleshooting, or ask our Answers community for help.
Annulation : je n'ai pas terminé ce tutoriel.
16 autres ont terminé cette réparation.

9 commentaires de tutoriel
Where can I get a new motherboard and new replacement parts ? Please help
kasynparts XSX XSS Donor Board Motherboard is a solution
Can you compare Xbox Series s and xbox one x motherboard? Say its 40% less space
Why can i not use 5 tb on one x? Can i upgrade Series s to blueray?
Where can I get a shell replacement?
King DK - Réponse