-
Cette étape n’est pas traduite. Aidez à la traduire
-
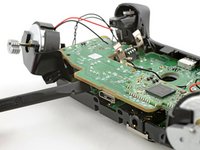
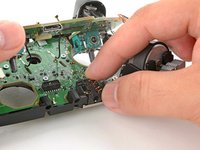
Slide one arm of a pair of tweezers under the antenna coaxial cable connector, as close to the metal head as possible.
-
Lift the connector straight up to disconnect it.
-
Repeat the procedure for the second antenna cable.
-
-
Cette étape n’est pas traduite. Aidez à la traduire
Outil utilisé dans cette étape :Silicone Work Mat$9.95-
Set the controller on a heat-resistant surface, such as a silicone work mat.
-
-
Cette étape n’est pas traduite. Aidez à la traduire
-
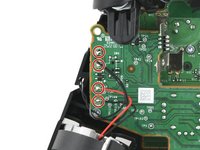
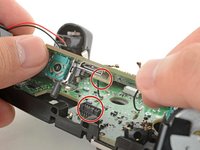
Use your soldering iron to heat up one of the motor wire solder pads.
-
Once the solder is melted, use tweezers to lift the wire away from the pad.
-
-
Cette étape n’est pas traduite. Aidez à la traduire
-
Desolder the seven remaining wires connecting the four motors to the circuit board.
-
-
Cette étape n’est pas traduite. Aidez à la traduire
-
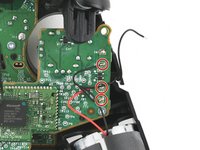
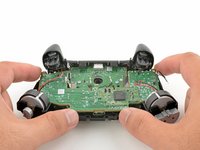
Use a Torx T5 driver to remove the two 7 mm‑long screws securing the daughterboard.
-
-
Cette étape n’est pas traduite. Aidez à la traduire
-
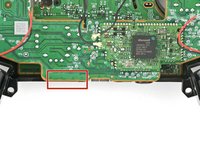
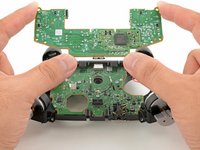
Insert the flat end of a spudger between the daughterboard and the bottom edge of the frame at the location marked on the image.
-
Twist the spudger to push up the daughterboard and disconnect the socket.
-
-
Cette étape n’est pas traduite. Aidez à la traduire
-
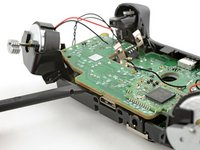
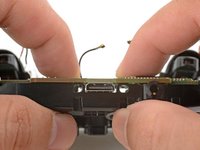
Line up the daughterboard socket to the main board socket.
-
Check that the headphone jack isn't out of position.
-
Check that the antenna cables aren't trapped between the two boards.
-
Use your fingers to gently squeeze the boards together to reconnect the socket.
-