Aller au contenu principal
ZD-N Plus Wireless Controller Left Joystick Replacement

ZD-N Plus Wireless Controller Left Joystick Replacement

Stacie Schmidt

Stacie Schmidt et 3 autres contributeurs

Dernière mise à jour le January 3, 2020

10 - 15 minutes
Modérée
Nécessite plus d'images

In this guide, steps will be provided to remove and replace the left joystick on your ZD-N Plus Wireless Controller. The joystick might have to be replaced if the joystick is drifting, or if the joystick is not responding to your touch.

Ce dont vous avez besoin

Outils

Afficher plus…

  1. ZD-N Plus Wireless Controller Left Joystick Replacement, Back Panel: étape 1, image 1 de 1
    • Remove the seven 12mm JIS #00 screws that hold the back panel in place.

  2. ZD-N Plus Wireless Controller Left Joystick Replacement: étape 2, image 1 de 2 ZD-N Plus Wireless Controller Left Joystick Replacement: étape 2, image 2 de 2
    • Lift up on the back panel of the ZD-N Plus to remove it from the rest of the controller.

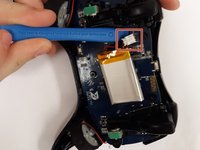
  3. ZD-N Plus Wireless Controller Left Joystick Replacement, Battery: étape 3, image 1 de 1
    • Use an opening tool to pry the battery from its original position.

    • The battery is glued on, so this may take some effort.

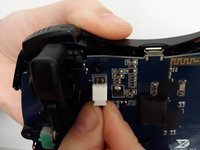
  4. ZD-N Plus Wireless Controller Left Joystick Replacement: étape 4, image 1 de 2 ZD-N Plus Wireless Controller Left Joystick Replacement: étape 4, image 2 de 2
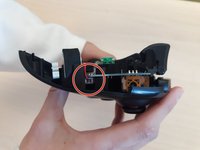
    • Use an opening tool to pry the connector away from the two metallic prongs.

    • The parts are built to stay together, so this may take some effort.

    • Be careful to not warp the prongs in the process.

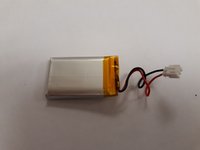
  5. ZD-N Plus Wireless Controller Left Joystick Replacement: étape 5, image 1 de 2 ZD-N Plus Wireless Controller Left Joystick Replacement: étape 5, image 2 de 2
    • Remove the battery from the controller.

  6. ZD-N Plus Wireless Controller Left Joystick Replacement, Rumble Motor: étape 6, image 1 de 2 ZD-N Plus Wireless Controller Left Joystick Replacement, Rumble Motor: étape 6, image 2 de 2
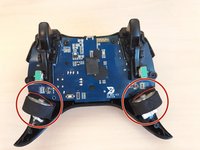
    • Remove the electrical connector attaching each rumble motor to the controller.

    • Lift up on the circular section of the rumble to remove it from the controller.

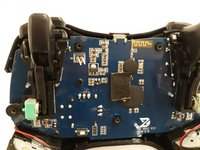
  7. ZD-N Plus Wireless Controller Left Joystick Replacement, Motherboard: étape 7, image 1 de 2 ZD-N Plus Wireless Controller Left Joystick Replacement, Motherboard: étape 7, image 2 de 2
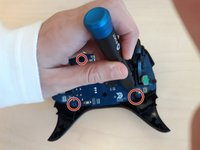
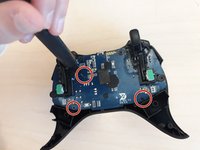
    • Remove the three 1.2mm JIS #00 screws that hold the motherboard in place.

  8. ZD-N Plus Wireless Controller Left Joystick Replacement: étape 8, image 1 de 1
    • Lift the motherboard out of the controller.

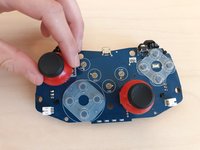
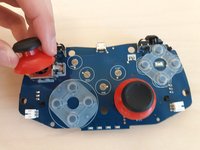
  9. ZD-N Plus Wireless Controller Left Joystick Replacement, Left Joystick: étape 9, image 1 de 2 ZD-N Plus Wireless Controller Left Joystick Replacement, Left Joystick: étape 9, image 2 de 2
    • Pull up on the left joystick to remove it from the motherboard. The plastic piece will unclip easily.

Conclusion

To reassemble your device, follow these instructions in reverse order.

Une autre personne a terminé cette réparation.

Stacie Schmidt

Membre depuis le 10/15/19

433 Réputation

3 tutoriels rédigés

0 commentaires de tutoriel

Ajouter un commentaire

Nombre de vues :

Dernières 24 heures : 0

7 derniers jours : 2

30 derniers jours : 13

Total : 765