Aller au contenu principal

PlayStation 4 Pro Teardown

Anglais
Allemand

Traduction de l’étape 4

Étape 4
PlayStation 4 Pro Teardown: étape 0, image 1 de 3 PlayStation 4 Pro Teardown: étape 0, image 2 de 3 PlayStation 4 Pro Teardown: étape 0, image 3 de 3
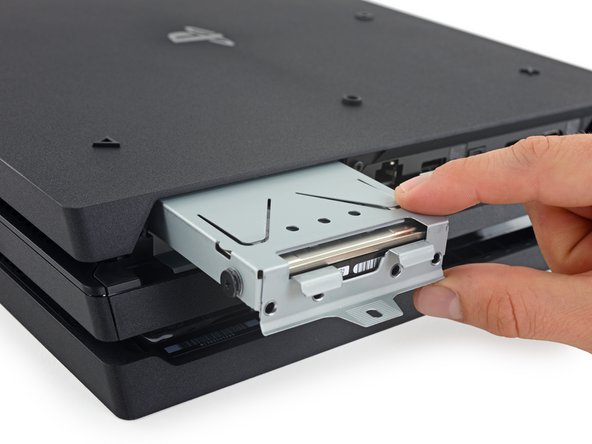
  • This triple-decker design is a little different from the ''first'' fourth PlayStation we tore down, but that doesn't stop our teardown engineers—without wasting time, we flip the console over, pop the first panel, and hit pay dirt!

  • A single, standard Phillips #0 screw stands between us and hard-drive-swapping glory. Now that's what I'm talkin' 'bout.

  • Replacements are awesome, and in keeping with a long tradition: every PlayStation to use a hard drive has had a user-replaceable hard drive.

  • Like the original PlayStation 3

  • ... and the Slim

  • ... and the Super Slim

  • ... right up to the original PlayStation 4 and PlayStation 4 Slim.

Diese Dreidecker-Konstruktion unterscheidet sich ein wenig von ''ersten'' vierten PlayStation, die wir zerlegt haben, das hält aber unsere Teardown-Ingenieure nicht auf — wir drehen die Konsole um, ohne Zeit zu verschwenden, lassen den ersten Deckel aufspringen und tauchen in das Durcheinander ein.

Eine einzige Standard - Kreuzschlitzschraube #0 steht zwischen uns und dem Triumph eines Festplattentauschs. Genau das meinte ich!

Die Möglichkeit, etwas auszutauschen ist wunderbar, und es ist eine lange Tradition: bei jeder Playstation mit Festplatte kann der Benutzer selbst die Festplatte auswechseln.

So war das bei der "original" PlayStation 3

Vos contributions sont faites dans le cadre de la licence open source Creative Commons.