Aller au contenu principal
HP Envy TouchSmart 15 CMOS Battery Replacement

HP Envy TouchSmart 15 CMOS Battery Replacement

Robert Patterson

Robert Patterson et 2 autres contributeurs

Dernière mise à jour le November 23, 2015

5 - 10 minutes
Facile

Upon boot up, the computer may read a “CMOS checksum error,” or date and time keep getting reset. If this is the error you are receiving you should replace your CMOS Battery.

Ce dont vous avez besoin

Outils

Afficher plus…

  1. HP Envy TouchSmart 15 CMOS Battery Replacement, Battery: étape 1, image 1 de 1
    • Press the battery release tab and the battery will pop up.

  2. HP Envy TouchSmart 15 CMOS Battery Replacement: étape 2, image 1 de 1
    • Remove the battery from the laptop, it will come out easily.

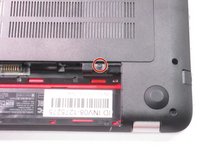
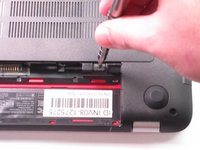
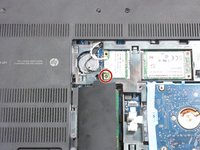
  3. HP Envy TouchSmart 15 CMOS Battery Replacement, Accessory Plate: étape 3, image 1 de 2 HP Envy TouchSmart 15 CMOS Battery Replacement, Accessory Plate: étape 3, image 2 de 2
    • Remove the single screw holding the accessory plate. This is a PH0 2.0x2.5 screw.

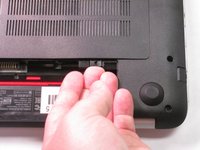
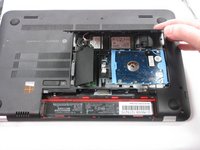
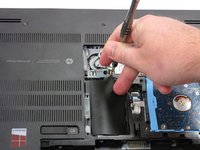
  4. HP Envy TouchSmart 15 CMOS Battery Replacement: étape 4, image 1 de 3 HP Envy TouchSmart 15 CMOS Battery Replacement: étape 4, image 2 de 3 HP Envy TouchSmart 15 CMOS Battery Replacement: étape 4, image 3 de 3
    • Pry the accessory plate up from the back of the laptop by applying force upwards where the screw was removed.

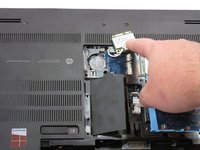
  5. HP Envy TouchSmart 15 CMOS Battery Replacement, CMOS Battery: étape 5, image 1 de 3 HP Envy TouchSmart 15 CMOS Battery Replacement, CMOS Battery: étape 5, image 2 de 3 HP Envy TouchSmart 15 CMOS Battery Replacement, CMOS Battery: étape 5, image 3 de 3
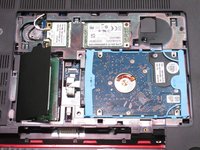
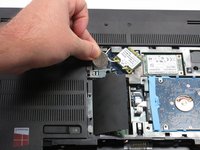
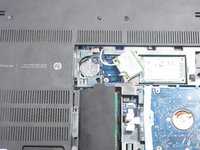
    • Remove the screw from the wireless adapter with a PH0 screwdriver then move the adapter out of the way to access the CMOS battery.

  6. HP Envy TouchSmart 15 CMOS Battery Replacement: étape 6, image 1 de 1
    • Use a plastic or metal spudger to release the CMOS battery from the clips.

  7. HP Envy TouchSmart 15 CMOS Battery Replacement: étape 7, image 1 de 2 HP Envy TouchSmart 15 CMOS Battery Replacement: étape 7, image 2 de 2
    • Remove the battery from the device.

Conclusion

To reassemble your device, follow these instructions in reverse order.

Une autre personne a terminé cette réparation.

Robert Patterson

Membre depuis le 09/04/15

1 457 Réputation

5 tutoriels rédigés

Équipe

USF Tampa, Team 2-6, Sullivan Fall 2015 Membre de l'équipe USF Tampa, Team 2-6, Sullivan Fall 2015

USFT-SULLIVAN-F15S2G6

4 membres

10 tutoriels rédigés

0 commentaires

Ajouter un commentaire

Nombre de vues :

Dernières 24 heures : 0

7 derniers jours : 9

30 derniers jours : 23

Total : 7,840