
MacBook Pro 15" Unibody 2.53 GHz Mid 2009 Logic Board Replacement

Introduction
Passez à l'étape 1Use this guide to replace a faulty logic board.
Ce dont vous avez besoin


-
-
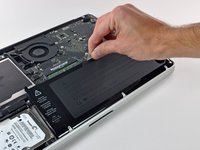
Remove the following ten screws securing the lower case to the upper case:
-
Seven 3 mm Phillips screws.
-
Three 13.5 mm Phillips screws.
-
-
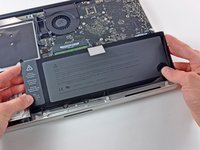
Outil utilisé dans cette étape :P6 Pentalobe Screwdriver 2009 15" MacBook Pro Battery$5.49
-
Three Pentalobe screws secure the battery to the upper case. They can be removed with this special driver.
-
-
-
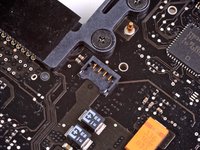
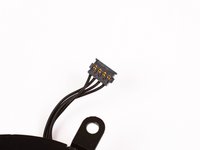
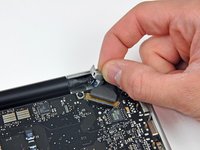
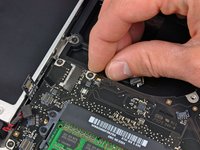
Use the flat end of a spudger to pry the fan cable connector up off its socket on the logic board.
-
-
-
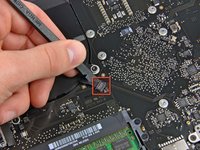
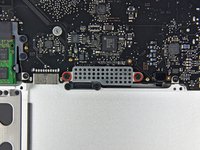
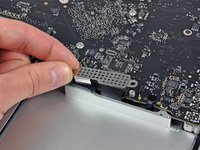
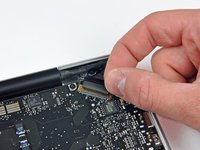
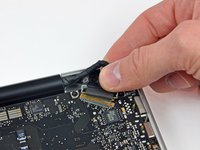
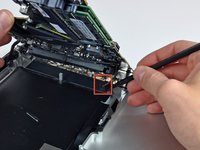
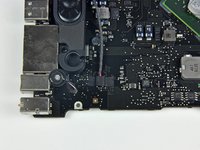
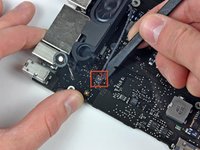
Hold the end of the cable retainer down with one finger while you use the tip of a spudger to slightly lift the other end and rotate it away from the camera cable connector.
-
-
-
-
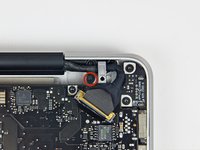
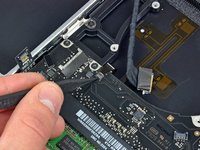
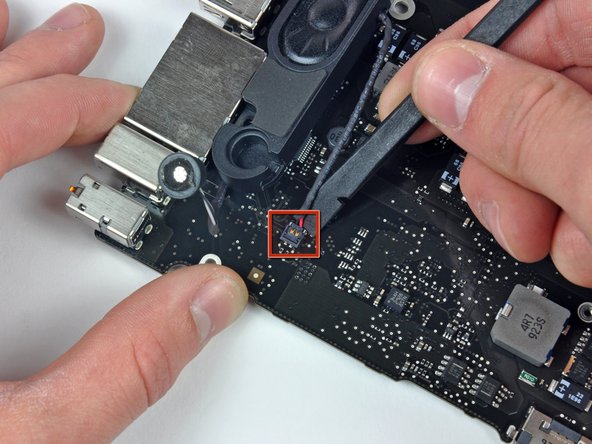
Disconnect the DC-In Board connector from the logic board by pulling it straight away from its socket.
-


To reassemble your device, follow these instructions in reverse order.
To reassemble your device, follow these instructions in reverse order.
Annulation : je n'ai pas terminé ce tutoriel.
30 autres ont terminé cette réparation.

4 commentaires de tutoriel
Hello,
Do you know the purpose of the component that is not welded in the lower right corner of the red square on the picture of step 12: http://d3nevzfk7ii3be.cloudfront.net/igi...
Someone tells me I can not have my backlight re-working without this component, but I think it simply does not work because of a liquid.
Any ideas ?
Thanks in advance
I just replaced the logic board, and all went fine, as far as I can tell. However, my new battery is still in transit, i.e: I do not have it at hand. My question is, how critical is it to have a battery in this model....given all the "do not remove battery or else" warnings. Is it OK to try to boot it just with the regular power supply? I do not want to fry my new logic board, so I need some informed opinion on this...
I greatly appreciated your comment in Step 11 saying: “Apple sticks a small strip of clear plastic with adhesive applied to one side to the logic board behind the camera cable connector to keep it in its socket“.
My problem was that I had an old Macbook Pro whose camera cable was out of its socket and I could not get it in because this piece of plastic was in the way. I had no idea what it was. It was not clear to me if it was an IC or some other important component. Your comment clarified what it was and its purpose.
Pushing down on it at one end did not achieve anything, so I have just lifted it up and off the board using a small scalpel blade.
I will use some tape to hold the cable connector in its socket.
Thank you
Hi,
Your article does not mention the WiFi (wireless) or Bluetooth cable connector.
Does WiFi connectivity come into the logic board via the camera cable, or some other cable?
Thank you