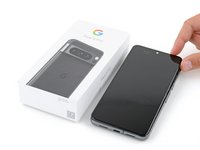
Retrait film graphite Pixel 8 Pro

Introduction
Passez à l'étape 1Ce tutoriel explique comment retirer le film en graphite de votre Pixel 8 Pro. Cette opération doit être effectuée avant presque toutes les réparations importantes.
Ce dont vous avez besoin
Outils


Afficher plus…

-
-
Débranchez tous les câbles de votre téléphone.
-
Éteignez complétement votre téléphone.
-
-
-
Mesurez 3 mm à partir de la pointe et marquez le médiator avec un marqueur permanent.
-
-
-
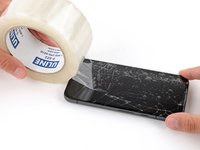
Appliquez des bandes de ruban adhésif qui se chevauchent sur le verre fissuré, jusqu'à ce que tout l'écran soit recouvert.
-
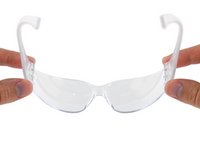
Portez des lunettes de sécurité pour protéger vos yeux des éclats de verre qui risquent de voler pendant la réparation.
-
-
-
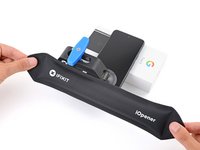
Chauffez un iOpener et placez-le sur le bord inférieur de l'écran pendant deux minutes, pour ramollir l'adhésif.
-
-
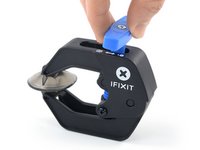
Outil utilisé dans cette étape :Clampy - Anti-Clamp$24.95
-
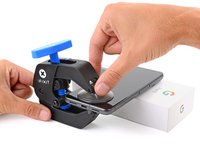
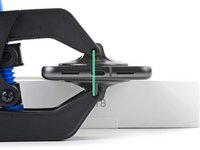
Tirez la poignée bleue vers l'arrière pour déverrouiller les bras de l'Anti-Clamp.
-
Placez votre téléphone, l'écran vers le haut, sur un objet, de manière à ce qu'il repose à plat entre les bras de l'Anti-Clamp. Le bord inférieur doit dépasser.
-
Faites glisser les bras sur le bord gauche de votre téléphone, de sorte que vous ayez accès au bord inférieur.
-
Positionnez les ventouses aussi près que possible du milieu du bord inférieur.
-
Pressez les ventouses ensemble pour qu'elles adhèrent.
-
-
-
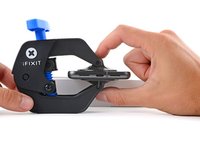
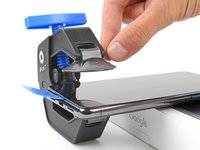
Tirez la poignée vers l'avant pour verrouiller les bras.
-
Tournez la poignée dans le sens horaire d'un tour complet (360 degrés), ou jusqu'à ce que les ventouses commencent à se tendre.
-
Lorsque les ventouses s'étirent, assurez-vous qu'elles restent alignées l'une avec l'autre. Si elles glissent, retirez l'Anti-Clamp et appliquez du ruban adhésif pour que les ventouses adhèrent.
-
-
-
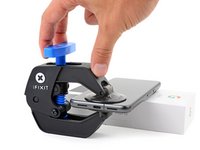
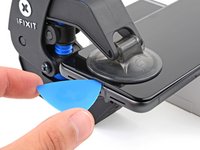
Attendez une minute pour qu'un espace se forme entre l'écran et le châssis.
-
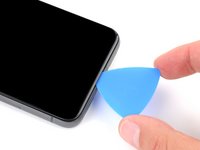
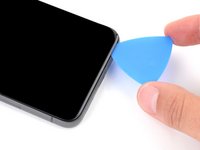
Insérez un médiator dans l'espace.
-
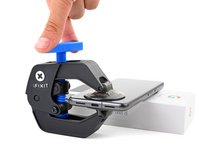
Tirez la poignée bleue vers l'arrière pour déverrouiller les bras et retirez l'Anti-Clamp en utilisant les languettes d'extraction sur les ventouses.
-
Passez les deux prochaines étapes.
-
-
-
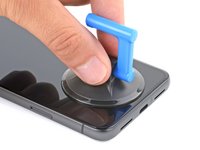
Appliquez une ventouse au milieu du bord inférieur de l'écran.
-
-
-
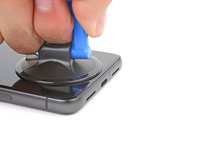
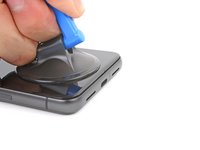
Tirez sur la ventouse avec une force forte et constante jusqu'à ce qu'un espace se forme entre l'écran et le châssis.
-
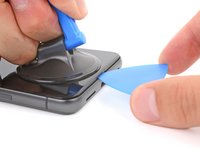
Insérez un médiator dans l'espace.
-
-
-
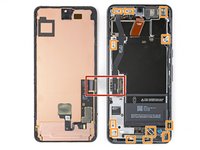
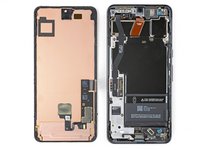
La nappe de l'écran Google Pixel 8 Pro se trouve un peu en dessous du centre du bord gauche du téléphone. Soyez très prudent ici pour éviter de déchirer la nappe.
-
Il y a de nombreux contacts à ressort autour du périmètre du téléphone. Soyez très prudent dans ces zones pour éviter de déformer les contacts.
-
-
-
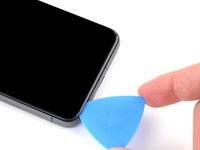
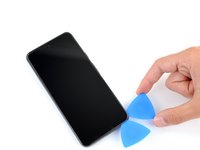
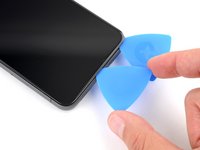
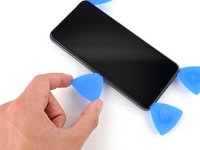
Faites glisser le médiator le long du bord inférieur pour séparer l'adhésif qui le maintient.
-
Laissez le médiator dans le coin inférieur droit pour éviter que l'adhésif ne se referme.
-
-
-
Appliquez un iOpener chaud sur le bord droit de l'écran pendant deux minutes.
-
-
-
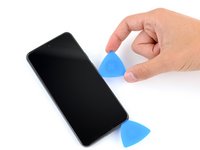
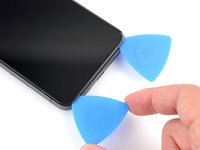
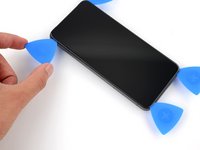
Insérez un deuxième médiator sous le coin inférieur droit de l'écran.
-
Faites glisser le nouveau médiator vers le coin supérieur droit, pour séparer l'adhésif qui maintient le bord droit de l'écran.
-
Laissez le médiator dans le coin supérieur droit pour éviter que l'adhésif ne se referme.
-
-
-
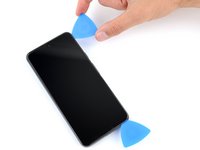
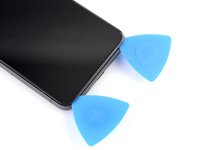
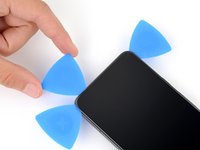
Insérez un troisième médiator sous le bord inférieur de l'écran.
-
Faites glisser le nouveau médiator vers le coin inférieur gauche.
-
Laissez le médiator dans le coin inférieur gauche pour éviter que l'adhésif ne se referme.
-
-
-
Appliquez un iOpener chaud sur le bord gauche de l'écran pendant deux minutes.
-
-
-
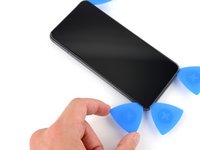
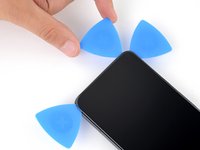
Insérez un quatrième médiator sous le coin inférieur gauche de l'écran.
-
Faites glisser un nouveau médiator vers le coin supérieur gauche, afin de séparer l'adhésif du bord gauche de l'écran.
-
Laissez le médiator dans le coin supérieur gauche pour empêcher l’adhésif de se refermer.
-
-
-
Appliquez un iOpener chaud sur le bord supérieur de l'écran pendant deux minutes.
-
-
-
Insérez un cinquième médiator sous le coin supérieur gauche de l'écran.
-
Faites glisser le nouveau médiator vers le coin supérieur droit, afin de séparer l'adhésif du bord supérieur de l'écran.
-
-
-
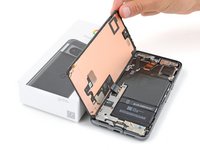
Placez une petite boîte ou une pile de livres à gauche de votre téléphone, afin de caler l’écran pendant que vous déconnectez sa nappe.
-
Soulevez le bord droit de l’écran comme la couverture d’un livre.
-
Calez l’écran pour pouvoir accéder à la nappe de l’écran sans forcer.
-
-
Outil utilisé dans cette étape :iFixit Opening Tool$1.99
-
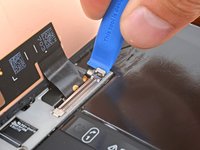
Utilisez un outil pour ouvrir iFixit pour soulever le bord supérieur du cache de la nappe d'écran.
-
Retirez le cache.
-
-
Outil utilisé dans cette étape :Spudger$2.99
-
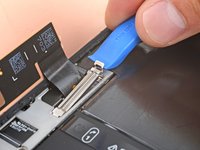
Insérez le bout pointu d'une spatule sous l'angle droit supérieur du connecteur à emboîter de l'écran.
-
Soulevez et déconnectez délicatement la nappe.
-
Retirez l'écran.
-
-
-
Saisissez votre écran par ses bords lorsque vous le manipulez.
-
Quand vous le posez sur votre plan de travail, assurez-vous que rien ne touche le bas de l'écran. Pensez à le poser sur un chiffon doux et non pelucheux.
-
-
-
Vérifiez soigneusement la totalité de l'écran pour déceler toute pellicule plastique ou tout ruban adhésif et utilisez les languettes d'extraction pour les retirer tous. Cherchez attentivement un grand morceau de plastique recouvrant l'arrière de l'écran, un petit près de la découpe de la caméra avant et des films adhésifs autour du périmètre.
-
Rebranchez la nappe de l'écran et réinstallez son cache.
-
C'est le moment idéal pour tester votre téléphone avant de le sceller. Allumez temporairement votre téléphone et assurez-vous qu'il fonctionne comme prévu. Éteignez-le avant de continuer.
-
Appuyez fermement sur l'écran pour le mettre en place sur le châssis : vous devriez sentir les clips s'enclencher.
-
Appuyez fermement sur le pourtour de l’écran pour que le nouvel adhésif adhère bien.
-
En option, vous pouvez renforcer la liaison adhésive en appliquant une pression uniforme sur le téléphone.
-
Suivez ce tutoriel pour calibrer le capteur d'empreintes digitales.
-
-
-
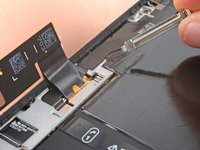
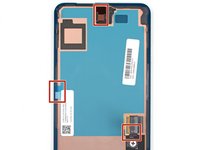
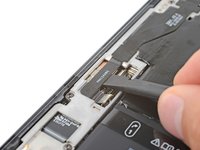
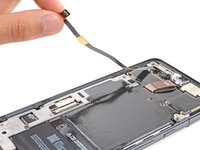
Insérez la pointe d'une spatule (spudger) sous le bord supérieur du connecteur à emboîter de l'antenne 5G mmWave.
-
Faites délicatement levier et déconnectez la nappe.
-
-
-
Chauffez un iOpener et posez-le sur la nappe de l'antenne 5G mmWave pendant deux minutes, afin de ramollir l'adhésif.
-
-
-
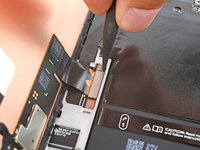
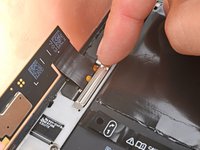
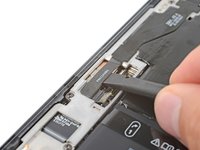
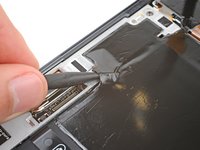
Insérez l'extrémité plate d'une spatule entre le bas de la nappe de l'antenne 5G mmWave et le châssis central, juste au-dessus du connecteur à emboîter.
-
Faites pivoter la spatule pour séparer la partie inférieure de la nappe du châssis central.
-
-
Outil utilisé dans cette étape :Tesa 61395 Tape$5.99
-
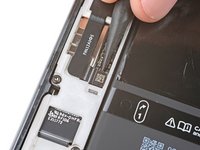
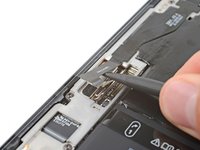
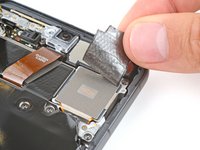
Saisissez le bas de la nappe de l'antenne 5G mmWave et détachez-la délicatement du châssis central.
-
-
-
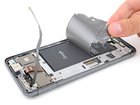
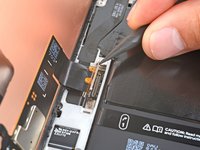
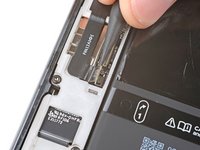
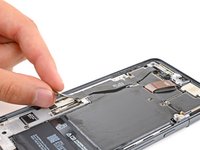
Insérez la pointe d'une spatule sous différentes parties du film en graphite et soulevez jusqu'à ce que vous puissiez le saisir avec vos doigts.
-
Décollez et retirez tout le film en graphite.
-


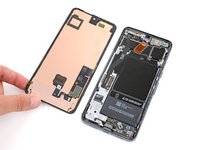


Pour remonter votre appareil, suivez ces instructions en sens inverse.
Pour remonter votre appareil, suivez ces instructions en sens inverse.
Merci à ces traducteurs :
100%

Claire Miesch nous aide à réparer le monde ! Vous voulez contribuer ?
Commencez à traduire ›
Équipez-vous pour vos futures réparations
Voir tous les produits


