Il est possible que cette traduction ne reflète pas les dernières mises à jour du tutoriel source. Aidez à mettre à jour la traduction ou bien consultez le tutoriel source.
Introduction
Si la batterie de votre téléphone ne tient plus la charge comme avant, il est peut-être temps de la remplacer. Suivez ce tutoriel pour remplacer votre batterie. Si votre batterie est gonflée, prenez les précautions appropriées.
Avertissement : L'écran est fortement collé, il n'y a donc que très peu d'espace pour insérer vos outils et ceci nécessite beaucoup de chaleur, par conséquent le risque d'endommager votre écran lors de cette procédure est assez élevé. Si vous remplacez l'écran de toute façon, vous n'avez pas de soucis à vous faire. Par contre pour toute autre réparation il faut être très vigilant et être préparé à devoir remplacer l'écran si nécessaire.
Ce dont vous avez besoin
-
-
Déchargez votre batterie avant le démontage si possible.
-
Si votre écran est fissuré, couvrez-le avec des bandes de scotch transparentes pour contenir les éclats de verre et éviter des blessures.
-
-
-
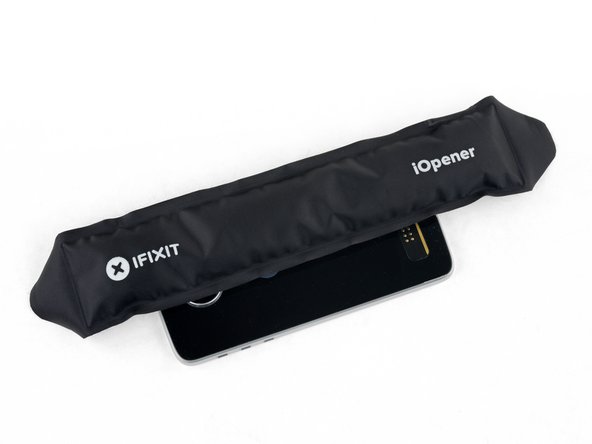
Préparez un iOpener et chauffez l'avant du téléphone le long du bord gauche pendant environ deux minutes ou jusqu'à ce qu'il soit légèrement trop chaud au toucher. Ceci permettra de ramollir la colle qui maintient l'écran.
-
-
-
Sur la première image vous pouvez voir, à titre de référence, l'arrière de l'écran complet (à droite) une fois retiré du téléphone (à gauche)
-
Si vous comptez réutiliser l'écran, soyez particulièrement vigilant par rapport aux bords des côtés. Lorsque vous coupez l'adhésif à ces endroits, veillez à insérez votre outil moins de 2 mm, sinon vous risquez de touchez et d'endommager le panneau d'écran.
-
Une carte de jeu est un outil moins rapide mais bien plus sur. Le fait qu'elle soit pliable et douce, réduit le risque d'endommager le panneau d'écran, ce qui est une bonne nouvelle si vous comptez le réutiliser.
-
-
-
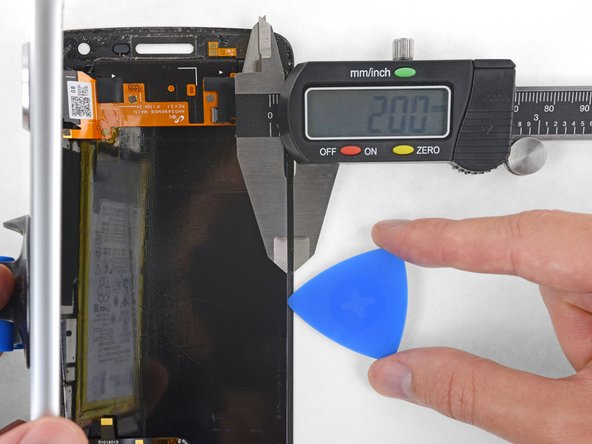
Posez une ventouse sur l'écran près du centre du bord gauche.
-
Tirez de façon constante et ferme sur la ventouse pour créer un petit interstice entre le panneau frontal et le boîtier arrière.
-
Ceci nécessite probablement pas mal de force, mais il suffit d'ouvrir qu'un tout petit interstice avec la ventouse pour insérer votre outil.
-
Si vous avez du mal, chauffez plus pour ramollir l'adhésif davantage. L'adhésif se refroidi très rapidement, vous devez donc probablement le chauffer plusieurs fois.
-
-
-
Découpez l'adhésif sous la bordure inférieure en faisant attention à ne pas endommager le capteur d'empreintes digitales.
-
Faites glisser ou rouler votre outil au-delà du bord inférieur du capteur d'empreintes digitales et continuez vers l'autre côté. Évitez de faire levier directement en dessous du capteur.
-
-
-
Insérez votre outil dans le coin supérieur droit du téléphone et commencez à le faire glisser sous la bordure supérieure pour découper l'adhésif.
-
Dès que l'outil est passé au-délà du bord gauche du haut-parleur interne, arrêtez-vous.
-
Faites glisser ou roulez votre outil au dessus du module flash de la caméra selfie pour éviter de l'endommager.
-
-
-
-
Tout en tenant l'écran ouvert, utilisez la pointe d'une spatule (spudger) pour ouvrir le clapet de verrouillage sur le connecteur ZIF de la nappe du capteur d'empreintes digitales.
-
-
-
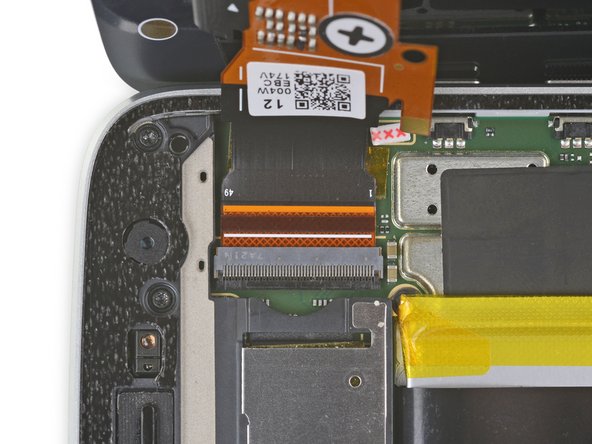
Utilisez votre spatule pour ouvrir le clapet de verrouillage sur le connecteur de la nappe d'écran sur le côté opposé du téléphone.
The locking tab on the is dark colored and runs almost the entire width of the ZIF connector. It is located on the opposite side from where the cable connects into. Pry upward from the bottom- it works like a hinge.
-
-
-
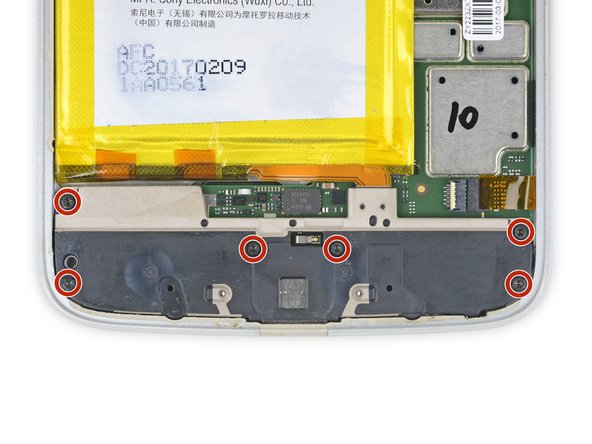
Retirez les six vis de 3,2 mm qui maintiennent le cache inférieur à l'aide d'un tournevis Torx T3.
The repair kit that was bought for this phone came with the wrong size torx bit. Mine came with a T5 Torx which was bigger and I almost ruined the screw. I noticed it was not working and looked at the bit and in fact it was not the T3. Luckily I have the full kit and had a T3 Torx handy. Make sure to look at the Bits before using them. The screws are so fragile that they can get stripped easily.
The kit comes with both a T3 and a T5—the T5 isn’t needed if all you’re doing is replacing the battery.
-
-
-
Décollez la languette noire sur le bord supérieur de la batterie et retirez-la lentement de la batterie dans un angle d'environ 45° pour relâcher les bandes adhésives élastiques en dessous.
-
Appliquez un peu d'alcool isopropylique hautement concentré (>90°) sous chaque coin de la batterie et laissez-le pénétrer pendant plusieurs minutes pour ramollir la colle.
-
Sinon vous pouvez posez un iOpener chauffé sur le dos du téléphone directement derrière la batterie pendant deux minutes pour ramollir la colle. Réchauffez et remettez le iOpener si nécessaire.
-
-
-
Insérez plusieurs médiateurs ou une carte en plastique sous le bord extérieur de la batterie.
-
Faites levier de façon constante et uniforme pour soulever la batterie lentement hors du téléphone.
I did sever the orange flex cable as i was lifting the battery free. Is there anyway to repair this fragile cable?
-
-
-
Avant d'installer votre nouvelle batterie, décollez l'ancien adhésif et retirez-le du téléphone.
-
Pour un meilleur résultat, nettoyez la zone sous la batterie avec de l'alcool isopropylique et un chiffon non pelucheux. Ceci permet de préparer la surface pour un meilleure adhérence de la nouvelle batterie.
-
-
-
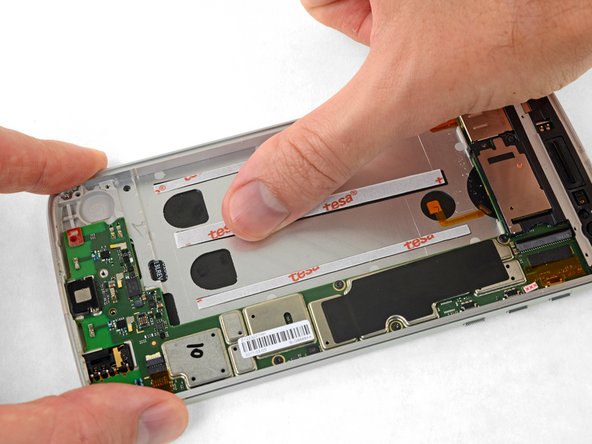
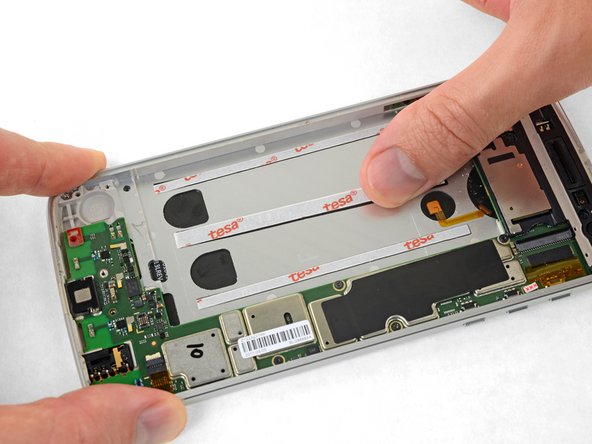
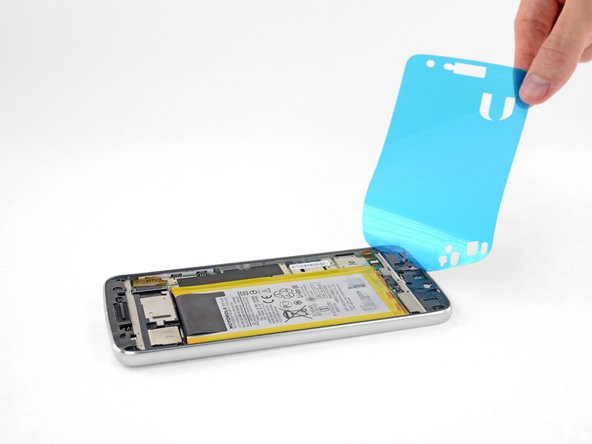
Placez des bandes adhésives étirables ou plusieurs bandes adhésives double-face d'une carte adhésive pré-découpée ou bien d'un rouleau de Tesa 61395 dans le renfoncement pour la batterie et appuyez dessus pour les faire adhérer.
-
-
-
Décollez les films protecteurs restants pour exposer l'adhésif avant d'y posez votre nouvelle batterie.
-
Positionnez soigneusement votre batterie puis appuyez fermement dessus pour la mettre en place.
-
Connectez la batterie à la carte mère et installez le cache inférieur y compris ses six vis T3 Torx.
-
-
-
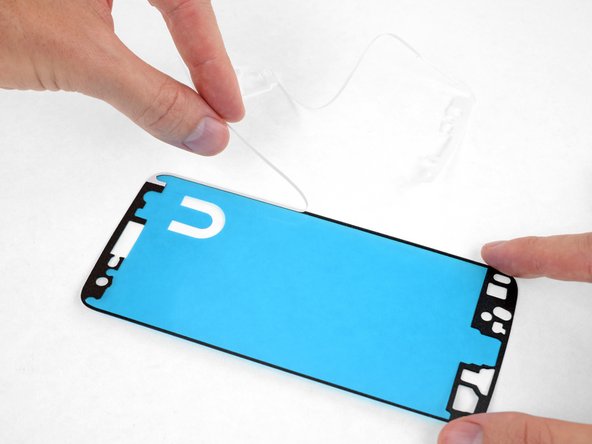
Décollez et retirez l'ancien adhésif d'écran de votre téléphone.
-
Utilisez la pointe d'une spatule pour retirer des petits bouts de colle.
-
Pour un meilleur résultat, nettoyez la zone sous l'adhésif que vous venez d'enlever avec de l'alcool isopropylique. Ceci permet de préparer la surface pour une meilleure adhérence du nouvel adhésif.
-
-
-
Si le vôtre dispose d'un film protecteur en papier, décollez-le et jetez-le.
-
-
-
Décollez et jetez le film plastique pour exposer l'adhésif d'écran.
Should the removal of the blue plastic backing wait until after verifying the screen works in the next step?
Well, you can’t connect the screen with the plastic in the way. But in principle, you’re right—it wouldn’t be a bad idea to pause before installing the display adhesive, plug everything in, and verify that it works. Unfortunately, you then have to unplug it again to install the adhesive, so you’ll want to test it again once it’s plugged back in, but before sealing up your phone—just to make sure the cables are seated properly. So, the verification step is probably best left where it’s at.
Well, I connected the screen to the motherboard without peeling off the plastic.
It is possible!
And after testing the phone I took off the plastic foil from the adhesive without unpluging the two connectors. The plasic foil herefor has two cuts in the area of the connectors .
So I think it’s a good idea to swap step 35 to step 36.
-
-
-
Avant de sceller l'écran en place, connectez les nappes d'écran et du capteur d'empreintes digitales, puis allumez votre téléphone.
-
Testez toutes les fonctions pour vous assurez que votre réparation a été un succès avant de sceller l'écran.
-


Comparez votre nouvelle pièce de rechange à la pièce d'origine. Vous devez éventuellement transférer des composants ou retirer des films de protection avant le montage.
Recyclez vos déchets électroniques de façon responsable.
Calibrez votre nouvelle batterie après avoir terminé ce tutoriel.
La réparation ne s'est pas déroulée comme prévu ? Consultez notre Forum de réponses pour obtenir de l'aide au diagnostic.
Annulation : je n'ai pas terminé ce tutoriel.
39 autres ont terminé cette réparation.
Merci à ces traducteurs :
75%


Ces traducteurs nous aident réparer le monde ! Vous voulez contribuer ?
Commencez à traduire ›


13 commentaires
Good instructions. 2 things to add. Be careful how much heat you apply, I damaged my screen. A real heat gun needed about 30 seconds. Second is you can get custom cut stickers for the Z play to reinstall the battery and screen they are from that big online company, you know the one.
One of the best guides ever: clear and precise, with a REAL step by step process. Thank you very much.
I only want to add something: on my model (EU) the battery is attached to the body by two striped along the short sides of the battery. It can be hard to work on those stripes so pur extra attention on that.
Excellent guide. The biggest pain by far was removing the old battery. I didn’t have a heat gun so just used a hair dryer for the multiple rounds of heating and prying. I did end up deforming the old one quite a bit getting it out, but luckily nothing happened. Also, on my adhesive, the U-shaped cutout was *not* at the top left. Just make sure the speaker holes line up.
Excellent instructions! I read it several times while waiting for my new battery to come from ifixit. I was pretty confident in my abilities and knew the risks of damaging the screen in the process. Sure enough, after going through the whole procedure and plugging my old screen back in, half of it was blank… Pretty sure I flexed the screen too much while lifting on it with the suction cup and cracked it. The screen is a lot thinner and flexible than I was expecting. I would have preferred to give more business to ifixit but I didn’t want to be down for another whole week so I had to order a new screen from online company with free 2 day shipping… No complaints towards the author or ifixit at all. I would attempt this repair again.
I just want to mention that even the packaging for the repair parts and tools was impressive. Lots of attention to detail. Only complaint about the tools is that I would have paid a few extra bucks to include some kind of case for the tools. Thanks!
One simple method I use to remove the battery. After heating up the back of the phone, I use an old gift card and insert it through the side of the battery and since its larger and flexible your able to reach the strips of glue underneath the battery and loosen it from the battery. A lot safer than pulling and togging at the battery from the top and the potential risk of puncturing it . Just make sure to look for locations that have any circuits underneath the battery and avoid those spots. Works well for any other phones or tablets. I used it on this phone and only needed to heat it up once. Hope this helps someone.
Great instructions. I’m almost done. My problem is that the phone is working but nothing is on the screen. I’ve tried resetting the phone and reseating the connector. Still nothing. Any advice before I go to Verizon?
Same for me! I replaced the battery and plugged both connectors in. The fingerprint reader is working. I can feel it vibrating when I touch it, but the screen shows nothing even though I know the phone is powered on. I tried reconnecting the screen plug and nothing.
Ok, so I don't know if I did something wrong. But the screen I got did not come with the finger print reader or the front flash. I moved the finger print reader over from the old screen, but I did not see these steps in the guide. And I forgot the front flash and did not notice until I had closed the phone up. Kinda frustrating, but I guess that is in me. If I have fixed the worn down battery I will be happy. Guess I will plug the hole with some tooth paste or something. Lol! Other then that, very helpful guide, I will be using Ifixit next time too. I second the earlier commented that I would have been happy to pay a bit more for a nice case for my new tools.
Sorry to hear of those frustrations! I will amend the guide with a reminder.
After replacing the battery and, yes, new screen, I thought all was good and reassembled the phone. I subsequently found that the speaker isn't working when I am watching a video. I have checked all the settings but can't find the problem. If anyone knows what the most likely problem is, I would appreciate your help. Email me at colormegone123@gmail.com
Mon téléphone, ne fait pas les transferts des données avec l'ordinateur par câble ! Que dois-je faire ??
Who is the manufacturer for OE AMOLED displays for Moto Z play ? How can i get original display ?
I am from INDIA and i need a original AMOLED display for my Moto Z play