
Toshiba Satellite C855-S5115 Keyboard Replacement

Introduction
Passez à l'étape 1Sticking and broken keys means it might be time for a new keyboard. This guide will show you how to remove and replace you Toshiba's keyboard.
Ce dont vous avez besoin


-
-
Use two fingers to pull the ridged lock tabs on the bottom of the computer toward the edges. This will unlock the battery.
-
-
-
-
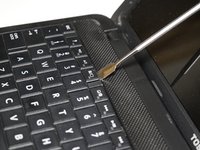
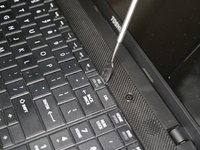
Carefully separate the keyboard from its assembly by pulling it out with the opening tool.
Use the tool on the user side of the board. See the connector below. Notice the small lndents on the very edge of the board to the right of the connector. That's where to use the tool on the left, right and bottom (user side). 7 on the user edge and 1 each on the left and right edges about a third of the way from the screen edge.
-
-
-
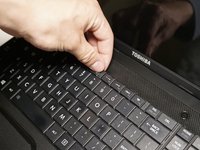
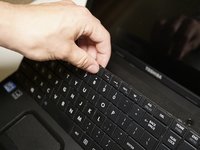
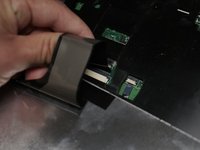
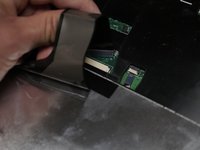
Pull out the connector attaching the keyboard to the main body of the laptop.
To remve the ribbon unlock the 2 small grey tabs on each end. The tabs are unlocked by gently moving them forward. GENTLY!
-


To reassemble your device, follow these instructions in reverse order.
To reassemble your device, follow these instructions in reverse order.
Annulation : je n'ai pas terminé ce tutoriel.
Une autre personne a terminé cette réparation.

Équipe

Linn Benton Community College, Team S1-G4, Johnson Spring 2018 Membre de l'équipe Linn Benton Community College, Team S1-G4, Johnson Spring 2018
LBCC-JOHNSON-S18S1G4
4 membres
14 tutoriels rédigés
2 commentaires de tutoriel
C855D-S5900 pry up the bottom of the keyboard, not the top. Installation is reverse of removal, put top of keyboard in, then snap in bottom.