Aller au contenu principal
Lenovo Thinkpad T450 Daughterboard Replacement

Lenovo Thinkpad T450 Daughterboard Replacement

Justin Ogihara

Justin Ogihara

Dernière mise à jour le April 17, 2023

10 - 20 minutes
Modérée

Also known as the daughter card, piggyback card, or mezzanine board, the daughterboard is an extension of the motherboard. The daughterboard is typically connected to the motherboard via a series of cables. Similar to the motherboard, the daughterboard has pins, plugs, sockets, and connectors to be attached to other boards.

As for the Lenovo ThinkPad T450 laptop, the daughterboard houses the USB port on the upper left side of the laptop. If you find that the devices you plug into this USB port are not being recognized, it may be time to replace the daughterboard. Follow these simple instructions to replace the daughterboard in your device.

Ce dont vous avez besoin

Outils

  1. Lenovo Thinkpad T450 Daughterboard Replacement, External Battery: étape 1, image 1 de 3 Lenovo Thinkpad T450 Daughterboard Replacement, External Battery: étape 1, image 2 de 3 Lenovo Thinkpad T450 Daughterboard Replacement, External Battery: étape 1, image 3 de 3
    • Using your hands, slide the two locking tabs away from each other to release the battery.

    • Slide the battery up and out of the device.

  2. Lenovo Thinkpad T450 Daughterboard Replacement, Back Cover: étape 2, image 1 de 1
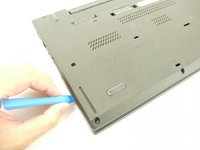
    • Using the JIS #00 screwdriver, unscrew seven screws from the back cover.

    • These screws are not removable and will remain in the back cover.

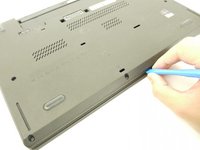
    • Use the JIS #00 screwdriver to remove the single 2.8 mm screw from the back cover.

  3. Lenovo Thinkpad T450 Daughterboard Replacement: étape 3, image 1 de 3 Lenovo Thinkpad T450 Daughterboard Replacement: étape 3, image 2 de 3 Lenovo Thinkpad T450 Daughterboard Replacement: étape 3, image 3 de 3
    • Insert a plastic opening tool into the edges of the laptop and work your way around the edges to pry off the back cover from the device.

    • Remove the back cover from the device.

  4. Lenovo Thinkpad T450 Daughterboard Replacement, RAM: étape 4, image 1 de 2 Lenovo Thinkpad T450 Daughterboard Replacement, RAM: étape 4, image 2 de 2
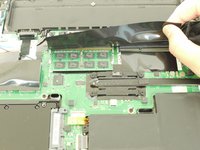
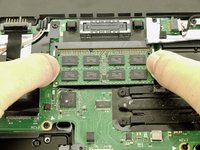
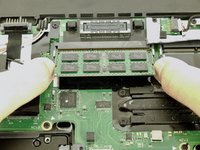
    • Lift up the black piece of tape and remove it to uncover the RAM sticks underneath.

  5. Lenovo Thinkpad T450 Daughterboard Replacement: étape 5, image 1 de 2 Lenovo Thinkpad T450 Daughterboard Replacement: étape 5, image 2 de 2
    • Using your fingers, push the two clips securing the RAM away from each other to release the RAM.

    • The RAM stick should pop up at a 30 degree angle.

    • Remove the RAM stick from the device.

    • Repeat this step for any additional RAM sticks.

  6. Lenovo Thinkpad T450 Daughterboard Replacement, Fan and Heatsink Assembly: étape 6, image 1 de 1
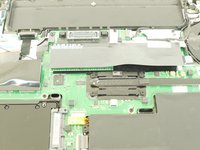
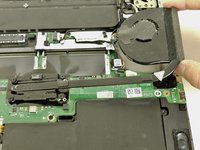
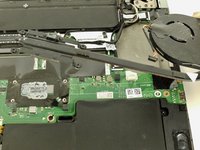
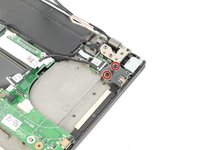
    • Using the JIS #00 screwdriver, unscrew the four screws securing the fan and heatsink assembly to the motherboard.

    • These screws are not removable and will stay on the fan and heatsink assembly.

  7. Lenovo Thinkpad T450 Daughterboard Replacement: étape 7, image 1 de 1
    • Disconnect the fan and heatsink assembly from the motherboard using the plastic opening tool.

  8. Lenovo Thinkpad T450 Daughterboard Replacement: étape 8, image 1 de 2 Lenovo Thinkpad T450 Daughterboard Replacement: étape 8, image 2 de 2
    • Lift up the fan and heatsink assembly and remove it from the device.

    • When you reassemble your device, don't forget to reapply thermal paste to the back of the heatsink and fan assembly. For proper technique and thermal paste application, please visit the How to Apply Thermal Paste guide.

  9. Lenovo Thinkpad T450 Daughterboard Replacement, Daughterboard: étape 9, image 1 de 2 Lenovo Thinkpad T450 Daughterboard Replacement, Daughterboard: étape 9, image 2 de 2
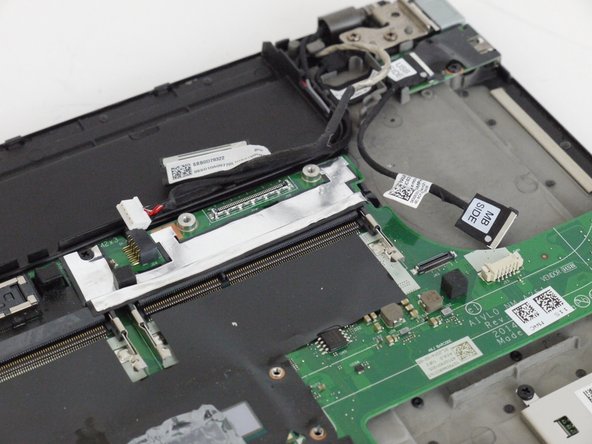
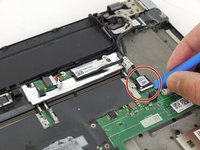
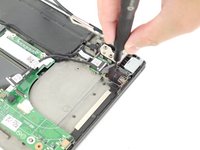
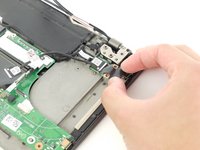
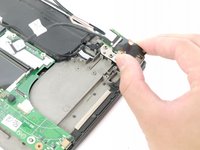
    • Use the plastic opening tool to disconnect the daughterboard cable from the motherboard.

  10. Lenovo Thinkpad T450 Daughterboard Replacement: étape 10, image 1 de 2 Lenovo Thinkpad T450 Daughterboard Replacement: étape 10, image 2 de 2
    • Using the JIS #00 screwdriver, remove the two 2.8 mm screws securing the daughterboard to the device.

  11. Lenovo Thinkpad T450 Daughterboard Replacement: étape 11, image 1 de 2 Lenovo Thinkpad T450 Daughterboard Replacement: étape 11, image 2 de 2
    • Lift up and remove the daughterboard from the device.

Conclusion

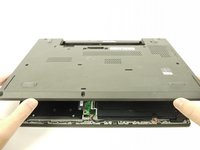
To reassemble your device, follow these instructions in reverse order.

Take your e-waste to an R2 or e-Stewards certified recycler.

Justin Ogihara

Membre depuis le 09/18/17

29 081 Réputation

52 tutoriels rédigés

Équipe

EDU Team Membre de l'équipe EDU Team

Staff

7 membres

753 tutoriels rédigés

0 commentaires

Ajouter un commentaire

Nombre de vues :

Dernières 24 heures : 0

7 derniers jours : 2

30 derniers jours : 20

Total : 869