Il est possible que cette traduction ne reflète pas les dernières mises à jour du tutoriel source. Aidez à mettre à jour la traduction ou bien consultez le tutoriel source.

Remplacement de l'écran complet avec châssis du Huawei P10 Lite

Introduction
Passez à l'étape 1Suivez ce tutoriel pour retirer et remplacer l'ensemble écran avec châssis de votre smartphone Huawei P10 Lite.
Si la vitre de votre écran est cassée, recouvrez-la de larges bandes de ruban adhésif avant de commencer la réparation. Cela protègera vos yeux et facilitera le nettoyage.
Au moment du remontage, posez du nouvel adhésif là où c'est nécessaire.
Ce dont vous avez besoin
Kit de réparation
Ce kit contient toutes les pièces et tous les outils nécessaires à la réalisation de ce tutoriel.

Pièces

Outils


Afficher plus…
-
-
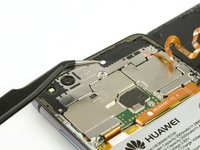
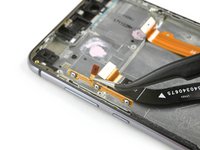
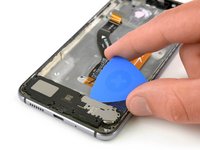
Insérez la pointe d'un médiator entre la coque arrière et le châssis central et faites-la glisser sur tout le tour du téléphone pour faire céder l'adhésif.
-
-
-
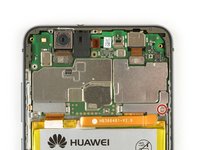
Dévissez la vis cruciforme qui fixe la plaque du connecteur de la batterie.
-
Retirez la plaque couvrant le connecteur de la batterie.
-
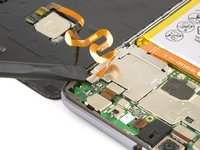
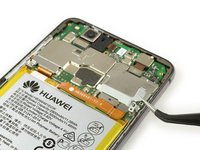
Déconnectez la nappe de la batterie avec l'extrémité plate d'une spatule.
-
-
-
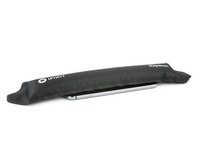
Servez-vous d'un iOpener four faire ramollir l'adhésif sous la batterie.
-
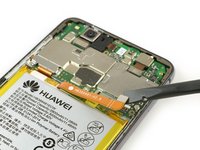
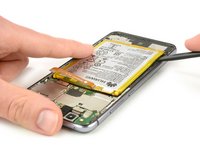
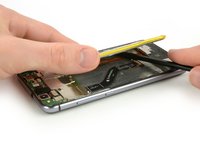
Insérez une spatule (spudger) entre la batterie et le châssis central pour ouvrir un espace.
-
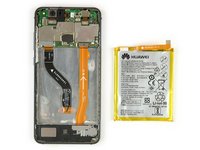
Insérez un médiator dans cet espace ou servez-vous de la spatule pour couper l'adhésif sous la batterie.
-
-
-
-
Utilisez un embout pour le retrait de la carte SIM ou un autre outil et enfoncez-le dans le petit trou dans le tiroir de la carte SIM.
-
Retirez le tiroir de carte SIM.
-
-
-
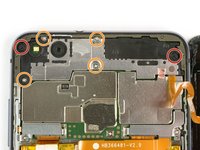
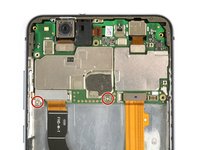
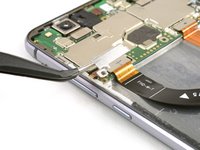
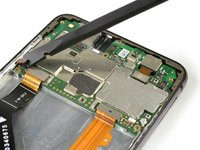
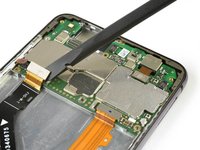
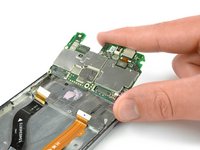
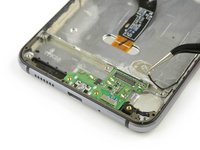
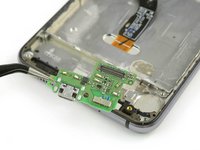
Dévissez les deux vis cruciformes.
-
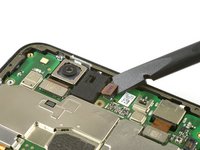
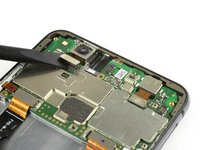
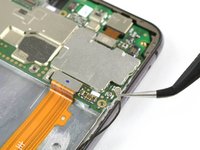
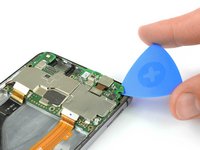
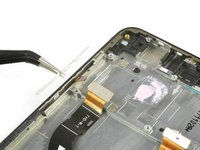
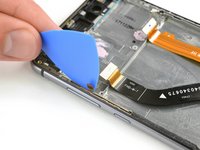
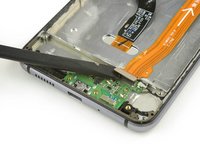
Retirez le cache de la nappe de l'écran avec une pincette.
-


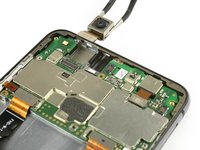


Pour remonter votre appareil, suivez ces instructions en sens inverse.
Pour remonter votre appareil, suivez ces instructions en sens inverse.
Annulation : je n'ai pas terminé ce tutoriel.
12 autres ont terminé cette réparation.
Merci à ces traducteurs :
92%


Ces traducteurs nous aident réparer le monde ! Vous voulez contribuer ?
Commencez à traduire ›


4 commentaires de tutoriel
Hello!
Thanks for the assembly guide! My phones display glass was broken, and I bought new display with frame (since the frame might have been bent), and this guide proved to be helpful. Though, I ought to mention that you did not show how the upper left metal cover for display port was removed (not that I needed it).
However, I think I slightly damaged the main cord between upper and lower motherboards, the orange one, when I was removing the battery. I can still recharge my phone and listen to music through loudspeaker, but I can not hear or be heard when I am having a phone call with someone. I can use hands-free with a microphone to get around the problem, but I wanted to ask that is it possible for the damaged cord to cause this problem, or could it be something else? I would imagine that I should at least hear the other person even if the cord is slightly damaged.
- Jesse
Hello Jesse
It could be, that cable sends data from the top to the bottom. The micro of the calls is the lower one, so the information could not reach the top if that part is damaged. Look at step 17, in that small plate is the microphone, it could be covered by dirt or not embedded in its hole. But the headset does not depend on that cable, could it have misplaced the headset? Look at step 13, if it is reversed, it will not work.
Oscar -
Hello all!
As we continue getting more and more boards with the same problem, I’d like to point out that you should be very careful when disconnecting the antenna cable. The soldering quality is probably not the best, and this may lead to the antenna cable coming out of the board along with the connector to which it is connected.. This is not so critical, but you will have to do some jewelry work to solder the detached connector.
Thank you for the good guide which helped us to save my son’s phone!
P.S.: I recommend buying the spare parts here - I had ordered the first display on ebay (this was before my brother recommended ifixit to me) and it was broken. The parts from ifixit came in perfect quality.