Aller au contenu principal
iPhone 16 Battery Replacement

iPhone 16 Battery Replacement

Alex Diaz-Kokaisl

Alex Diaz-Kokaisl et 6 autres contributeurs

Dernière mise à jour le April 3, 2025

1 - 2 heures
Modérée
Tutoriel vedette

Use this guide to replace the battery in your iPhone 16.

iPhone batteries are rated to hold 80% of their capacity for up to 500 charge cycles, or roughly 18–24 months. If your iPhone needs to be charged more often or runs slower, it might be time to replace the battery.

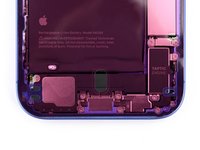
This iPhone and the iPhone 16 Plus use a battery adhesive that requires an electrical charge to loosen it. Apple's repair manual recommends connecting a 9V battery for 90 seconds, but you can use a power supply or a power bank at a 5–20V output instead—the time required to loosen the adhesive will vary.

The guide uses the VoltClip along with the FixHub Portable Power Station to release the adhesive. If you're using a different method, follow the guide normally and supplement your power source's operating procedures during the necessary steps.

After completing this repair, you may receive warnings about your replacement part and lose access to battery health data, but your new battery will otherwise work normally. As of iOS 18.1, battery health works with both genuine and aftermarket replacement batteries. Run Repair Assistant to reset the battery metrics.

Ce dont vous avez besoin

iFixit touche une commission lorsque vous achetez par l'intermédiaire de ces liens.
  1. iPhone 16 Battery Replacement, Before you begin: étape 1, image 1 de 2 iPhone 16 Battery Replacement, Before you begin: étape 1, image 2 de 2
    • Allow your phone's battery to drain below 25%, as a charged lithium-ion battery is a potential safety hazard.

    • Unplug any cables from your phone.

    • Hold the power and either volume buttons and slide to power off your phone.

  2. iPhone 16 Battery Replacement, Tape over any cracks: étape 2, image 1 de 2 iPhone 16 Battery Replacement, Tape over any cracks: étape 2, image 2 de 2
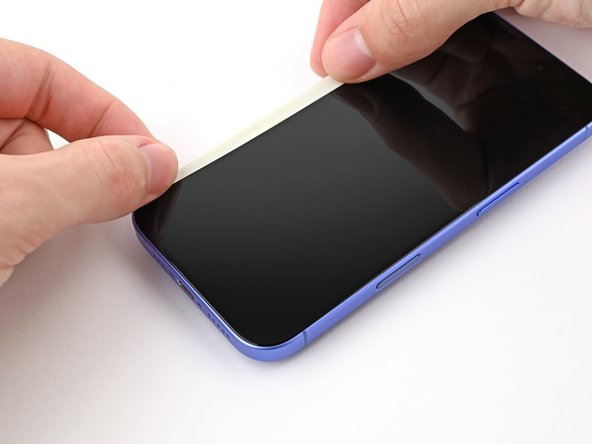
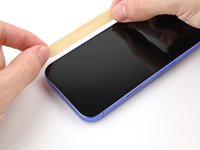
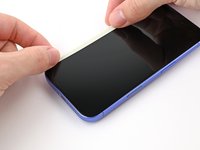
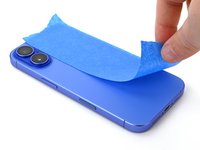
    • If your screen or back glass is badly cracked, lay overlapping strips of packing tape over the glass to protect yourself and make disassembly easier.

    • Make sure there's a smooth area near the bottom edge that's big enough for a suction cup to stick to.

  3. iPhone 16 Battery Replacement, Remove the pentalobe screws: étape 3, image 1 de 2 iPhone 16 Battery Replacement, Remove the pentalobe screws: étape 3, image 2 de 2
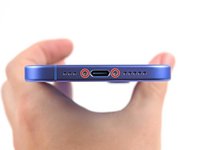
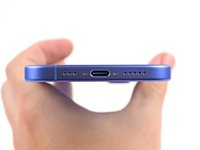
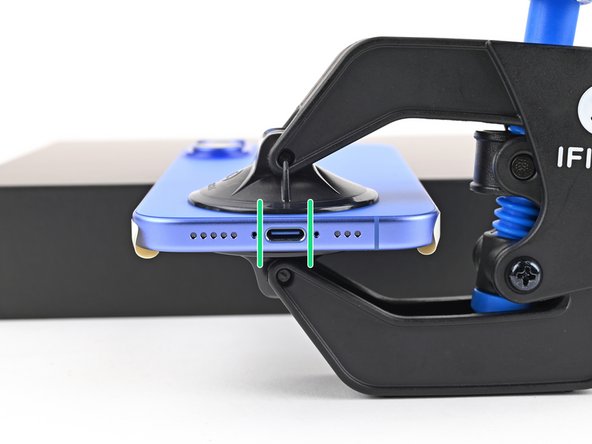
    • Use a P2 pentalobe driver to remove the two 7.7 mm-long screws on either side of the charging port.

  4. iPhone 16 Battery Replacement, Mark your opening picks: étape 4, image 1 de 3 iPhone 16 Battery Replacement, Mark your opening picks: étape 4, image 2 de 3 iPhone 16 Battery Replacement, Mark your opening picks: étape 4, image 3 de 3
    • If inserted too far, an opening pick can damage your device. Follow this step to mark your pick and prevent damage.

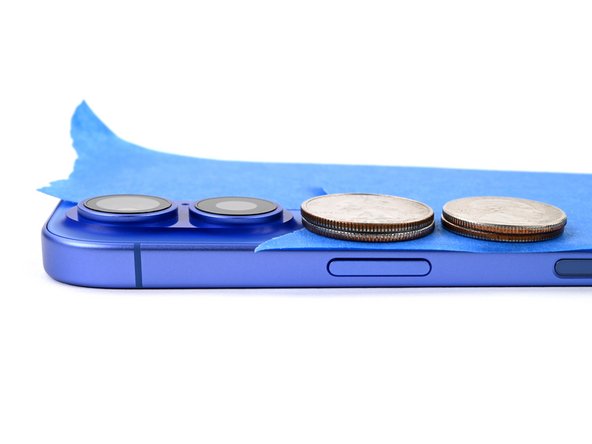
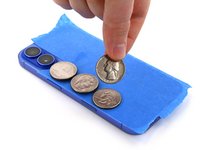
    • Measure 3 mm from the tip and mark the opening pick with a permanent marker.

    • You can also mark the other corners of the pick with different measurements.

    • Alternatively, tape a coin to a pick 3 mm from the tip.

    Got to step 2 and realized the fix kit doesn't include an opening pick! Looks like a guitar pick, and I have those lying around. Is that expected? Looks like the pick is used in many steps below. There's a little blue crowbar that isn't mentioned in the instructions. Perhaps that replaces the opening pick?

    Sloan Looney - Réponse

    Hi! I can't see which guide you were using when writing this comment. Can you reply here with which guide and fix kit you used?

    Clay Eickemeyer -

    I see you posted this in Meta. I hope it's resolved soon! In the meantime, a guitar pick may work well enough for your repair.

    Clay Eickemeyer -

    what fix kit?

    Meow Purr -

    My fix kit didn't include an opening pick either

    WILLIAM HARRIS - Réponse

    Make sure you check inside the black boxes after emptying them. My pick was stuck inside one of the boxes.

    AndyF - Réponse

    My AliExpress refurbished screen came with a pick that has a coin-like circle that pops out, so no modification was necessary

    Gijs Leegwater - Réponse

    the picture shows 3 cm but the description says 3 mm's. Which one is it?

    John Pena - Réponse

    That is a misunderstanding. It is a ruler with a scale for cm, it shows 0.3 cm, i.e. 3 mm.

    VauWeh -

    Oh, come ON!

    Big Ed -

    It will ALWAYS be millimeters on a phone, but this step is ridiculous, skip it!

    Leif DeWolf -

    It's not an Ifixit KIT if it doesn't include everything. You'll need to order the opening pic separately. Or head to Walmart like myself and look for guitar pics. Hopefully, this will work just as well.

    Jaleeljb97@icloud.com - Réponse

    No pick in mine as well. It’s really not clear that you have to order this separately when ordering an IPhone SE 202/2022 screen repair kit. Is this the case?

    Jackson Castiglione - Réponse

    Frustrated, I ordered a compact package where everything was encapsulated. Useless suction tools could not separate the screen. If it is unable to decouple the screen, then why sucking suction tools you have provided.

    Shourob Datta - Réponse

    For my kit the triangle pick was stuck inside the box with the screen not with the other tools maybe it's also there for you

    Henry Scheibehenne - Réponse

    Y’all are getting far, FAR too detailed with some of this stuff…. Measuring and marking the pick that you won’t actually use to open the device?!? lol that’s kinda funny. Just heat it up, grab a spudger, and the back just pops right off! The iFixit tech need to stick to the KISS method more often, you know KEEP IT SIMPLE STUPID!!! Like l, for reals, I’ve been doing this stuff for YEARS and using iFixit guides regularly and this is just ridiculous at this point!

    Leif DeWolf - Réponse

    Will the phone still work if the sensor assembly on the back of the screen is damaged?

    Mutshidzi Rambau - Réponse

  5. iPhone 16 Battery Replacement, Secure the screen: étape 5, image 1 de 3 iPhone 16 Battery Replacement, Secure the screen: étape 5, image 2 de 3 iPhone 16 Battery Replacement, Secure the screen: étape 5, image 3 de 3
    Outil utilisé dans cette étape :
    Clampy - Anti-Clamp
    $24.95
    • The next four steps demonstrate the Anti-Clamp, a tool we designed to make the opening procedure easier. If you aren't using the Anti-Clamp, skip down four steps for an alternate method.

    • For complete instructions on how to use the Anti-Clamp, check out this guide.

    • The Anti-Clamp applies suction to both the screen and the back glass. To open only the back glass, you need to secure the screen with tape. You can also check out the full instructions on how to use this tape.

    • Cut two strips of tape, apply them along the long edges of the phone, and fold them over the screen to secure it.

    • Make sure the tape is only securing the screen and not the back glass.

  6. iPhone 16 Battery Replacement, Secure an Anti-Clamp: étape 6, image 1 de 3 iPhone 16 Battery Replacement, Secure an Anti-Clamp: étape 6, image 2 de 3 iPhone 16 Battery Replacement, Secure an Anti-Clamp: étape 6, image 3 de 3
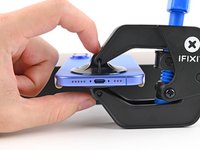
    • Pull the Anti-Clamp's blue handle backward to unlock the arms.

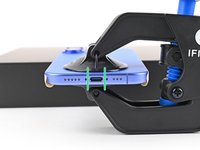
    • With the back glass facing up, slide the arms over the right edge of your phone, with one suction cup on the back glass and the other on the screen. Center the suction cups near the bottom edge.

    • Support your phone so it rests level while between the Anti-Clamp's arms—a small box works well.

    • Squeeze the cups together to create suction.

    • If you find that the surface of your iPhone is too slippery for the Anti-Clamp to hold onto, use tape to create a grippier surface.

  7. iPhone 16 Battery Replacement, Create a gap under the back glass: étape 7, image 1 de 3 iPhone 16 Battery Replacement, Create a gap under the back glass: étape 7, image 2 de 3 iPhone 16 Battery Replacement, Create a gap under the back glass: étape 7, image 3 de 3
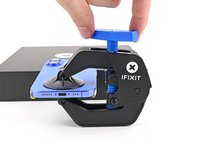
    • Pull the blue handle forward to lock the arms.

    • Turn the handle one full turn (360 degrees) or until the cups start to stretch.

    • As the cups stretch, make sure they stay vertically aligned with each other. If they keep slipping, remove the Anti-Clamp and apply tape for the cups to stick to.

    • If you don't have tape, you may warm up the suction cups to help them stick.

  8. iPhone 16 Battery Replacement, Insert an opening pick: étape 8, image 1 de 2 iPhone 16 Battery Replacement, Insert an opening pick: étape 8, image 2 de 2
    • Use a hair dryer or heat gun to heat the bottom edge of the back glass until it's hot to the touch.

    • Be careful not to heat the phone hotter than this—the battery is susceptible to heat damage.

    • Wait up to a minute for the adhesive to separate and a gap to form between the back glass and the frame.

    • If a gap doesn't appear after one minute, apply more heat and rotate the handle a quarter turn. Let the Anti‑Clamp and time do the work for you.

    • Insert an opening pick into the gap.

    • Remove the Anti-Clamp using the pull tabs on the suction cups.

    • Skip the next two steps.

  9. iPhone 16 Battery Replacement, Heat the bottom edge: étape 9, image 1 de 1
    Outil utilisé dans cette étape :
    iOpener
    $12.99
    • Use a hair dryer or heat gun to heat the bottom edge of the back glass until it's hot to the touch.

    • You can also use an iOpener to heat the back glass. Follow these instructions to heat and apply the iOpener properly.

  10. iPhone 16 Battery Replacement, Insert an opening pick: étape 10, image 1 de 3 iPhone 16 Battery Replacement, Insert an opening pick: étape 10, image 2 de 3 iPhone 16 Battery Replacement, Insert an opening pick: étape 10, image 3 de 3
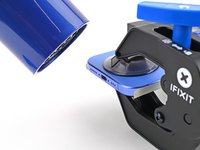
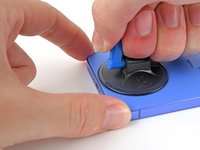
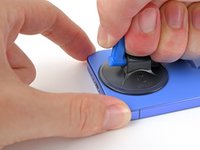
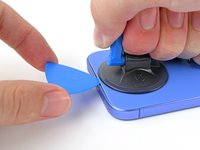
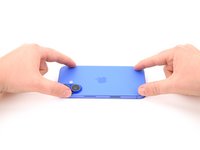
    • Apply a suction handle to the bottom edge of the back glass.

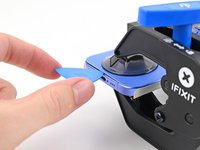
    • While supporting the frame with one hand, pull up on the handle with a strong, steady force to create a gap between the back glass and the frame.

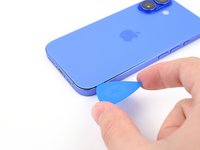
    • Insert the tip of an opening pick into the gap.

  11. iPhone 16 Battery Replacement, Back glass information: étape 11, image 1 de 1
    • As you slice the adhesive securing the back glass in the following steps, don't insert your pick deeper than 3 mm to avoid damaging the following areas:

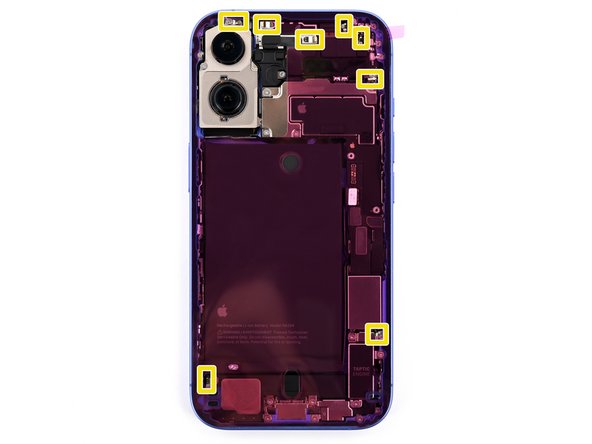
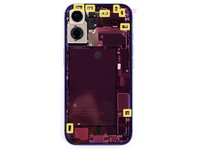
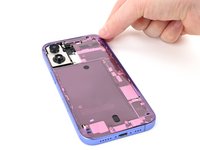
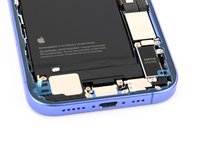
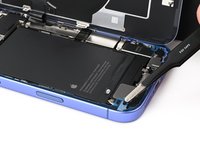
    • A delicate cable connecting the back glass to the phone, right next to the volume down button. Don't insert your pick here to avoid slicing the cable.

    • Multiple spring contacts around the perimeter of the phone.

  12. iPhone 16 Battery Replacement, Heat the right edge: étape 12, image 1 de 1
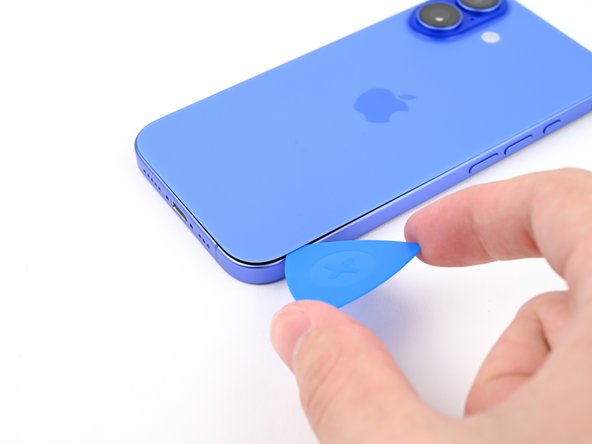
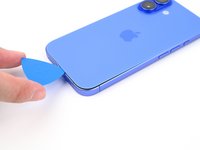
    • Use a hair dryer or heat gun to heat the right edge of the back glass until it's hot to the touch.

  13. iPhone 16 Battery Replacement, Separate the bottom right adhesive: étape 13, image 1 de 3 iPhone 16 Battery Replacement, Separate the bottom right adhesive: étape 13, image 2 de 3 iPhone 16 Battery Replacement, Separate the bottom right adhesive: étape 13, image 3 de 3
    • Don't insert your pick deeper than 3 mm to avoid damaging the spring contacts.

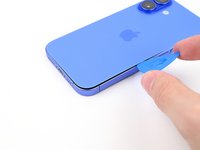
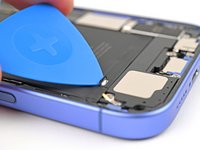
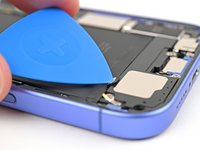
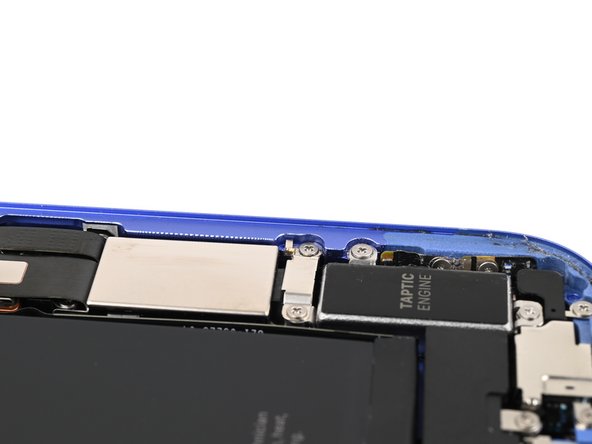
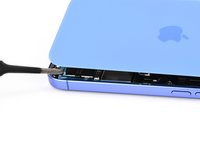
    • Slide your pick around the bottom right corner and to the volume down button to separate the adhesive and release the metal clip.

    • Don't slide past the volume buttons to avoid damaging the wireless charging cable.

    • You'll hear and feel the metal clip release as you pass it.

    • Leave this pick inserted to prevent the adhesive from resealing.

  14. iPhone 16 Battery Replacement, Heat the left edge: étape 14, image 1 de 1
    • Use a hair dryer or heat gun to heat the left edge of the back glass until it's hot to the touch.

  15. iPhone 16 Battery Replacement, Separate the left adhesive: étape 15, image 1 de 3 iPhone 16 Battery Replacement, Separate the left adhesive: étape 15, image 2 de 3 iPhone 16 Battery Replacement, Separate the left adhesive: étape 15, image 3 de 3
    • Don't insert your pick deeper than 3 mm to avoid damaging the spring contacts.

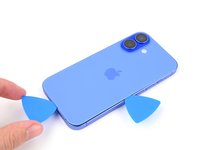
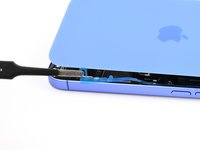
    • Insert a second opening pick at the bottom edge.

    • Slide the second pick around the bottom left corner and along the left edge of the screen to separate the adhesive and release the metal clips.

    • You'll hear and feel the metal clips release as you pass them.

    • Leave this pick inserted at the top left corner to prevent the adhesive from resealing.

  16. iPhone 16 Battery Replacement, Heat the top edge: étape 16, image 1 de 1
    • Use a hair dryer or heat gun to heat the top edge of the back glass until it's hot to the touch.

  17. iPhone 16 Battery Replacement, Separate the top right adhesive: étape 17, image 1 de 3 iPhone 16 Battery Replacement, Separate the top right adhesive: étape 17, image 2 de 3 iPhone 16 Battery Replacement, Separate the top right adhesive: étape 17, image 3 de 3
    • Don't insert your pick deeper than 3 mm to avoid damaging the spring contacts.

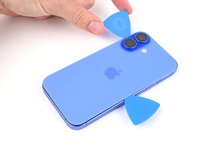
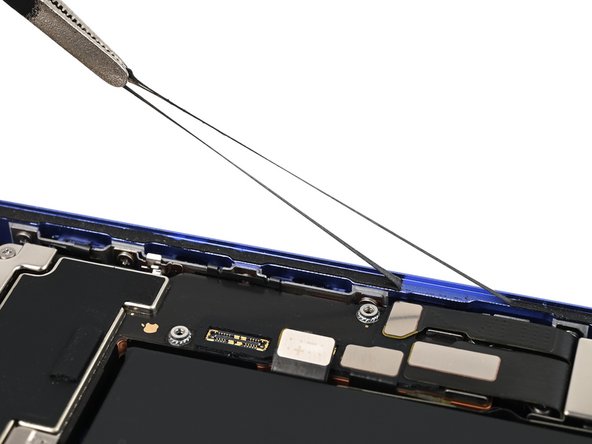
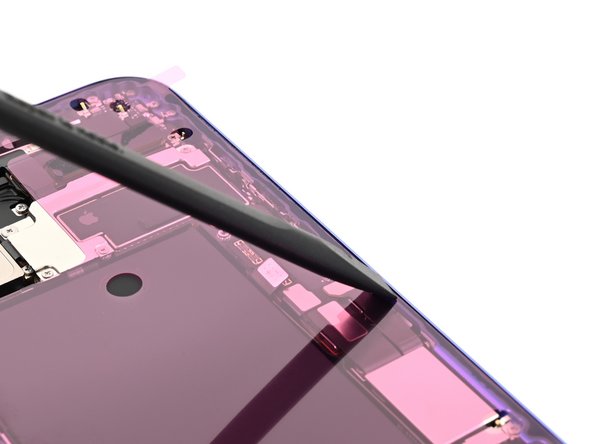
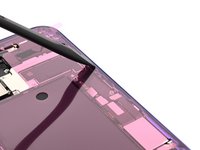
    • Slide your second opening pick around the top left corner and along the top edge to separate the adhesive and release the metal clips.

    • You'll hear and feel the metal clips release as you pass them.

    • Continue sliding your pick around the top right corner until you reach the Action button.

    • Leave this pick inserted to prevent the adhesive from resealing.

  18. iPhone 16 Battery Replacement, Reposition the back glass: étape 18, image 1 de 3 iPhone 16 Battery Replacement, Reposition the back glass: étape 18, image 2 de 3 iPhone 16 Battery Replacement, Reposition the back glass: étape 18, image 3 de 3
    • At this point, the back glass should be free from the frame. If the back glass feels stuck, go back around the perimeter with your pick to check for missed sections of adhesive or stuck clips.

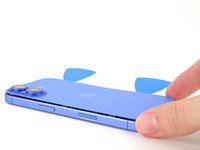
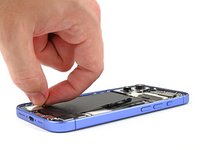
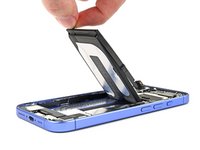
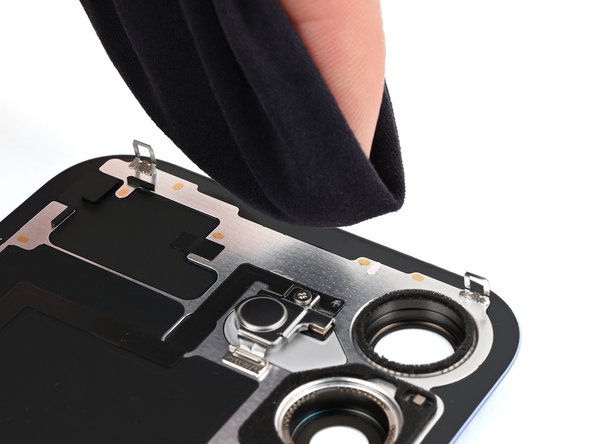
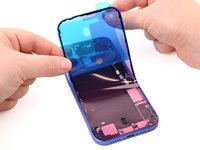
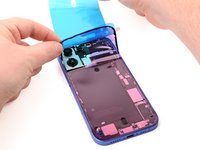
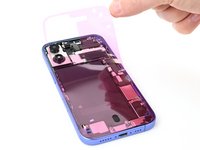
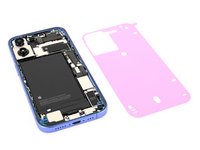
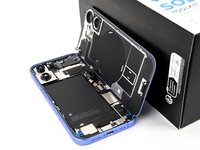
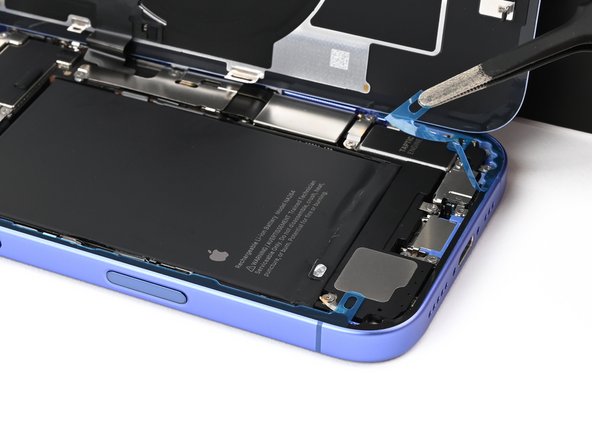
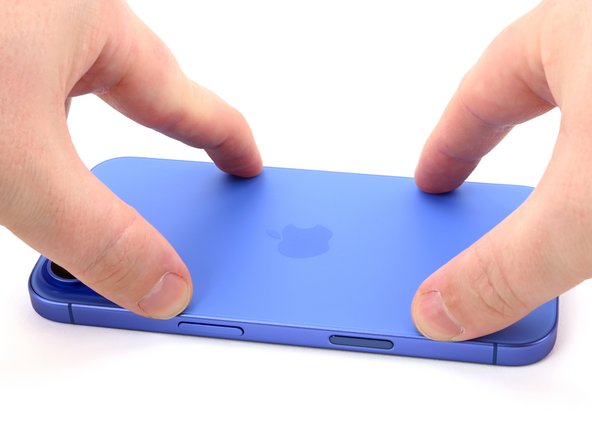
    • Swing open the back glass to the right of the phone to separate the remaining adhesive.

    • Support the back glass with a clean, sturdy object.

    • Remove the opening picks before continuing.

  19. iPhone 16 Battery Replacement, Remove the middle connector cover screws: étape 19, image 1 de 2 iPhone 16 Battery Replacement, Remove the middle connector cover screws: étape 19, image 2 de 2
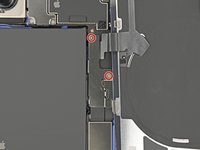
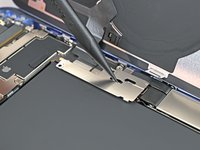
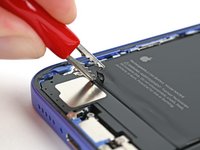
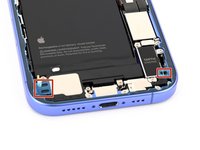
    • Use a tri-point Y000 driver to remove the two 1 mm‑long screws securing the middle connector cover.

  20. iPhone 16 Battery Replacement, Remove the middle connector cover: étape 20, image 1 de 3 iPhone 16 Battery Replacement, Remove the middle connector cover: étape 20, image 2 de 3 iPhone 16 Battery Replacement, Remove the middle connector cover: étape 20, image 3 de 3
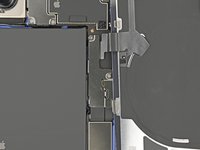
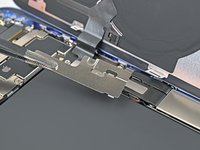
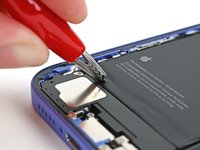
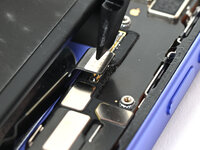
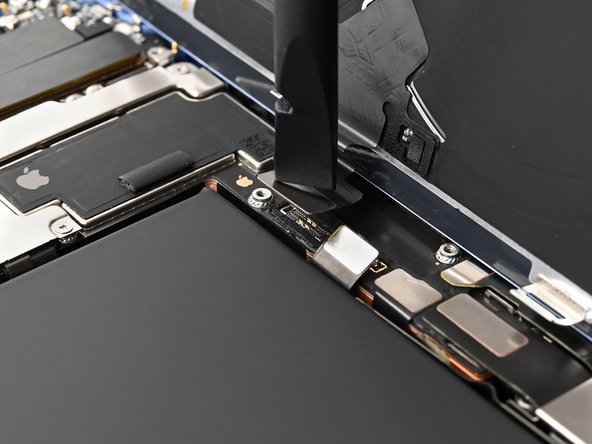
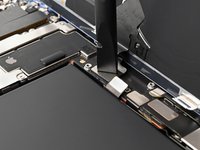
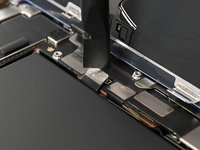
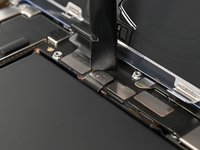
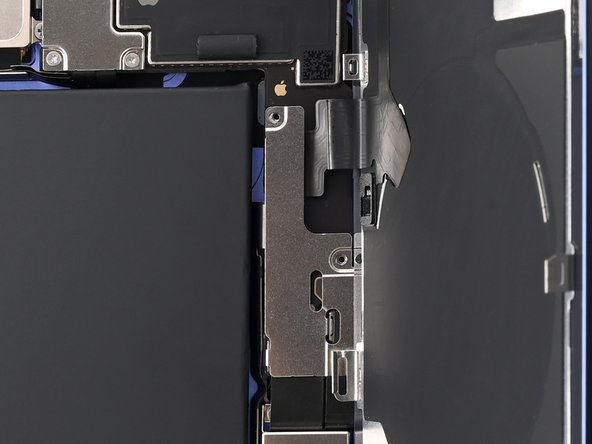
    • Insert the point of a spudger in either cutout on the middle connector cover.

    • Slide the cover towards the left edge of the phone and release its hook from its slot on the logic board.

    • Remove the cover.

  21. iPhone 16 Battery Replacement, Disconnect the battery: étape 21, image 1 de 2 iPhone 16 Battery Replacement, Disconnect the battery: étape 21, image 2 de 2
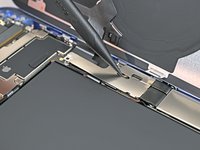
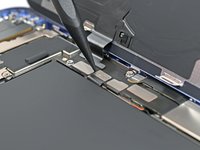
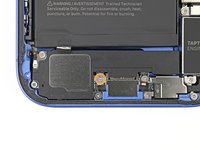
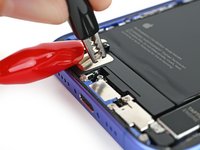
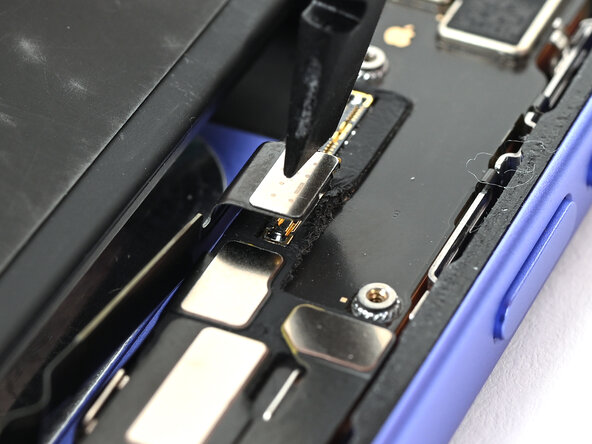
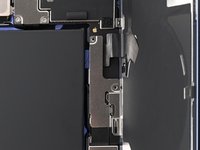
    • Use the point of a spudger to pry up and disconnect the battery press connector.

  22. iPhone 16 Battery Replacement, Disconnect the wireless charging coil: étape 22, image 1 de 2 iPhone 16 Battery Replacement, Disconnect the wireless charging coil: étape 22, image 2 de 2
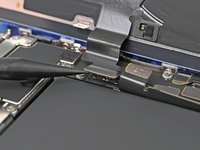
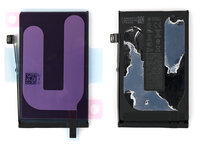
    • Use the point of a spudger to pry up and disconnect the wireless charging coil press connector.

  23. iPhone 16 Battery Replacement, Remove the back glass: étape 23, image 1 de 1
    • Lift the back glass off the frame and remove it.

  24. iPhone 16 Battery Replacement, Separate the silver tab: étape 24, image 1 de 2 iPhone 16 Battery Replacement, Separate the silver tab: étape 24, image 2 de 2
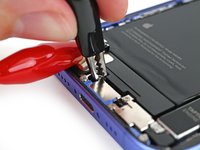
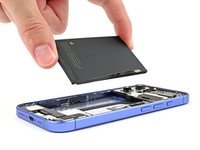
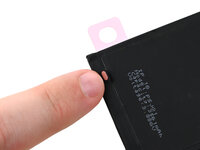
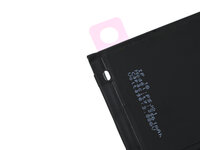
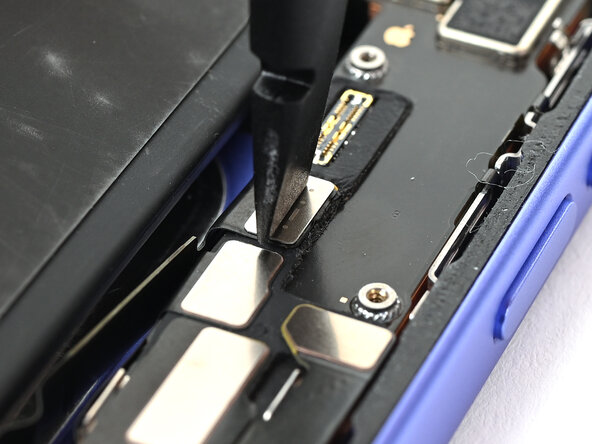
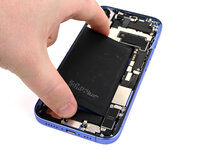
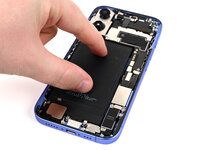
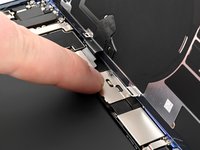
    • Use an opening pick, or a clean fingernail, to peel up the silver tab at the bottom edge of the battery.

  25. iPhone 16 Battery Replacement, Assemble the VoltClip: étape 25, image 1 de 2 iPhone 16 Battery Replacement, Assemble the VoltClip: étape 25, image 2 de 2
    • Plug the VoltClip's barrel connector into the USB-C elbow.

    • Don't connect the VoltClip to a power source just yet. The loose alligator clips may accidentally touch each other and cause an electrical short.

  26. iPhone 16 Battery Replacement, Attach the alligator clips: étape 26, image 1 de 2 iPhone 16 Battery Replacement, Attach the alligator clips: étape 26, image 2 de 2
    • Attach the red alligator clip to the silver tab.

  27. iPhone 16 Battery Replacement: étape 27, image 1 de 3 iPhone 16 Battery Replacement: étape 27, image 2 de 3 iPhone 16 Battery Replacement: étape 27, image 3 de 3
    • Attach the black alligator clip to the grounding screw.

  28. iPhone 16 Battery Replacement, Connect power to the VoltClip: étape 28, image 1 de 3 iPhone 16 Battery Replacement, Connect power to the VoltClip: étape 28, image 2 de 3 iPhone 16 Battery Replacement, Connect power to the VoltClip: étape 28, image 3 de 3
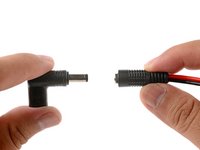
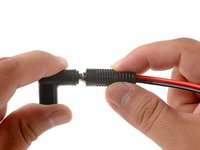
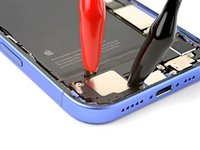
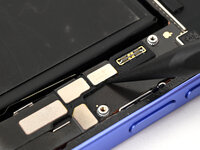
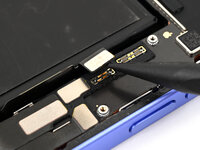
    • Make sure the red alligator clip isn't touching any stray metallic surfaces.

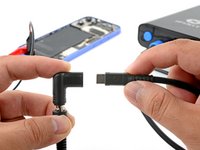
    • Connect a powered USB-C cable to the USB-C elbow and wait 90 seconds for the adhesive to loosen.

  29. iPhone 16 Battery Replacement, Disconnect the VoltClip: étape 29, image 1 de 3 iPhone 16 Battery Replacement, Disconnect the VoltClip: étape 29, image 2 de 3 iPhone 16 Battery Replacement, Disconnect the VoltClip: étape 29, image 3 de 3
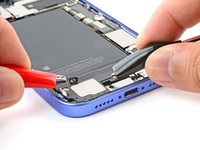
    • Disconnect the USB-C cable from the elbow, then disconnect the alligator clips.

  30. iPhone 16 Battery Replacement, Remove the battery: étape 30, image 1 de 3 iPhone 16 Battery Replacement, Remove the battery: étape 30, image 2 de 3 iPhone 16 Battery Replacement, Remove the battery: étape 30, image 3 de 3
    • Your adhesive should be fully loosened at this point. If your battery doesn't budge during the step, reconnect the alligator clips for an additional minute and try again.

    • Grip the silver tab and lift the battery out of the frame.

    • Alternatively, you can use a suction handle to pull the battery out. If the battery doesn't come out easily, don't force it—repeat the previous step.

  31. iPhone 16 Battery Replacement, End of disassembly: étape 31, image 1 de 1
    • Congratulations on completing disassembly! The remaining steps will show you how to reassemble your device.

    • When reconnecting press connectors, align the connector carefully over its socket and press down with your fingertip or spudger—first on one side, then the other—until it clicks into place. Don't try to force the connector into place. If you're having trouble, reposition it and try again.

  32. iPhone 16 Battery Replacement, Remove residual battery adhesive: étape 32, image 1 de 2 iPhone 16 Battery Replacement, Remove residual battery adhesive: étape 32, image 2 de 2
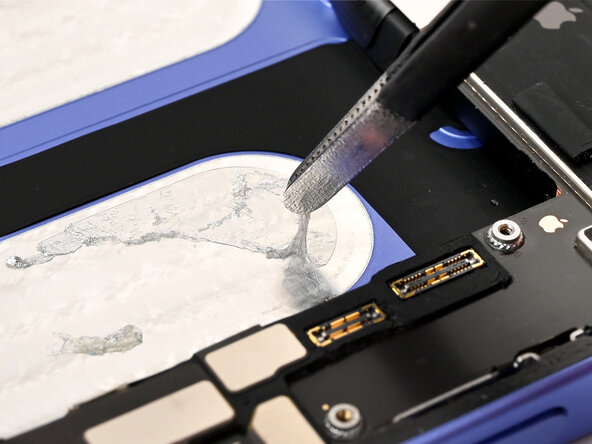
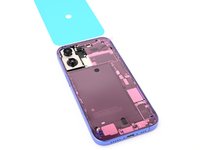
    • Use a pair of tweezers to peel up any large pieces of residual battery adhesive from the iPhone frame.

  33. iPhone 16 Battery Replacement, Remove adhesive residue: étape 33, image 1 de 2 iPhone 16 Battery Replacement, Remove adhesive residue: étape 33, image 2 de 2
    • Use coffee filters or a lint‑free cloth and high‑concentration (>90%) isopropyl alcohol to wipe off any remaining battery adhesive residue from the iPhone frame.

  34. iPhone 16 Battery Replacement, Remove the top battery‑side liner: étape 34, image 1 de 3 iPhone 16 Battery Replacement, Remove the top battery‑side liner: étape 34, image 2 de 3 iPhone 16 Battery Replacement, Remove the top battery‑side liner: étape 34, image 3 de 3
    • If your battery came with the adhesive installed, skip this step and the next four steps.

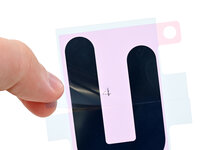
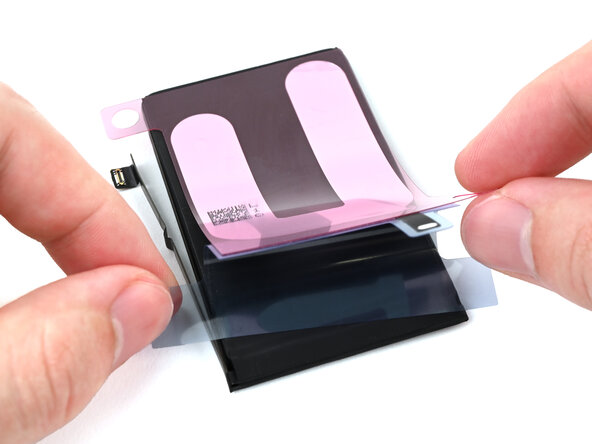
    • Lay the old battery with the adhesive facing up next to the new battery. Lay the new adhesive on the new battery to see how it needs to be applied.

    • Your adhesive may look slightly different or have different liners.

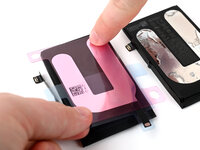
    • If the battery‑side of your adhesive has two liners, remove the top liner.

    • If the battery‑side of your adhesive has one liner, remove it.

  35. iPhone 16 Battery Replacement, Apply the top of the adhesive: étape 35, image 1 de 3 iPhone 16 Battery Replacement, Apply the top of the adhesive: étape 35, image 2 de 3 iPhone 16 Battery Replacement, Apply the top of the adhesive: étape 35, image 3 de 3
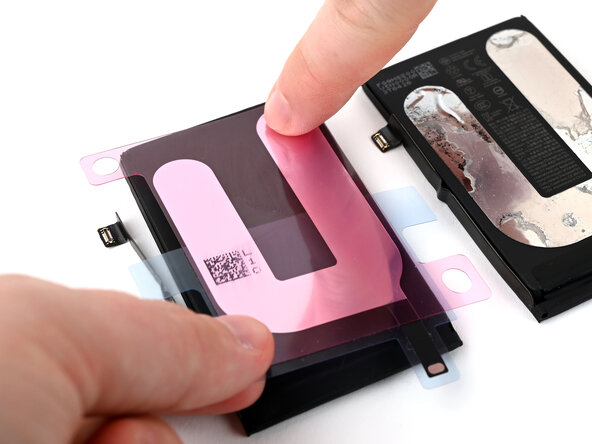
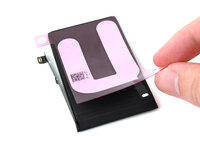
    • With the old battery nearby so you can align the new adhesive correctly, use your finger to lightly press the new adhesive to the new battery.

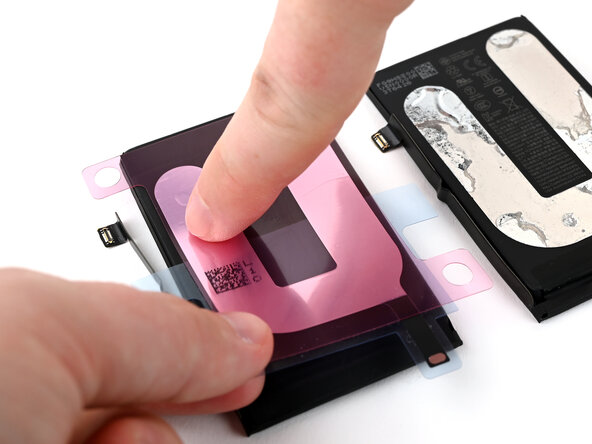
    • Compare the placement of the new adhesive with the old adhesive.

    • If you need to adjust it, you can carefully peel the adhesive up and try again.

    • Once the new adhesive is aligned correctly and matches the old adhesive, press it firmly to the battery.

  36. iPhone 16 Battery Replacement, Remove the bottom battery‑side liner: étape 36, image 1 de 3 iPhone 16 Battery Replacement, Remove the bottom battery‑side liner: étape 36, image 2 de 3 iPhone 16 Battery Replacement, Remove the bottom battery‑side liner: étape 36, image 3 de 3
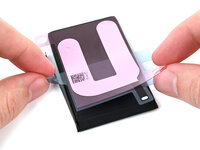
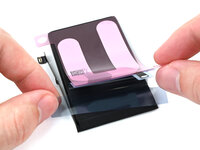
    • If the battery‑side of your adhesive still has a bottom liner on it, remove it now.

  37. iPhone 16 Battery Replacement, Press the adhesive: étape 37, image 1 de 3 iPhone 16 Battery Replacement, Press the adhesive: étape 37, image 2 de 3 iPhone 16 Battery Replacement, Press the adhesive: étape 37, image 3 de 3
    • Lay the adhesive onto the battery and press it into place.

  38. iPhone 16 Battery Replacement, Fold the conductive tab: étape 38, image 1 de 3 iPhone 16 Battery Replacement, Fold the conductive tab: étape 38, image 2 de 3 iPhone 16 Battery Replacement, Fold the conductive tab: étape 38, image 3 de 3
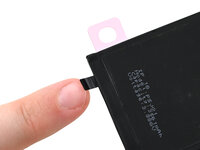
    • Use your finger to fold the conductive tab around to the front of the battery and press it into place.

  39. iPhone 16 Battery Replacement, Remove the iPhone‑side liner: étape 39, image 1 de 3 iPhone 16 Battery Replacement, Remove the iPhone‑side liner: étape 39, image 2 de 3 iPhone 16 Battery Replacement, Remove the iPhone‑side liner: étape 39, image 3 de 3
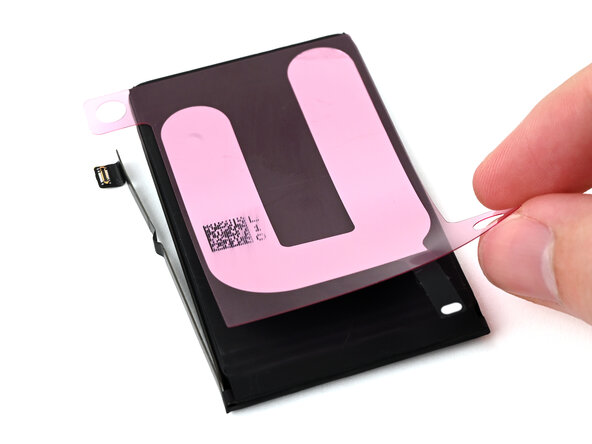
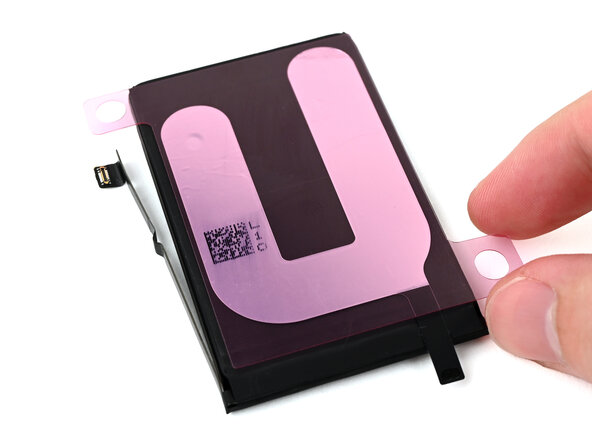
    • Peel the iPhone‑side liner off of the battery adhesive.

  40. iPhone 16 Battery Replacement, Connect the battery: étape 40, image 1 de 3 iPhone 16 Battery Replacement, Connect the battery: étape 40, image 2 de 3 iPhone 16 Battery Replacement, Connect the battery: étape 40, image 3 de 3
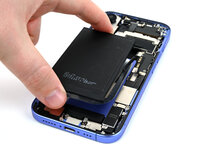
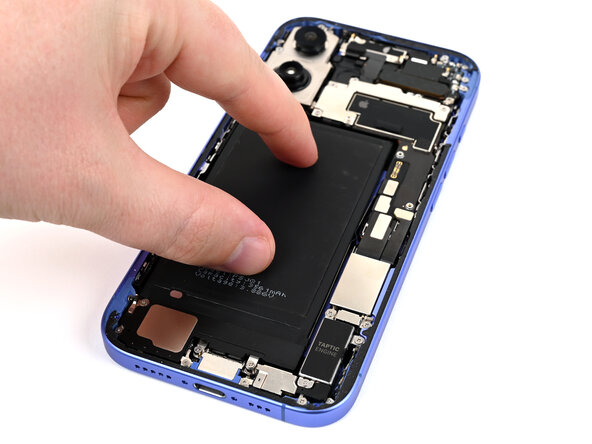
    • Hold the battery over its place in the iPhone, but don't lower it into place yet.

    • To ensure the battery is properly placed, use a spudger or your finger to connect the battery press connector.

  41. iPhone 16 Battery Replacement, Place the battery: étape 41, image 1 de 3 iPhone 16 Battery Replacement, Place the battery: étape 41, image 2 de 3 iPhone 16 Battery Replacement, Place the battery: étape 41, image 3 de 3
    • With the battery connected, lower it into its place in the iPhone.

    • Use your fingers to press the battery into place.

  42. iPhone 16 Battery Replacement, Disconnect the battery: étape 42, image 1 de 2 iPhone 16 Battery Replacement, Disconnect the battery: étape 42, image 2 de 2
    • Use a spudger or your finger to disconnect the battery to protect your iPhone during the rest of the reassembly process.

  43. iPhone 16 Battery Replacement, Remove the back glass adhesive: étape 43, image 1 de 3 iPhone 16 Battery Replacement, Remove the back glass adhesive: étape 43, image 2 de 3 iPhone 16 Battery Replacement, Remove the back glass adhesive: étape 43, image 3 de 3
    • Be careful not to damage any of the spring contacts as you clean the frame.

    • This is a good point to test your repair before sealing up your phone. Connect the battery and back glass, power on your phone, and make sure it works as expected. Power it back down, disconnect the battery and back glass, and continue reassembly.

    • The adhesive remaining on your phone is difficult to remove and leaves residue. If you have trouble removing the adhesive, apply some heat using a hair dryer or heat gun.

    • Use the pointed end of a spudger to press and roll the adhesive until you can grip it with a pair of tweezers.

  44. iPhone 16 Battery Replacement: étape 44, image 1 de 2 iPhone 16 Battery Replacement: étape 44, image 2 de 2
    • Use the tweezers to pull the adhesive off of the phone.

    • Repeat the previous step and this step until all of the adhesive is removed.

  45. iPhone 16 Battery Replacement, Clean the frame: étape 45, image 1 de 3 iPhone 16 Battery Replacement, Clean the frame: étape 45, image 2 de 3 iPhone 16 Battery Replacement, Clean the frame: étape 45, image 3 de 3
    Outil utilisé dans cette étape :
    Microfiber Cleaning Cloths
    $3.99
    • Any leftover residue will compromise your iPhone's seal. Be sure to clean the frame thoroughly.

    • Wrap a microfiber or lint-free cloth over the point of a spudger and apply a few drops of high-concentration isopropyl alcohol (over 90%) to the cloth.

    • Wipe in one direction along the perimeter of the frame to clean the adhesive residue.

    • Wait a few minutes before proceeding to make sure any excess alcohol has evaporated.

  46. iPhone 16 Battery Replacement, Clean the black glass: étape 46, image 1 de 2 iPhone 16 Battery Replacement, Clean the black glass: étape 46, image 2 de 2
    • If you're not reusing your back glass, skip this step.

    • Apply a few drops of high-concentration isopropyl alcohol (over 90%) to a microfiber or lint-free cloth and wipe around the perimeter of the back glass to prepare the surface for new adhesive.

    • If any clips on the back glass are bent, gently straighten them with your fingers.

  47. iPhone 16 Battery Replacement, Orient the adhesive: étape 47, image 1 de 2 iPhone 16 Battery Replacement, Orient the adhesive: étape 47, image 2 de 2
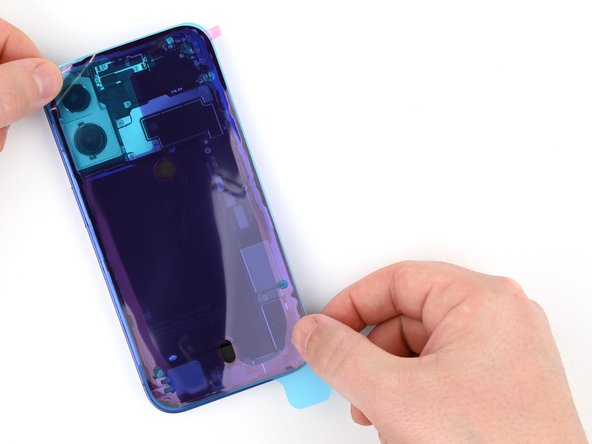
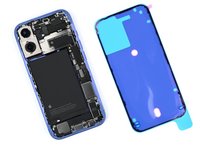
    • Orient your replacement adhesive over the frame with the larger blue liner on the underside and its pull tab in the bottom-right corner.

    • The color of your liner and the pull tab locations may be different on your adhesive.

    • Use features such as the camera cutout and notches along the edges to visualize how the adhesive will lay in the frame.

  48. iPhone 16 Battery Replacement, Expose the bottom edge of the adhesive: étape 48, image 1 de 1
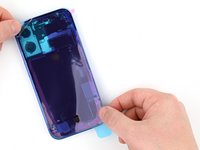
    • Use the pull tab to begin peeling the back liner off of the adhesive starting from the bottom, but do not remove the liner all the way.

  49. iPhone 16 Battery Replacement, Apply the adhesive: étape 49, image 1 de 3 iPhone 16 Battery Replacement, Apply the adhesive: étape 49, image 2 de 3 iPhone 16 Battery Replacement, Apply the adhesive: étape 49, image 3 de 3
    • Once the adhesive is pressed into place, you can't reposition it—you'll have to remove it and start over with new adhesive.

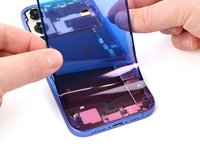
    • Hold the blue liner out of the way and align the adhesive with the bottom edge of the iPhone.

    • Lay the bottom edge of the adhesive into its recess in the frame, making sure the iPhone's spring contacts are aligned with their cutouts in the liner.

  50. iPhone 16 Battery Replacement: étape 50, image 1 de 3 iPhone 16 Battery Replacement: étape 50, image 2 de 3 iPhone 16 Battery Replacement: étape 50, image 3 de 3
    • Continue peeling the back liner off of the adhesive while pressing the adhesive into place along the edges of the iPhone's frame.

    • If you correctly aligned the lower edge of the adhesive, the side and top edges will fall perfectly into place. If the adhesive is misaligned, remove it and start over with new adhesive.

    • If your adhesive is misaligned and you don't have another set handy, it's okay to temporarily put your iPhone back together and use it normally without any adhesive, but keep in mind that your iPhone's water resistance will be compromised until you install new adhesive.

  51. iPhone 16 Battery Replacement, Press the adhesive into place: étape 51, image 1 de 3 iPhone 16 Battery Replacement, Press the adhesive into place: étape 51, image 2 de 3 iPhone 16 Battery Replacement, Press the adhesive into place: étape 51, image 3 de 3
    • Use the flat end of a spudger to press the adhesive into place around the perimeter of the frame.

    • Be careful not to touch the spring contacts sticking through the pink liner.

  52. iPhone 16 Battery Replacement, Remove the pink liner: étape 52, image 1 de 3 iPhone 16 Battery Replacement, Remove the pink liner: étape 52, image 2 de 3 iPhone 16 Battery Replacement, Remove the pink liner: étape 52, image 3 de 3
    • Use the small pull tab in the top-right corner to remove the pink adhesive liner.

  53. iPhone 16 Battery Replacement: étape 53, image 1 de 2 iPhone 16 Battery Replacement: étape 53, image 2 de 2
    • Once the top liner is removed, there should be three narrow liners on top of the adhesive with pull tabs near the bottom edge.

    • Your pull tabs may be in different positions.

    • If you don't see these pull tabs, you may have accidentally removed the thin liners in the previous step. If the adhesive is clean and properly aligned, you may proceed, just be careful not to touch anything to the exposed adhesive until you are ready to install the back glass.

  54. iPhone 16 Battery Replacement, Connect the charging coil: étape 54, image 1 de 3 iPhone 16 Battery Replacement, Connect the charging coil: étape 54, image 2 de 3 iPhone 16 Battery Replacement, Connect the charging coil: étape 54, image 3 de 3
    • Prop up the back glass along the right edge of your iPhone, using a box or similar sturdy object to support the screen.

    • Use the flat end of a spudger or your finger to connect the charging coil press connector.

  55. iPhone 16 Battery Replacement, Connect the battery: étape 55, image 1 de 2 iPhone 16 Battery Replacement, Connect the battery: étape 55, image 2 de 2
    • Use the flat end of a spudger or your finger to connect the battery.

  56. iPhone 16 Battery Replacement, Install the cover: étape 56, image 1 de 3 iPhone 16 Battery Replacement, Install the cover: étape 56, image 2 de 3 iPhone 16 Battery Replacement, Install the cover: étape 56, image 3 de 3
    • The connector cover has two hooks that slide into slots on the logic board.

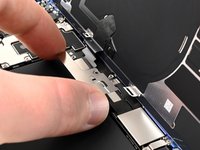
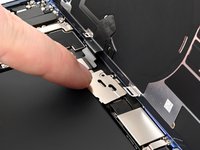
    • Lay the connector cover on the phone so the hooks are slightly to the left of their slots in the logic board.

    • Use your finger to press the connector cover down and to the right until both hooks slide into their slots.

  57. iPhone 16 Battery Replacement, Install the cover screws: étape 57, image 1 de 2 iPhone 16 Battery Replacement, Install the cover screws: étape 57, image 2 de 2
    • Use a tri-point Y000 driver to install the two 1 mm‑long screws securing the middle connector cover.

  58. iPhone 16 Battery Replacement, Remove the final adhesive liners: étape 58, image 1 de 3 iPhone 16 Battery Replacement, Remove the final adhesive liners: étape 58, image 2 de 3 iPhone 16 Battery Replacement, Remove the final adhesive liners: étape 58, image 3 de 3
    • As you remove the liners in this step, the adhesive will be fully exposed. Make sure nothing touches the exposed adhesive.

    • Use the blue tabs to remove the liners from the bottom, left, and top edges of your iPhone. Wait to remove the liner along the right edge.

  59. iPhone 16 Battery Replacement: étape 59, image 1 de 2 iPhone 16 Battery Replacement: étape 59, image 2 de 2
    • Without letting the back glass touch the adhesive, hold the back glass over the phone so you can access the final liner along the right edge of the phone.

    • Use a pair of tweezers or your fingers to remove the final liner along the right edge of the phone.

  60. iPhone 16 Battery Replacement, Place the back glass: étape 60, image 1 de 3 iPhone 16 Battery Replacement, Place the back glass: étape 60, image 2 de 3 iPhone 16 Battery Replacement, Place the back glass: étape 60, image 3 de 3
    • Hold the back glass above the phone and align it with the frame.

    • Lay the glass straight down onto the frame and press until the clips engage.

    • Press around the perimeter of the back glass to engage all clips.

  61. iPhone 16 Battery Replacement, Heat the back glass: étape 61, image 1 de 3 iPhone 16 Battery Replacement, Heat the back glass: étape 61, image 2 de 3 iPhone 16 Battery Replacement, Heat the back glass: étape 61, image 3 de 3
    • To help the adhesive bond, apply heat to the edges of the back glass using an iOpener, hair dryer, or heat gun until it's hot to the touch.

    • Firmly press around the perimeter of the back glass.

    • If you have screen vise clamps, use them to strengthen the bond of your new adhesive. If not, keep reading for more ways to secure the back glass.

  62. iPhone 16 Battery Replacement, Press the back glass: étape 62, image 1 de 3 iPhone 16 Battery Replacement, Press the back glass: étape 62, image 2 de 3 iPhone 16 Battery Replacement, Press the back glass: étape 62, image 3 de 3
    • To evenly compress your iPhone and strengthen the bond of the back glass to the frame, you need to account for the camera bump.

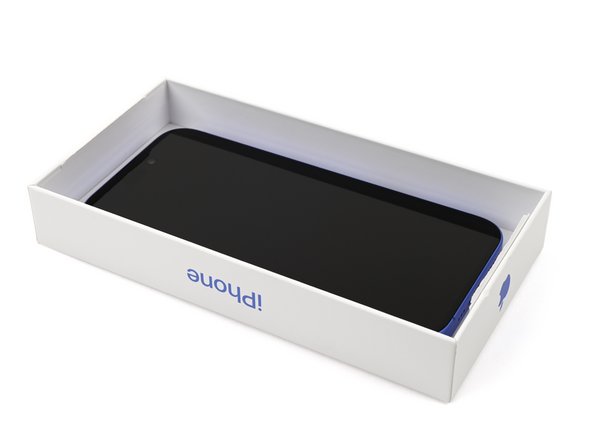
    • If you have the box your iPhone came in, take the lid and place it on a flat surface.

    • If you don't have your original box, skip this step for an alternate method.

    • Place your iPhone screen-side-up in the lid of your box with the camera bump in its recess.

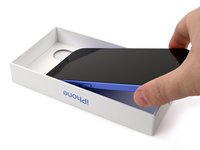
    • Find something close to the size of your iPhone, but taller than the sides of the box. Stack it on top of the iPhone, followed by a few heavy objects.

    • Leave the objects in place for at least thirty minutes. The lighter the objects, the longer they should be left. Ideally, leave them stacked overnight.

  63. iPhone 16 Battery Replacement: étape 63, image 1 de 2 iPhone 16 Battery Replacement: étape 63, image 2 de 2
    • If you don't have the original box for your iPhone, follow the next three steps for another method to evenly compress the back glass.

    • Place the iPhone screen-side-down on a soft, flat surface.

    • Apply tape to the back glass to protect its finish.

  64. iPhone 16 Battery Replacement: étape 64, image 1 de 3 iPhone 16 Battery Replacement: étape 64, image 2 de 3 iPhone 16 Battery Replacement: étape 64, image 3 de 3
    • Place two layers of coins or similarly thick objects on the tape along the edges of the back glass.

    • Evenly distribute the coins and make sure they are at least as thick as the camera bump.

  65. iPhone 16 Battery Replacement: étape 65, image 1 de 1
    • Stack multiple books or other heavy objects on your iPhone.

    • The coins may leave an impression on the bottom object, so don't use anything valuable.

    • Leave the objects in place for at least thirty minutes. The lighter the objects, the longer they should be left. Ideally, leave them stacked overnight.

  66. iPhone 16 Battery Replacement, Install the pentalobe screws: étape 66, image 1 de 2 iPhone 16 Battery Replacement, Install the pentalobe screws: étape 66, image 2 de 2
    • Use a P2 pentalobe driver to install the two 7.7 mm-long screws on either side of the charging port.

Conclusion

To reassemble your device, follow these instructions in reverse order.

After your repair, run Apple's Repair Assistant. Navigate to Settings General About Parts & Service History, tap Restart & Finish Repair, and follow the onscreen prompts.

Calibrate your newly installed battery after completing this guide.

Take your e-waste to an R2 or e-Stewards certified recycler.

Repair didn’t go as planned? Try some basic troubleshooting, or ask our iPhone 16 Answers Community for help.

2 autres ont terminé cette réparation.

Alex Diaz-Kokaisl

Membre depuis le 01/16/22

164 606 Réputation

769 tutoriels rédigés

Équipe

iFixit Membre de l'équipe iFixit

Staff

121 membres

19 765 tutoriels rédigés

1 commentaire de tutoriel

Thats some crazy stuff going on with the battery. Gonna need the same method to loosesn the back glass somehow. Maybe a hidden Positive and negaitve terminal in the sim slot where a special insert would loosen the glue with power being sent through it

Sebastian Wilmer - Réponse

Ajouter un commentaire

Nombre de vues :

Dernières 24 heures : 38

7 derniers jours : 335

30 derniers jours : 1,988

Total : 14,825